Save to My DOJO
Table of contents
VMware has been putting a lot of focus on being able to manage containers. With vSphere Integrated Containers version 1.4 it really shows the leaps they have made with the product compared to last year. I’m going to demonstrate how to get started with being able to host containers in vSphere 6.7.
Now before we start, why would I want to manage my containers with vSphere Integrated Containers? Why not just have a Docker VM hosting all my containers? One potential issue with this is if you have lots of containers on that Docker VM when you migrate it around, all the resources are tied to that VM. With vSphere integrated containers, DRS actually works with the container itself and can swap it around to another vSphere Container Host. So we can use the performance management of our hypervisor with our containers. Eventually, there may be a day when we are just deploying hundreds of containers on our ESXi hosts. Instead of deploying massive VMs for our containers, we will be deploying VCHs (Virtual Container Host) and managing our containers through there.
Below are the requirements for installing vSphere Integrated Containers:
- vCenter Server 6.0, 6.5, or 6.7.
- ESXi 6.0, 6.5, or 6.7 for all hosts.
- At least 2 vCPUs.
- At least 8GB RAM.
- At least 80GB free disk space on the datastore. Note: the disk space for the appliance uses thin provisioning.
Installing the vSphere Integrated Container Server
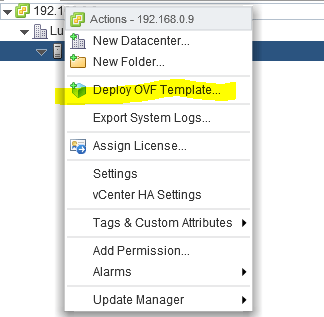
Download vSphere Integrated Container Server here. Download the OVF, then right click on vCenter and select Deploy OVF Template:
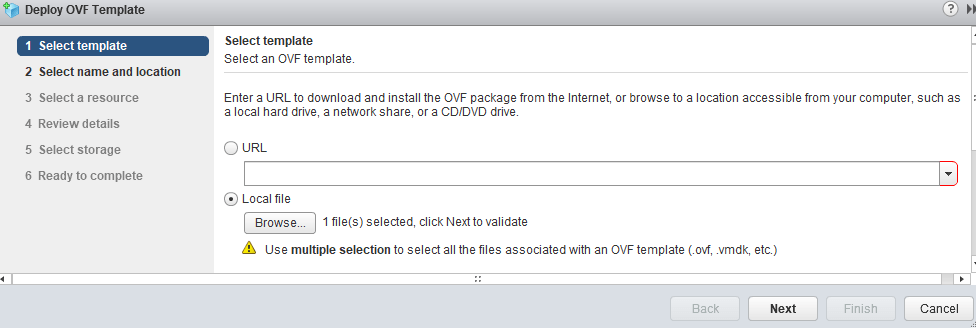
Select the location of the OVF you downloaded. Then select Next:
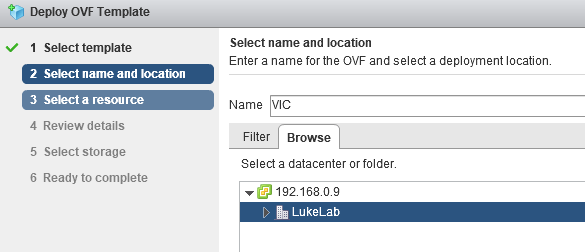
Select the datacenter and ESXi host to deploy the OVF on, also type in the name of the VM. I chose “VIC” short for vSphere Integrated Containers. Select Next:
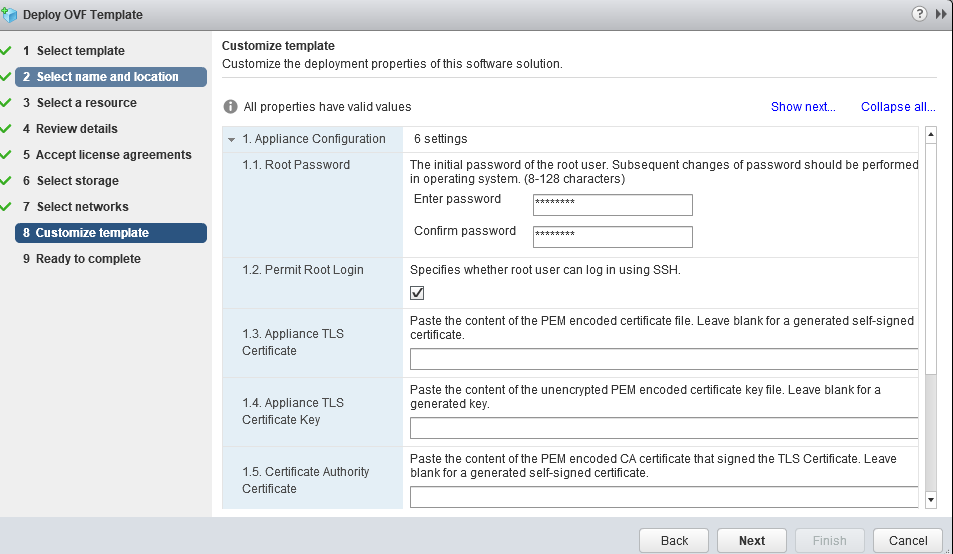
Select the storage and virtual networking and then we will end up on the customizing template page. Input the root password for the appliance:
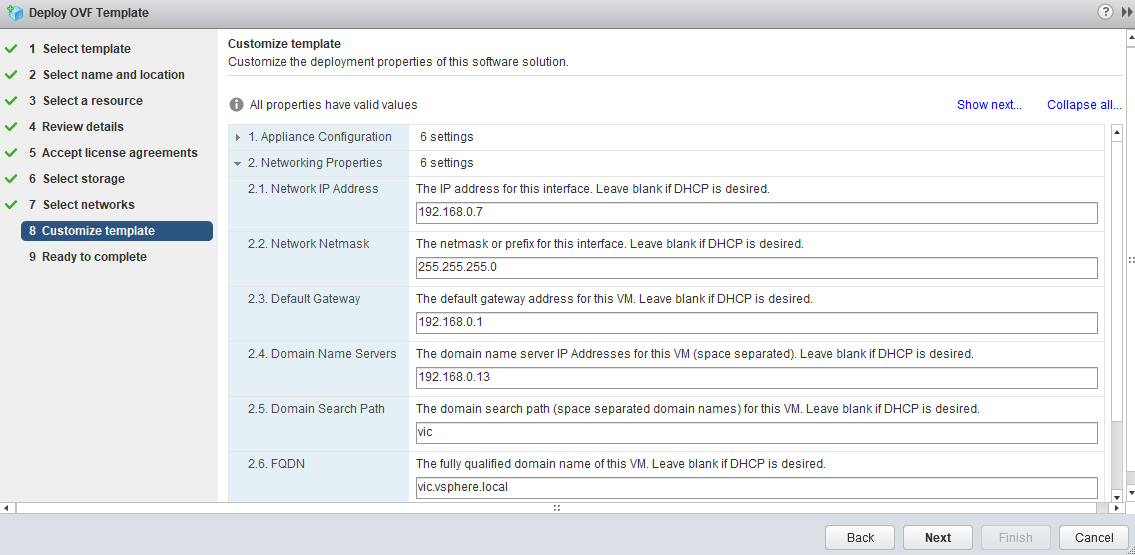
Scroll down to the Networking Properties section on the Customize Template page. Input the static IP Address information that you would like to assign the VM:
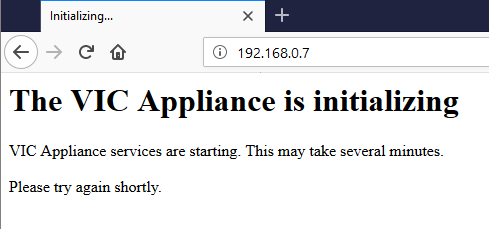
Select Next and Finish. Once the template is done deploying, open up a browser and browse to the IP address of the VM. If the VM is still starting up you will get a web page like below, just wait a few more minutes:
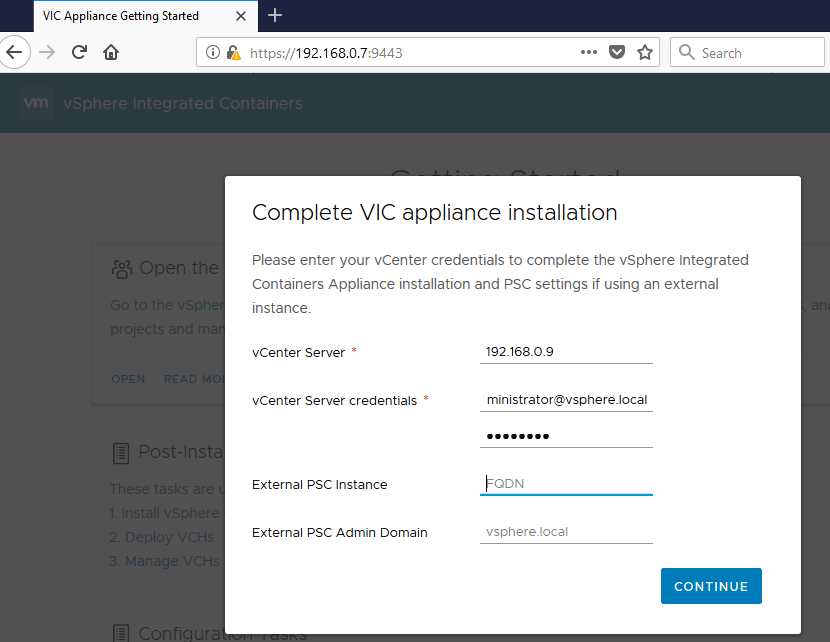
When the VIC server is fully running you will get a prompt for completing the install when accessing the web ui. Plug in your VCenter information and select Continue:
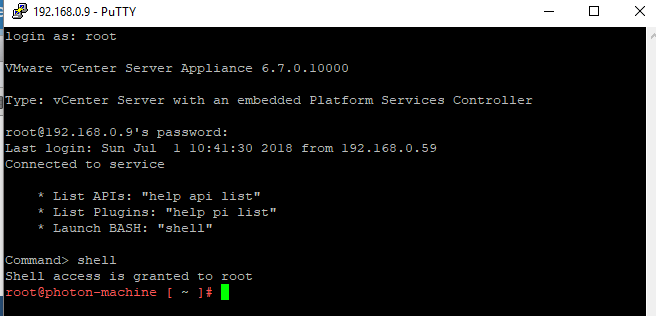
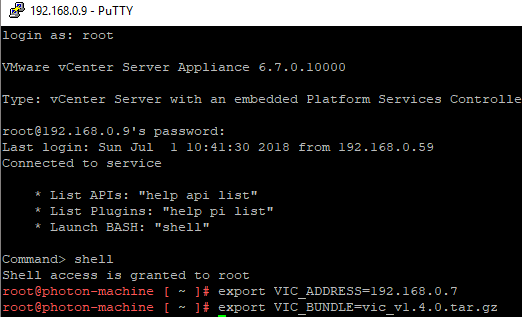
Next, we need to install the vSphere Integrated Containers plugin for vSphere. Also, note that the plugin is only for the HTML 5 web client. We will start an SSH session into our vCenter Appliance server and launch bash by typing “shell”:
Now we will type in the following to set the environment variables. Note the IP address of my VIC server is 192.168.0.7:
export VIC_ADDRESS=192.168.0.7
export VIC_BUNDLE=vic_v1.4.0.tar.gz
Now paste in the below command to copy the .gz file to VCenter. No need to modify the syntax as we already created the environmental variables previously:
curl -kL https://${VIC_ADDRESS}:9443/files/${VIC_BUNDLE} -o ${VIC_BUNDLE}

Now type the following to unpack the installer:
tar -zxf ${VIC_BUNDLE}
Change to the VCSA directory:
cd vic/ui/VCSA
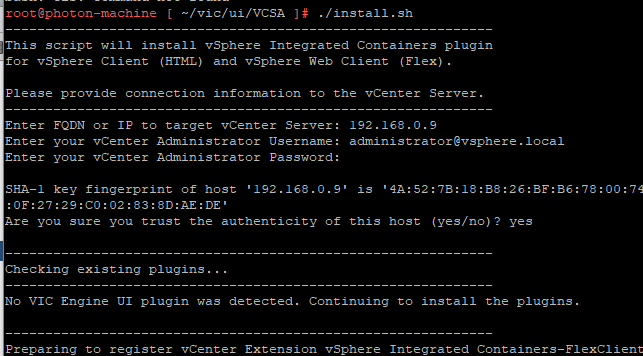
Then run the script:
./install.sh
Enter the IP address of the vCenter Service, the username and password, and then enter Yes to accept the certificate and wait for the install to finish:
Once complete, stop and restart the services of the web clients:
service-control --stop vsphere-client && service-control --start vsphere-client
service-control --stop vsphere-ui && service-control --start vsphere-ui
Now verify the plugin is installed by logging into the HTML 5 web sphere and selecting the home page, we can see the shortcut for vSphere Integrated Containers is there:

Create the Virtual Container Host
Now we have everything we need to host containers in vSphere, and we can create our Virtual Container Host. A Virtual Container Host is like a resource pool for your containers but allows you to control and manage your containers as well. A VCH is NOT a server, it is a docker API endpoint. This API endpoint methodology allows the containers to live on multiple VCHs. Also, multiple VCHs can be created for an environment and a good use case would be having a test, deployment, and/or production VCHs. Also, this would be great to use for hosting multi-tenant container environments. VCHs also maintain the cache of container images. We can create them with a handy new wizard in the HTML 5 vSphere client. So log into the HTML client and select vSphere Integrated Containers Plugin from the home menu:
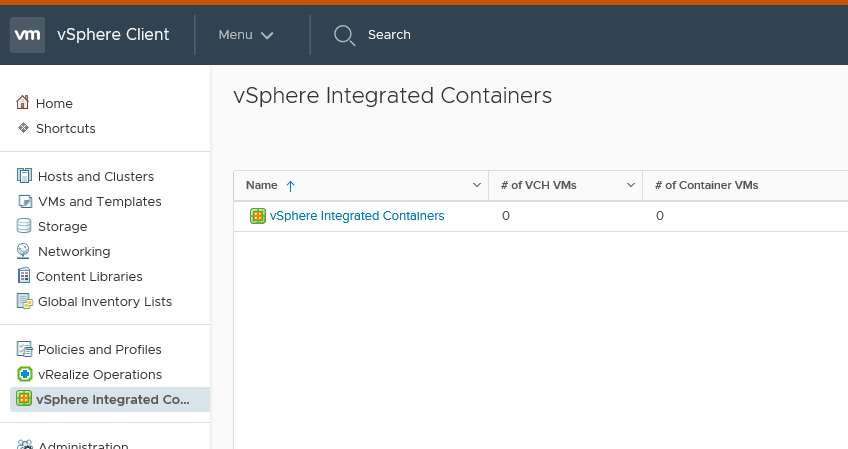
Next select New Virtual Container Host to proceed with creating our first VCH through the wizard:
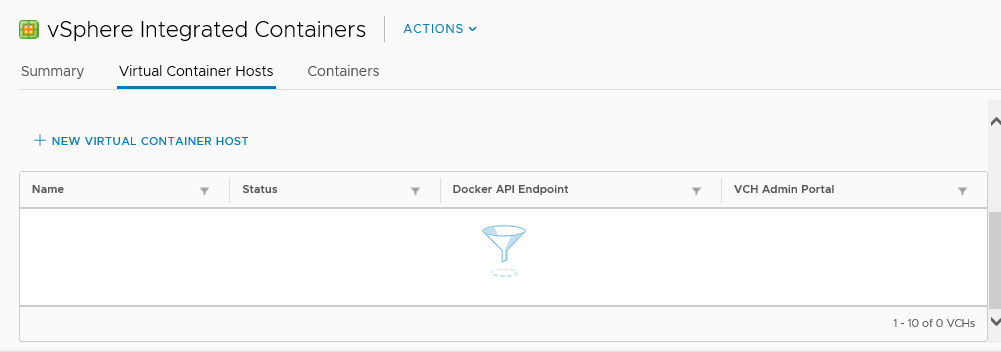
In our example, since I want to set up a VCH for my Lab, I’ll name the VCH “VCHLab”. Next, we can choose how the container VM names are populated. I preferred the docker name vs the container ID. We’ll leave the debugging and logging as the defaults. Click Next:
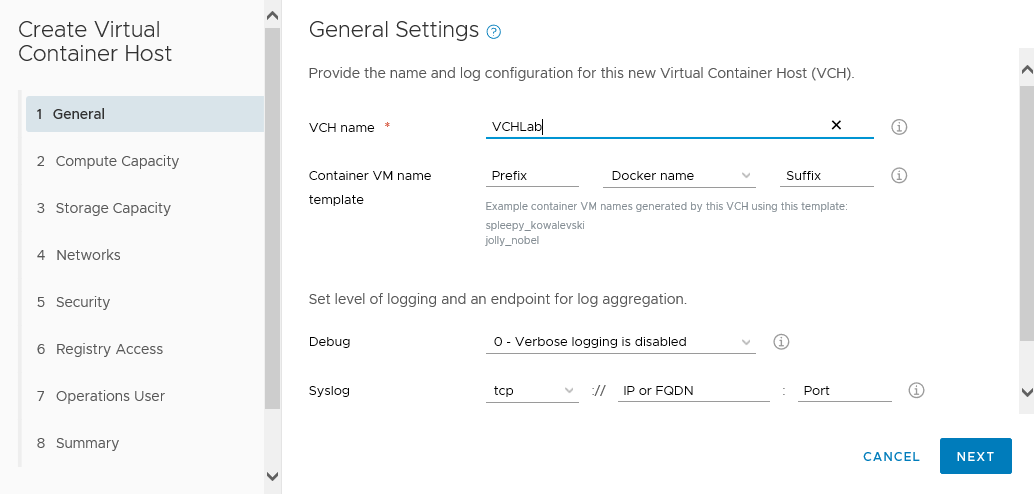
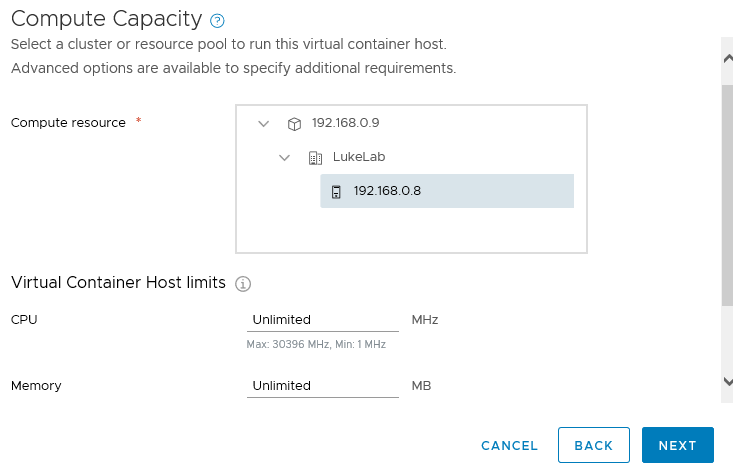
Then select the compute cluster or node that we want to run this VCH on and click Next:
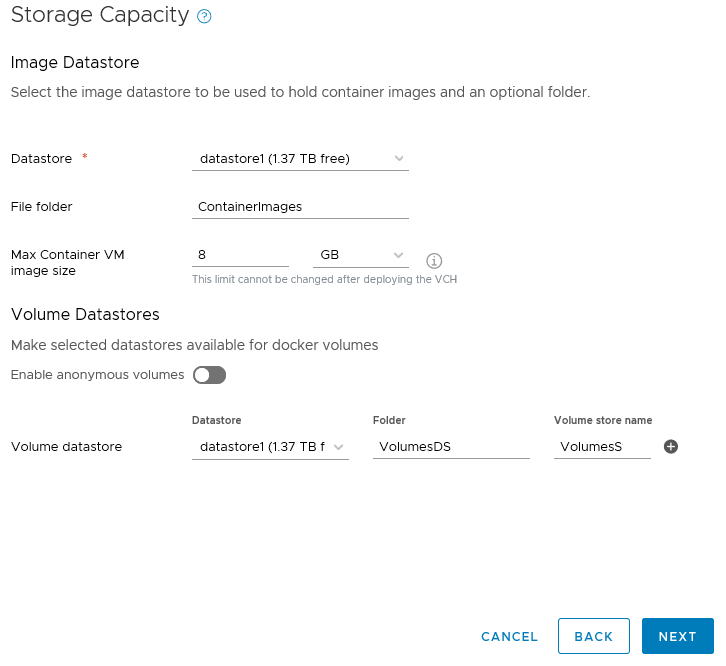
Now we need to configure the storage options for our VCH. Select the datastore that you want to store your container images on and optionally specify a folder to put them in. We will stick with the max container VM size of 8GB, this is also thin provisioned so we won’t immediately be using 8GBs up each time. Volume Datstores are used for containers that need to create a volume datastore. If we do not have this set we will not be able to deploy any containers that make use of volume data stores which I’d like to do eventually so we will configure the settings for the Volume Datastore location. Click Next:
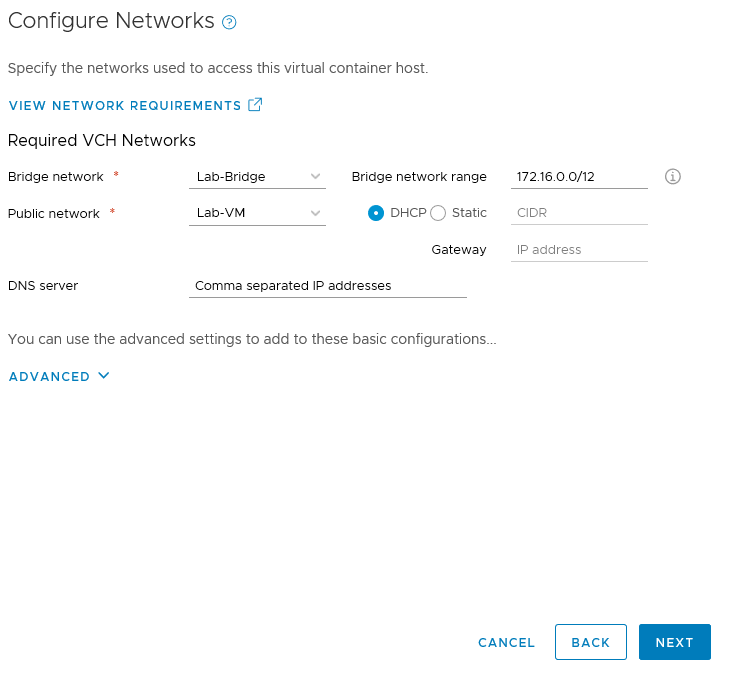
It is recommended to run one bridge network per VCH and to have your bridge networks separate from your VM network:
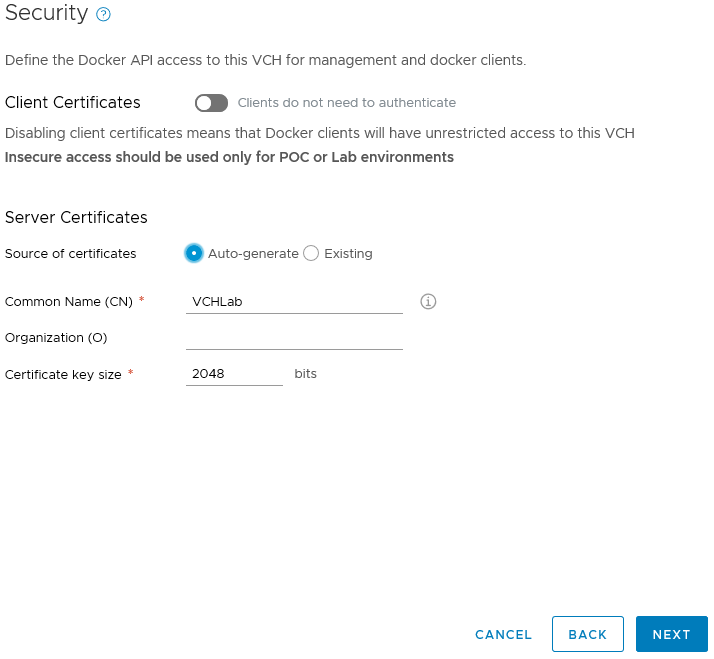
Since this is a lab environment I’m going to not require clients to authenticate with certificates, click Next:
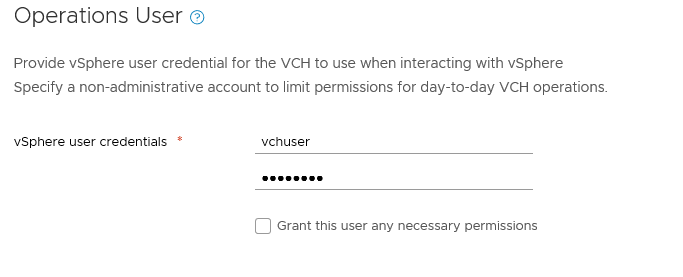
Now we need to provide a user account for VCH to use for interacting with vSphere.
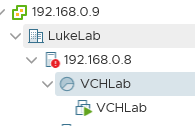
Click finish and wait for the VCH to be created. Once it’s done, you can see it in vSphere:
And we now have our Virtual Container Host listed in the VIC plugin. The Docker API Endpoint is the real meat and potatoes to hand over to the docker container developers, they will use that to create and manage their containers on this VCH:

We now have the ability to host containers in our vSphere environment! I can see this slowly becoming the norm for VMware administrators as containers become more and more accepted/utilized in our environments. The agility and flexibility of the container concept are just too efficient to pass up on for developers so it’s important to have a good understanding of how to support and meet the demands for rapid development that we are seeing today, and VMware has provided us a great tool to do so with vSphere Integrated Containers.
Thanks for reading!
[the_ad id=”4738″][thrive_leads id=’18673′]


Not a DOJO Member yet?
Join thousands of other IT pros and receive a weekly roundup email with the latest content & updates!



4 thoughts on "Getting Started with vSphere Integrated Containers in vSphere 6.7"
You need Enterprise Plus licence!!!!!!!!