Save to My DOJO
I recently got a request on how to install vCenter Server Appliance from a Linux workstation instead of Windows. I never really thought about it since, hate me or not, my primary working OS has always been Windows. So today, I’ll be sharing my experience installing vCSA 6.5 U1 using the command line and UI installers from a CentOS 7 64-bit VM running X Windows and Gnome.
What I won’t be covering is the actual process of installing vCSA as this has already been covered in How to install vCenter Server Appliance 6.5 from scratch and How to run an unattended vCSA installation. Instead, I’ll show you how to kick off the vCSA installation and tackle any issues I may run into along the course of installing vCenter.
Mounting the vCSA CD/DVD
The basic requirement, of course, is to have a vCSA 6.5 ISO image. If you don’t, go ahead and download one from the VMware my.vmware.com website.
Once you have the ISO, your options are to either burn the ISO to a DVD or extract its contents to a folder, if you have Linux running on a physical machine. If you’re using a Linux VM to install vCSA – like I’m doing – you can simply mount the ISO image as a CD/DVD drive.
The ISO image used for this post is VMware-VCSA-all-6.5.0-5318154.iso.
For VMware Workstation users, mount the ISO image using the steps shown in the next screenshot. Just make sure that the Device Status (6) is set to Connected.
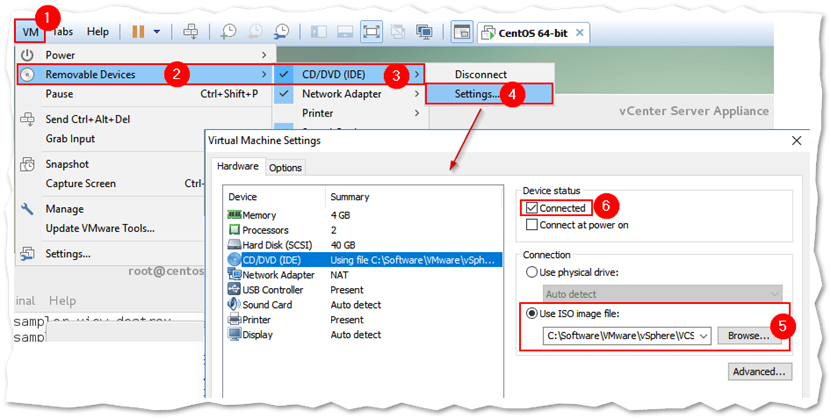
Mounting an ISO image as a CD/DEV device in VMware Workstation
For VMware ESXi / vCenter Server users, follow the steps labeled in the next screenshot.
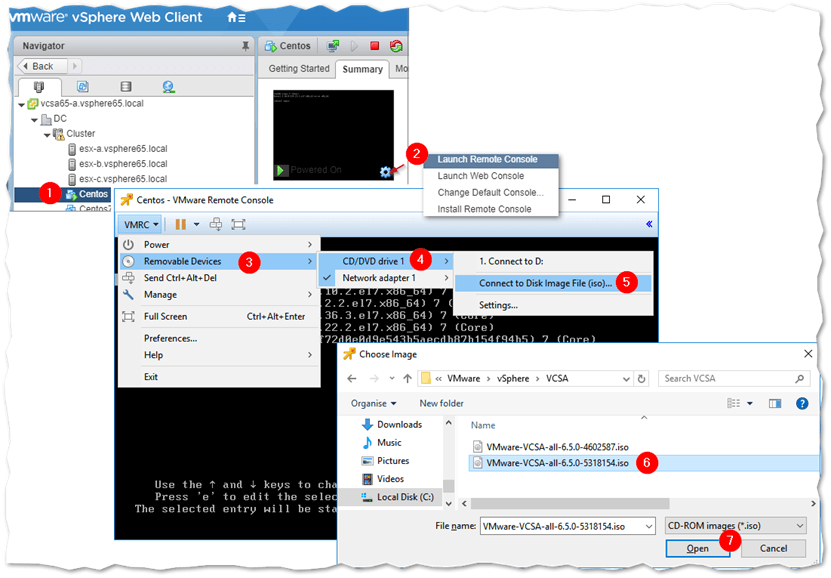
Mounting an ISO image as a CD/DEV device on VMs hosted on ESXi
If you’re running Linux without X Windows, you need to run the following commands to access the CD/DVD drive contents.
mkdir /tmp/vcsaiso
mount -t iso9660 /dev/cdrom /tmp/vcsaiso
If you’re running Linux with X Windows, the CD/DVD will mount automatically for you once the ISO image is mounted on the VM.
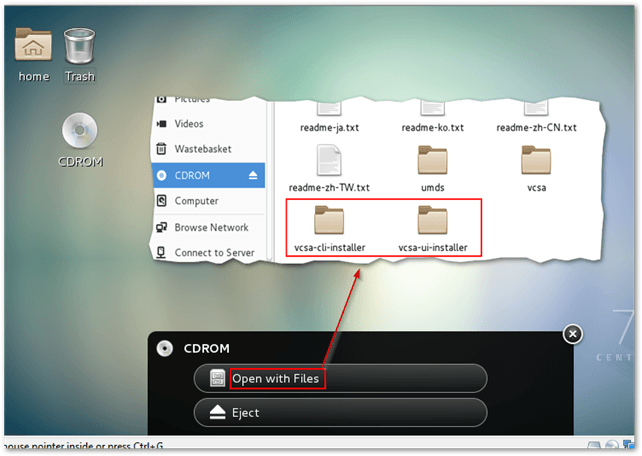
Centos 7 configured to run X Windows and Gnome. The vCSA CD/DVD media is mounted automatically.
Installing vCSA with the UI installer
For Linux users with X Windows and a desktop environment such as Gnome, the UI installer is probably the best option for installing vCSA. The procedure is outlined as follows.
Step 1 – Click on the CD-ROM icon and drill down to vcsa-ui-installer/lin64.
Step 2 – Click on installer.

Running the vCSA UI installer under Linux
Note: If nothing happens after you click on the installer, you are probably missing one or more dependencies. To find out what’s missing, open a terminal window – right-click on the desktop and select Open Terminal – and drag the installer file to it and press Enter.
On my CentOS VM, I kept running in a missing library error which prevented the vCSA installer from executing. I fixed the problem by using yum to first find out which software was calling the library and, secondly, to install it. Here are the commands I used.
yum whatprovides <missing library or dependency>
yum install <library or package>
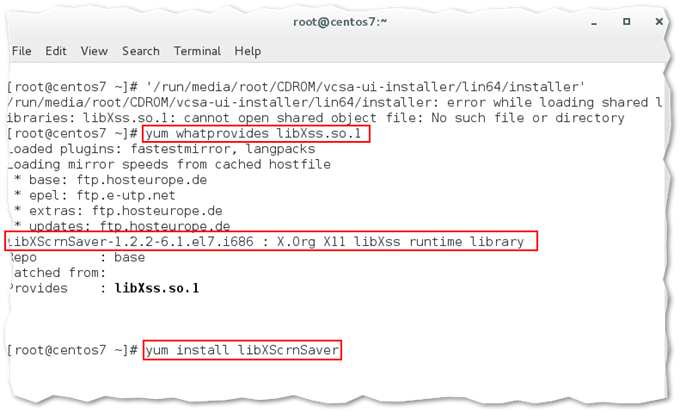
Adding a missing dependency in Linux to allow the vCSA UI installer to execute
Step 3 – Click Install on the vCSA installer.
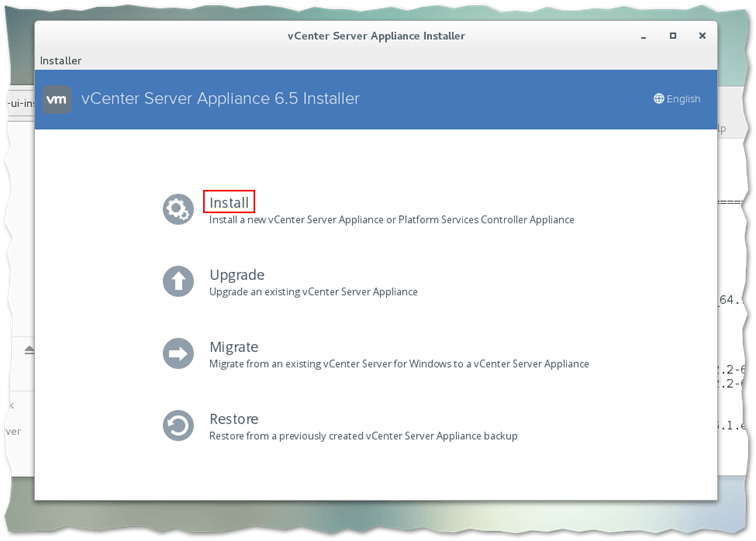
Kicking off the vCSA 6.5 installation using the UI installer
The vCSA installation, as you probably know, consists of 2 stages. Here’s a video showing stage 1 from the installation process. If you’re familiar with the installation process, you’ll notice that it is identical to how it’s done in Windows.
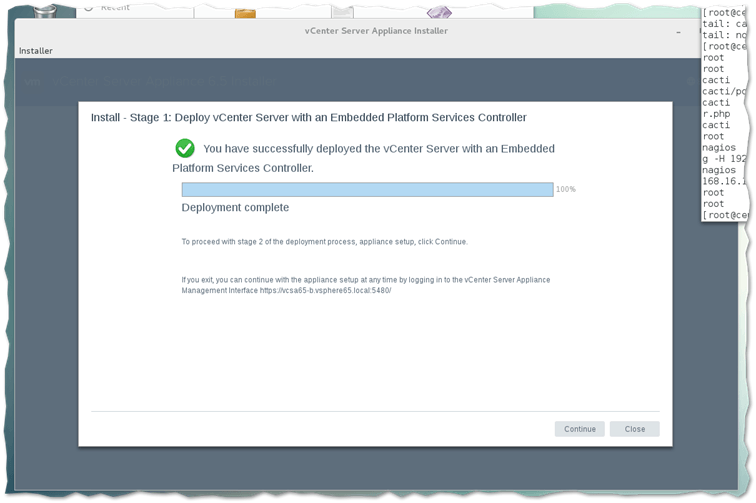
Stage 1 completed successfully!
Installing vCSA using the command line installer
Again, have a look How to run an unattended vCSA installation to learn how to use the command line vCSA installer. The procedure on Linux is almost identical as outlined next.
Step 1 – Download and edit the JSON configuration as required. Note, the I included, is used to deploy vCSA to an existing vCenter Server, say, as a nesting environment. For any other setup, you should pick the correct template from /run/media/root/CDROM/vcsa-cli-installer/templates/install.
Step 2 – From a terminal Window or console, type vim /tmp/vcsa.json and press Insert. Paste the contents of the JSON file and press :wq! to save and quit. Alternatively, copy the JSON file using scp or a similar file-copy method.
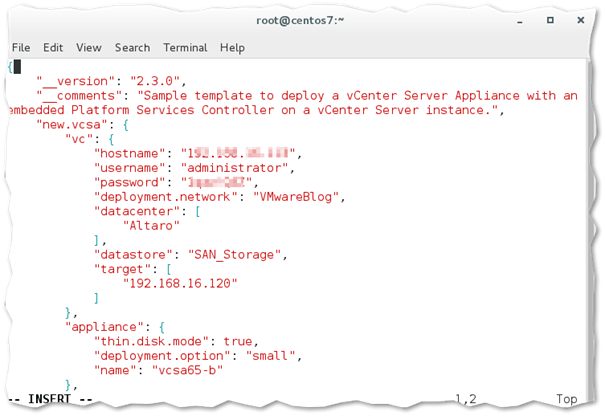
Step 3 – Navigate to the vCSA media folder using cd <path to CDROM>. In my case the path is /run/media/root/CDROM/. Drill down to vcsa-cli-installer/lin64.
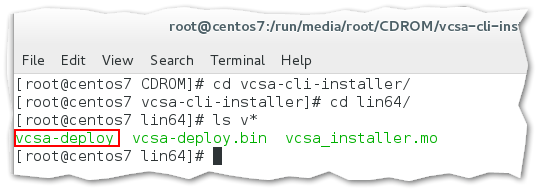
Step 4 – Run the following command to verify that the JSON configuration is correct. The command performs several checks. Make sure a Verification completed successfully is returned for all. If not, recheck the JSON config file.
./vcsa-deploy install --verify-only /tmp/vcsa.json
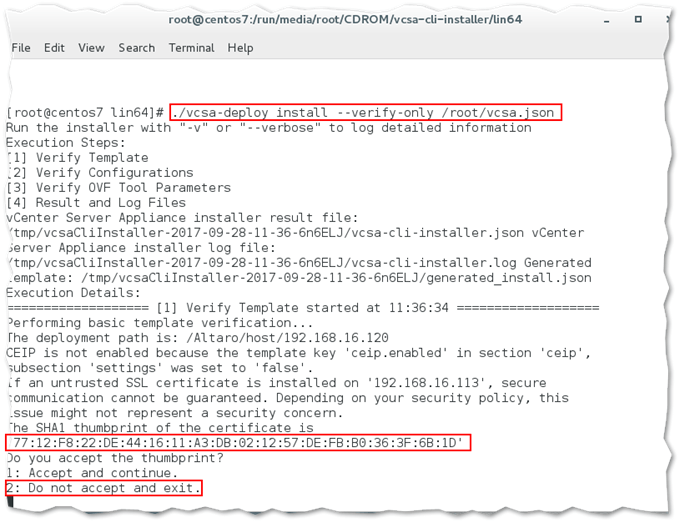
Step 5 – Copy the SSL thumbprint shown in the above screenshot (yours will differ) and re-run the previous command as follows:
./vcsa-deploy install --deployment-target-ssl-thumbprint 77:12:F8:22:DE:44:16:11:A3:DB:02:12:57:DE:FB:B0:36:3F:6B:1D --accept-eula /root/vcsa.json
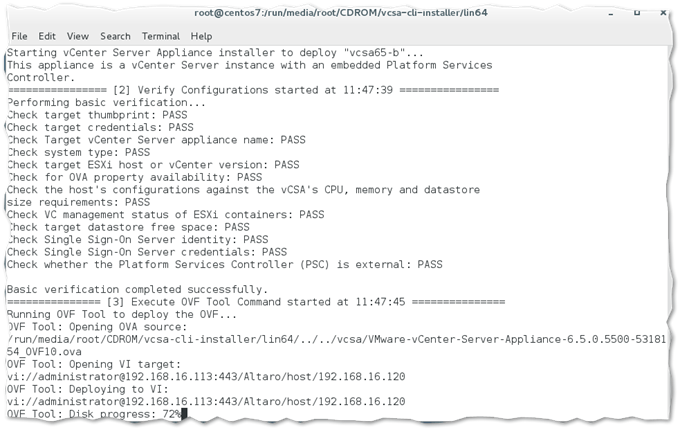
Step 6 – Verify that the installation completed successfully. Apart from looking at the installer’s output, the easy way to verify if vCenter is running is by pointing a browser to https://<vCenter Server IP or FQDN>.
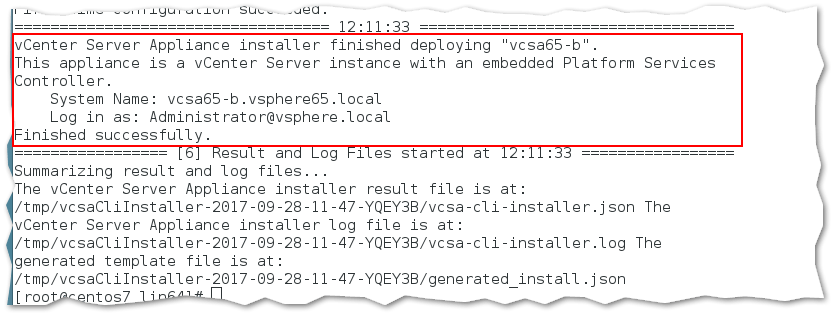
vCSA 6.5 successfully installed using the cli method from Linux
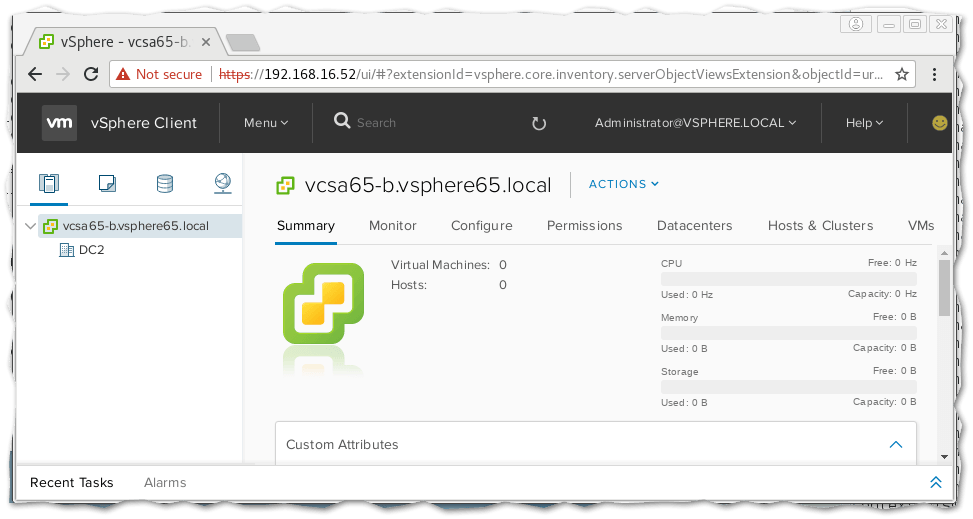
The vSphere client (HTML5) running in Chrome under Linux
Wrap-Up
The vCSA installer can be run on a number of operating systems including Windows, Linux and macOS. Today I’ve covered how to install vCSA 6.5 U1 using both the UI and cli based installers on a CentOS 7 Linux machine. I won’t be covering macOS anytime soon since I don’t have any Macs lying around but there are plenty of posts out there, such as this one, which describes the installation process. To my mind, it should be identical to installing vCSA from Linux, give and take.
In the meantime, do have a look at the complete list of VMware posts hoping you’ll find something equally interesting and useful. If you like this post, please be sociable and share.
[the_ad id=”4738″][the_ad id=”4796″]


Not a DOJO Member yet?
Join thousands of other IT pros and receive a weekly roundup email with the latest content & updates!


3 thoughts on "How to install vCenter Server Appliance 6.5 U1 from Linux"
So I take it this will not work with deb package installer… it shows as unknown file type.
Yes, there is no deb package installer for vCenter. You must use this installer to deploy the vCenter appliance the ESXi host.