Save to My DOJO
All ESXi hosts have an inbuilt firewall sitting between the management interface and the rest of the network. Enabled by default, the ESXi firewall is configured to drop all ingress and egress traffic but for a specific set of services, a subset of which is given in Figure 1 below.

Figure 1 – A subset of the services running on ESXi and their corresponding ports
Managing the Firewall using the vSphere client
I’ll be using the C# vSphere Client since the web client is available only when vCenter Server has been installed, which is not the case here. Having said that, VMware Labs have released a fling you can use to manage an ESXi host via an embedded HTML/Javascript extension, though I still have to find out if you can edit firewall settings.
Update: As it were, I installed the fling and even though I admittedly haven’t really dug that deep, I do confirm that it allows you to update firewall rules. This will turn out to be a useful tool to anyone missing the vSphere Web Client.
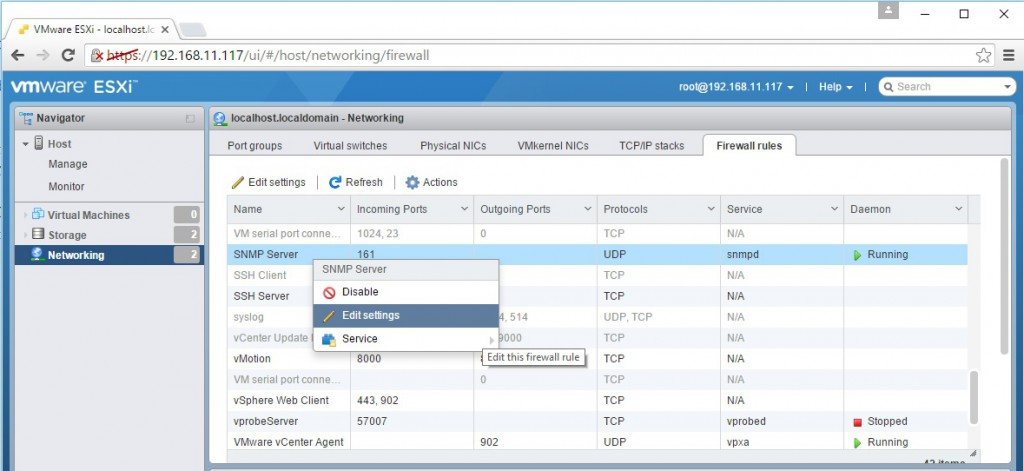
Managing ESXi through the “ESXi Embedded Host Client” fling
Regardless, I’ll stick to the C# vSphere client for now. To review the firewall settings on an ESXi host, log in with the vSphere Client, select the “Configuration” tab and highlight “Security Profile” under “Software”. You’ll see that the “Security Profile” pane is split into 3 areas, the two topmost ones “Services” and “Firewall” being the ones we’re interested in (Figure 2).
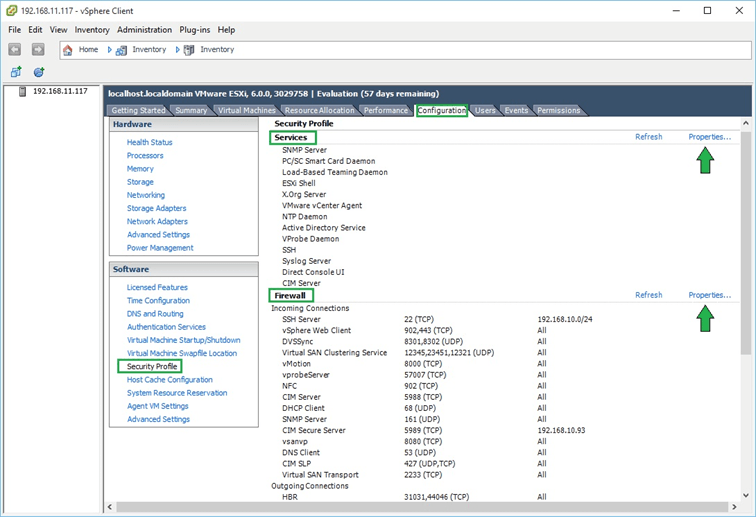
Figure 2 – Security profile configuration screen for an ESXi host
Clicking on “Properties” under “Services” brings up a dialog box showing which services are enabled and those that aren’t. Clicking on the Options button gives you access to the startup policy for the selected service as you can see in Figure 3.
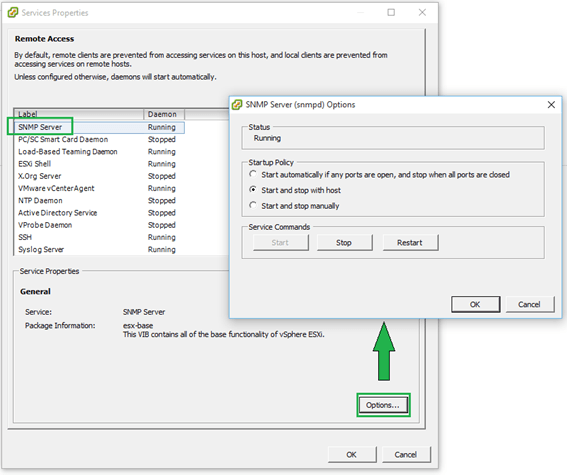
Figure 3 – Start-up policy for a selected service
Similarly, clicking on “Properties” under the “Firewall” section gives you access to a specific service’s settings. A ticked on check-box next to a service tells you that the service is accepting remote access calls. Clicking on the “Firewall” button allows you to limit remote access to the service in question.
For instance, let’s suppose you want to limit SSH access to the sysadmin team. Their workstations reside on the 192.168.10.0/24 network. To enact this rule, you just need to add the 192.168.10.0/24 network to the “Allowed IP Addresses” list as shown in the next Figure. Any call originating from outside this range will be dropped.
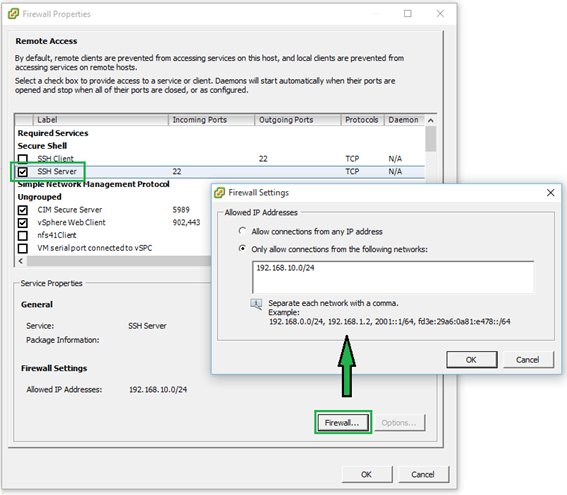
Figure 4 – Restricting remote access to a service
Managing the Firewall using ESXCLI
The esxcli network firewall family of commands can be similarly used to manage the ESX firewall. To use them, you’ll need to SSH to the ESXi host using software such as putty.
The command set has a root namespace called ruleset with two child nodes these being allowedip and rule. A service has a ruleset attached to it which can either be disabled or enabled. A ruleset can contain one or more rules.
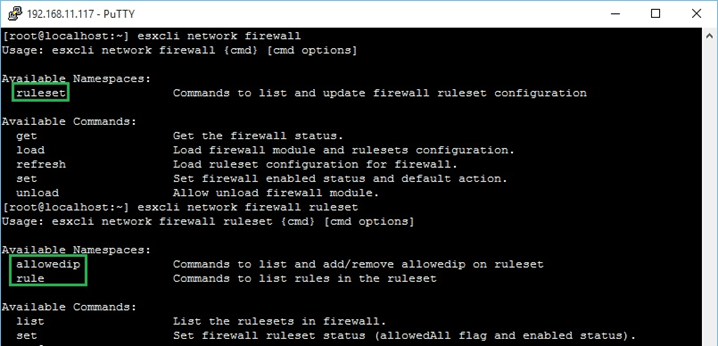
Figure 5 – Namespaces for the esxcli network firewall command
Here are a few examples to get you started with the command line syntax;
- List all currently enabled (disabled) rulesets.
esxcli network firewall ruleset list | grep true
esxcli network firewall ruleset list | grep false
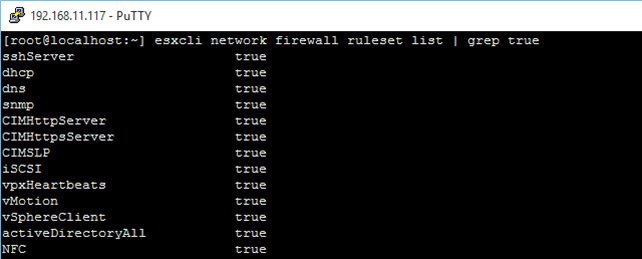
List all currently enabled (disabled) rulesets
- List rules associated with a particular service’s ruleset
esxcli network firewall ruleset rule list -r "sshServer"

List rules associated with a particular service’s ruleset
Note: Use the –r parameter to target a specific service by its name which you can learn using the esxcli network firewall ruleset list command.
- Enable a ruleset for a service and restrict remote access
In this example I’ll enable the SNMP server and specify that only ip address 192.168.11.201 has remote access to it
esxcli network firewall ruleset set -r "snmp" -a false -e true
esxcli network firewall ruleset allowedip add -r "snmp" -i "192.168.11.201"
- List all the rulesets for which the allowedip list has been enabled
esxcli network firewall ruleset allowedip list | grep -v "All"

List those rulesets for which allowedip has been enabled
- Display the firewall status
esxcli network firewall get
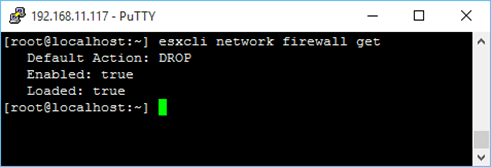
Display the firewall status
- Disable the firewall
esxcli network firewall set -e false

Disable the firewall
Here, you will find a complete list of all the available firewall commands.
Unfortunately there is no easy way – not that I know of – to add custom rulesets other than creating and importing them using VIB packaging. There’s a good article here on how to go about it. It definitely works as I have used it in the past to enable custom rulesets but it’s not for the impatient and takes some time to get used to. VMware refer to it in this KB article which also provides a link to this Word document explaining the entire procedure in full detail.
Note that the VIB method must be used to create custom rulesets that persist after reboots. Alternatively, there are 2 XML files you can play with as described here. Once again, these changes will not persist at least not on ESXi 5.5 and earlier versions – with ESXi 6 I’m not entirely sure since I got mixed results when testing. There’s a not so clean hack you can try where the /etc/rc.local.d/local.sh script is modified such that it copies the amended firewall XML files, which are stored on a datastore on the ESXi host’s local storage, every time it is rebooted. Regardless, my opinion is to stick with the VIB method, despite being cumbersome and all.
Managing the Firewall using PowerCLI
With PowerShell, there are a couple of options you can use to manage the ESXi firewall. You can either expose the same ESXCLI functionality through the Get-EsxCli cmdlet or use the following cmdlets;
- Get-VMHostFirewallException
- Set-VMHostFirewallException
- Get-VMHostFirewallDefaultPolicy
- Set-VMHostFirewallDefaultPolicy
However, if you’re already familiar with the ESXCLI syntax, you would naturally want to use get-EsxCLi since it’s pretty much the same thing save for a few syntactical differences. Here’s how to do it;
First of all, you need to retrieve the esxcli.network.firewall namespace and save it as an object. We do this as follows;
$esxcli = (get-esxcli –
192.168.11.117).network.firewall
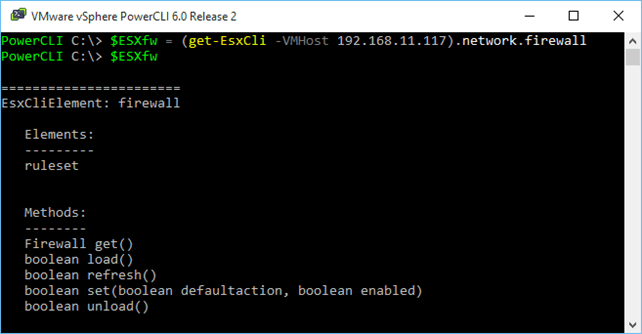
Retrieving esxcli.network.firewall in PowerShell
I’m going to replicate the examples I listed under the “Managing the Firewall using ESXCLI” section so you can compare and contrast.
- List all currently enabled (disabled) rulesets
$ESXfw.ruleset.list() | Where {$_.Enabled -eq "false"}
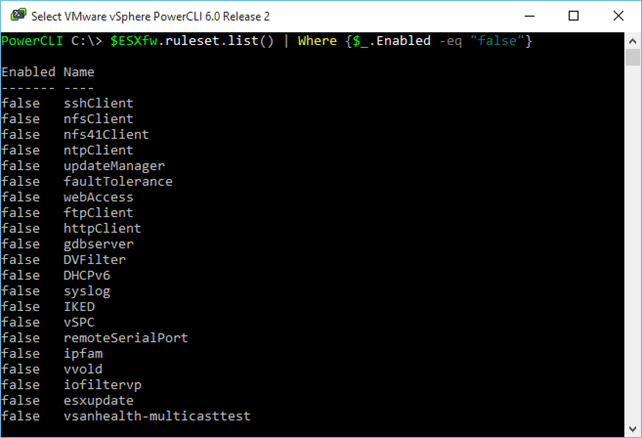
List all currently enabled (disabled) rulesets
- List rules associated with a particular service’s ruleset
$ESXfw.ruleset.rule.list("sshServer")

List rules associated with a particular service’s ruleset
- Enable a ruleset for a service and restrict remote access
$ESXfw.ruleset.set($false, $true, "snmp")
$ESXfw.ruleset.allowedip.add("192.168.11.201","snmp")
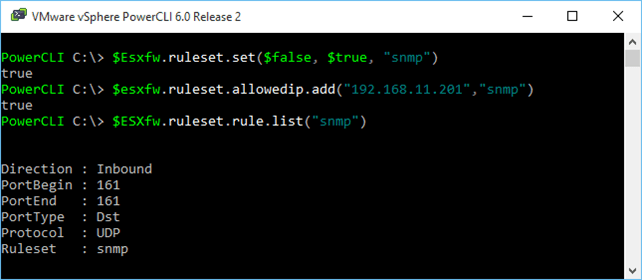
Enabling a ruleset for a service while restricting remote access
- List all the rulesets for which the allowedip list has been enabled
$esxcli.ruleset.allowedip.list() | where {$_.AllowedIPAddresses -ne "All"}

List those rulesets for which allowedip has been enabled
- Display the firewall status
$esxcli.get()
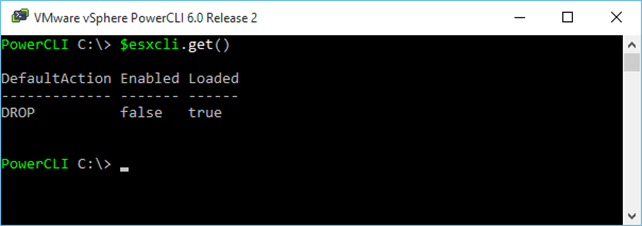
Display the firewall status
- Disable the firewall (and set it to DROP packets)
$esxcli.set("false","false")
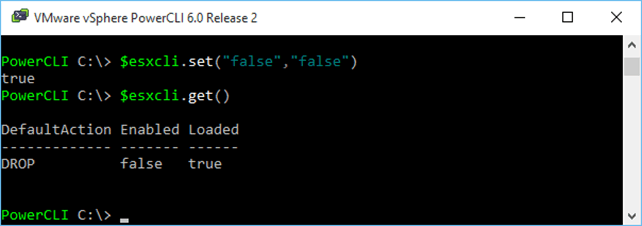
Disable the firewall
Note the two Boolean values passed to the cmdlet. The first specifies the action the firewall takes with true=PASS and false=DROP. The 2nd parameter simply enables or disables the firewall.
Conclusion
As we’ve seen, there are a number of methods you can use to manage your ESXi host’s firewall settings. It would be great if with future releases, VMware would add an easy way to include custom rulesets as the current method is somewhat awkward and quite frankly a pain to deal with.
I hope you enjoyed reading this post and better still learned something from it.
[the_ad id=”4738″][the_ad id=”4796″]


Not a DOJO Member yet?
Join thousands of other IT pros and receive a weekly roundup email with the latest content & updates!


3 thoughts on "Managing the ESXi firewall"
Good info , thanks. Would like to see a script to set allowed ip address ( or addresses ) of any firwall enabled service. Thanks
Glad you found it useful.