Save to My DOJO
Hello again everyone!
A few weeks ago, I put out an article that covered the installation of the newer versions of PowerCLI on Windows. Here at Altaro, I talk to a lot of different system administrators and with management workstations becoming more diverse in the cloud era, I felt like having a similar how-to for Ubuntu Linux would be helpful for some folks. With that in mind, I’ve included a step-by-step guide here as well as a brief video near the bottom of this post.
Steps to Install PowerCLI on Ubuntu Linux
-
- Patch the System
- Install Prerequisites
- Add the Microsoft PowerShell Repo
- Install PowerShell
- Install PowerCLI with PowerShellGet
Step 1 – Patch the System
It goes without saying in most cases, but I like to reiterate this point. You should always make sure your system is at the latest known-good working patch level before adding any new software, and that applies in this case as well. The first thing we need to do is make sure that Ubuntu is up to date. You can do that by running the below commands in a terminal window (Such as Gnome-Terminal, or xterm)
Refresh the package repositories
sudo apt-get update
Then update all the installed packages
sudo apt-get upgrade
Alternatively, you can make sure you’re running the latest official version of Ubuntu by running the below. (This is the step we took in our demo video below)
sudo apt-get dist-upgrade
Step 2 – Installation Prerequisites
We’ll be using a package called curl in order to set up the package repo for PowerShell prior to downloading it and installing. You can install curl by issue the following command
sudo apt-get install curl
Step 3 – Add the Microsoft PowerShell Repo
A Repo (or repository) in Linux is essentially an installation source. In order to install PowerShell via Ubuntu’s built-in package manager (Apt) we first need to set up a connection to the Microsoft hosted repo. We can do that by issuing the below commands.
curl https://packages.microsoft.com/keys/microsoft.asc | sudo apt-key add –
sudo curl -o /etc/apt/sources.list.d/microsoft.list https://packages.microsoft.com/config/ubuntu/18.04/prod.list
sudo apt-get update
Note that we had to issue another apt-get update. This was because Apt knows nothing about the new repo until we force it to look at it and query it for packages.
Step 4 – Install PowerShell
We can’t install PowerCLI without Powershell, so this step is non-negotiable. In this step, we’ll actually install PowerShell
Note: For the purposes of this how-to, support for Ubuntu 18.04 was not available in the stable branch of PowerShell for Linux at the time of this writing, hence we have to install the preview version of the package instead. If you’d like to see if the current stable branch of PowerShell for Linux now works on Ubuntu 18.04, refer to the PowerShell GitHub Page here.
We install PowerShell with the below command
sudo apt-get install powershell-preview
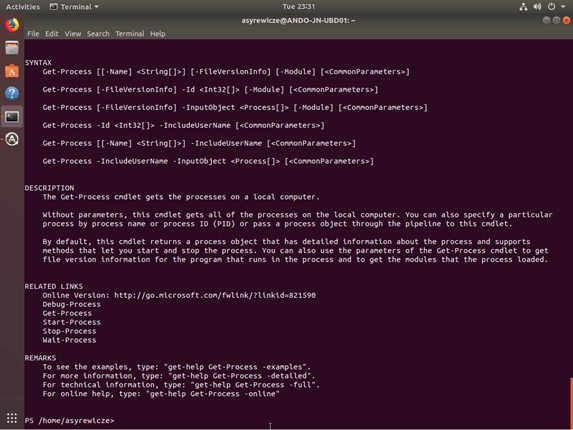
From there we can run PowerShell by issuing the below command
sudo pwsh-preview
Now we have PowerShell running on Linux!
Note: You won’t run PowerShell as the superuser every time you launch it. We’re simply doing so because installation of the PowerCLI module in the next step requires elevated privileges.
Step 5 – Install PowerCLI with PowerShellGet
Now for our final step. We’re going to utilize PowerShellGet (Which is already contained within PowerShell) to pull down the latest version of the PowerCLI Module from the PowerShell Gallery. Think of PowerShellGet as something akin to Apt, but for PowerShell.
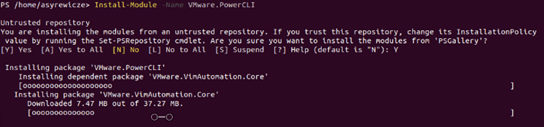
We can install PowerCLI using the below command from the new PowerShell Prompt.
Install-Module -Name VMware.PowerCLI
Select Y at the prompt to continue
Once that’s done you can run the below command to verify installation and to check the currently installed version of PowerCLI
Get-Module VMware.PowerCLI -ListAvailable
That’s it! You’re now running PowerCLI on PowerShell in Linux! Exciting Stuff!
Where to go from Here
From here you can use PowerCLI as you normally would, likely starting with Connect-VIServer as usual.
One other thing to be aware of…. Newer versions of PowerCLI will not allow you to connect with an invalid certificate. You’ll get an error much like the below
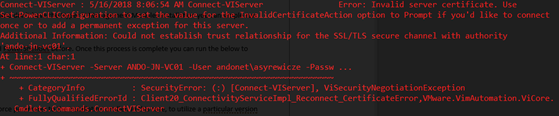
In order to bypass this, you can simply issue the below command
Set-PowerCLIConfiguration -InvalidCertificateAction Ignore
See it in Action
Wrap-Up
Linux is becoming much more commonly used by system administrators these days and with PowerCLI installed on your Linux endpoint, you’ll be well equipped to continue supporting your vSphere environment.
If you need instructions for additional flavors of Linux you can find that information here.
Has this how-to been helpful to you? Do you have further questions? Concerns? Comments? How about an interesting use case, or even something else you’d like to see us cover? Let us know in the comments section below!
Thanks for reading!
- [the_ad id=”4738″][thrive_leads id=’18673′]


Not a DOJO Member yet?
Join thousands of other IT pros and receive a weekly roundup email with the latest content & updates!
More in this category


About the Author
Andy Syrewicze


2 thoughts on "How to Install PowerCLI on Ubuntu Linux 18.04 LTS"
If only we could use a bash-powercli equivalent without powershell…
Powershell syntax is so awful.