Save to My DOJO
This blog post will show you how to install VMware’s vSphere ESXi 6.0 hypervisor on a bare metal server as a real-world example. A bare metal server is simply a server that has yet to have an OS installed on it.
These are the steps I’m going to take you through in this post, so let’s get going.
- Is my hardware compatible?
- Download ESXi
- Create a bootable medium
- Install ESXi
- Finalize the installation
- Configure ESXi using the vSphere client
Update (21/6/2017): Visit my Deploying vSphere ESXi 6.5 to learn how to deploy the latest version of ESXi.
Is my hardware compatible?
This, perhaps, is the most important step as it ensures that your hardware is ESXi ready. Failing this, ESXi may fail to install or you might run into unexpected issues further down the line. Additionally, you won’t be getting support from VMware if your hardware does not support ESXi.
Note: Have a look at How to use VMware compatibility tools to learn how to check if your hardware is compliant.
The hardware I will be installing ESXi 6.0 on, is an HP Proliant MicroServer Gen7 that’s been gathering dust in the office. Figure 1 is an actual picture of it. The poor bugger has seen better days.
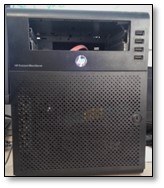
Figure 1 – HP Gen7 MicroServer
–
I first need to power it up to determine the type of processor, amount of RAM installed, etc. Pressing F10 takes me to the BIOS utility which I’ll be using to learn about the server’s hardware si I can assess if it is ESXi 6.0 complaint or not. As per Fig. 2, the BIOS utility is of very little help save for the processor type and serial number provided. Well, let’s try and plug in the serial number on HP’s support website. This gives me a thorough listing of the server’s hardware but, in this case, the site returned nothing that I didn’t already know.
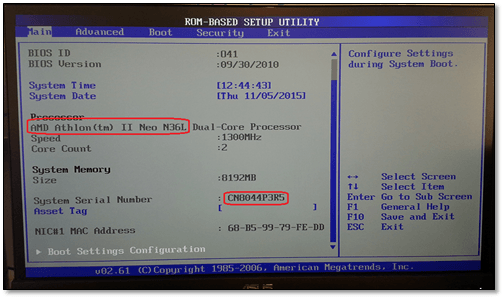
Figure 2 – Determining hardware specs from the BIOS utility
–
The next step is to use the VMware Compatibility Guide and not surprisingly, the server isn’t listed here either. I had a feeling this was going to be the case since I knew beforehand that the AMD Athlon II family of processors is not supported. This is evidenced by the conspicuous absence of AMD processors – except for the Opteron family – listed under CPU Series as per Fig. 3.
Tip: You can use keywords to narrow down the search to narrow down the results returned.
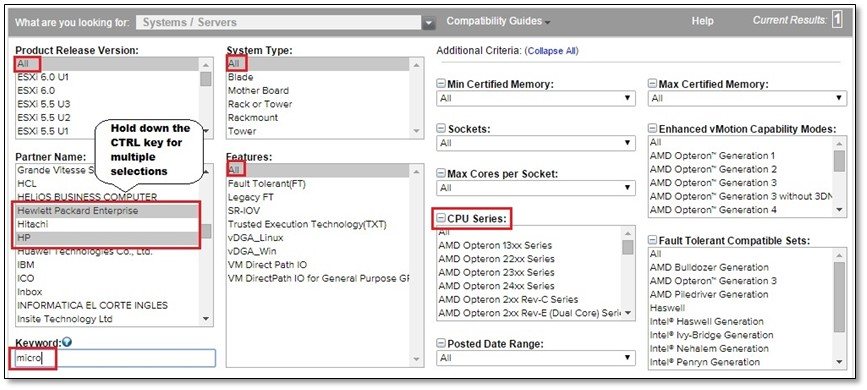
Figure 3 – The VMware Compatibility Guide query screen
–
The only server returned by the search query is the HP Proliant MicroServer G8 (see Fig. 4) which has better specs than the one I have. Regardless, I’m stuck with what I have.

Figure 4 – Results returned by the VMware Compatibility Guide
–
Let’s head back to HP’s website so we can have a look at the compatibility matrix. This is worth doing when verifying compatibility as major vendors will generally provide this type of information. As already confirmed, ESXi is only supported on HP’s Gen8 microservers. I guess it’s time to throw in the towel!
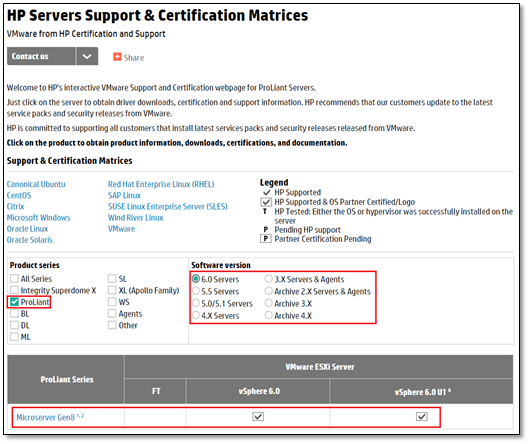
Figure 5 – Verifying VMware compatibility on the vendor’s (HP) website
–
If this were a production deployment, I would shelf the idea of using this server for anything but testing. And since testing we are, let’s have a go and see if we can install and run ESXi on it.
TIP: This excellent VMware article, describes how to gather data to use with the VMware Compatibility Guide on existing ESXi installations. This comes in handy when planning ESXi upgrades or simply adding new hardware to existing servers.
Download ESXi
ESXi is distributed as a bootable ISO image which you can burn or copy to any medium that is made bootable. To download and evaluate ESXi, visit the VMware vSphere Product Evaluation Center and select VMware vSphere as per Fig. 6.
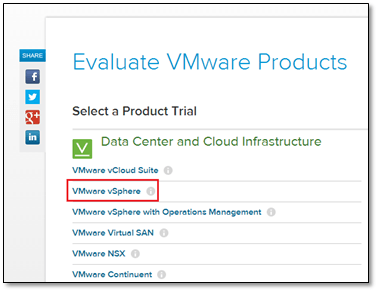
Figure 6 – VMware’s Evaluation website
–
If you don’t already have one, sign up for an account ave one. On completion, you will receive an activation link on the email address supplied.
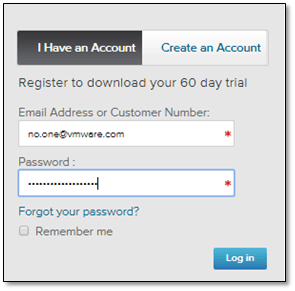
Figure 7 – Creating a VMware user account
–
Once the account is activated, log in and proceed to the download area. Select the ISO image shown in Figure 8 and download it to any folder of your liking.
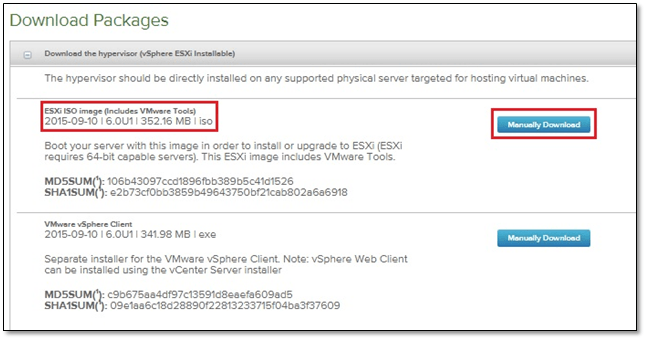
Figure 8 – VMware ISOs download area
–
Note: VMware make frequent changes to their website so any links and screenshots given here are valid at the time of writing.
Create a bootable medium
We next need to create a bootable device of off which ESXi will be installed. I’ll be using a USB pen drive since the HP server is missing an optical drive. Another option, involves deploying ESXi over the network using PXE. However, the network card on the server is not PXE compliant so it’s back to using the pen drive.
Update (21/6/2017): Testing ESXi Auto Deploy in a nested environment shows you how to deploy ESXi using PXE and Auto Deploy.
A 4GB Corsair USB stick will do just fine. I’ll also be using a piece of software called Rufus to make the pen bootable. You can Rufus get. There’s also a portable version of Rufus if you’d rather not install it. Regardless, remember to scan any files you download before running or installing; better safe than sorry!
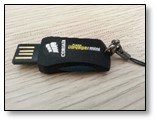
Figure 9 – Preparing an ESXi bootable USB stick
–
The process is straight forward unlike other methods that involve diskpart or Linux. After you insert the USB stick in a free USB port, launch Rufus and;
- Select the ESXi ISO image.
- Press Start.
- Click Yes to confirm the Replace menu.c32? prompt.
- Click OK to accept the data deletion warning and wait for it to finish.

Install ESXi
We can finally install ESXi. With the USB pen drive in place, power up the server and wait for the boot screen (see Fig. 13). If this fails, return to the BIOS utility and verify that the boot-up sequence includes USB devices.
The steps required to install ESXi are as follows:
- Select the “ESXi-xxx …. installer” option and press Enter. It takes a couple of minutes before the binaries finish loading (Figs. 13-15).
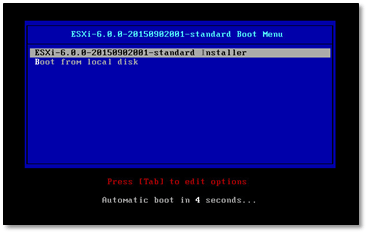
Figure 13 – ESXi installer boot-up screen
–
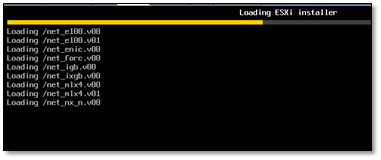
Figure 14 – Loading the ESXi binaries
–
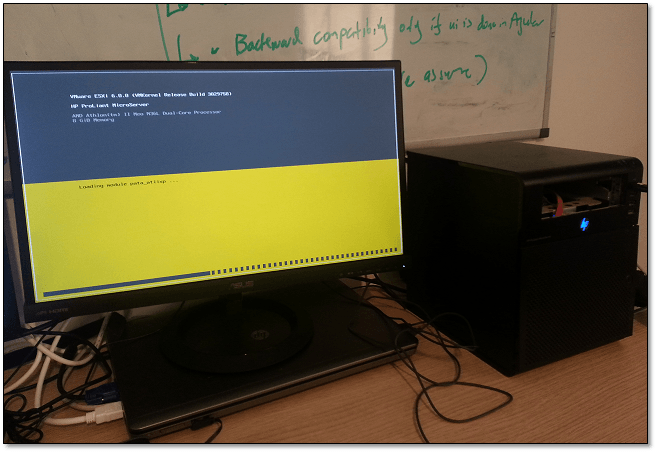
Figure 15 – ESXi installation in progress
–
- Press Enter to continue the installation. At the next screen, press F11 to accept the EULA. This is immediately followed by a device scan.
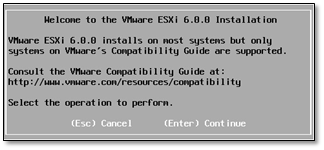
Figure 16 – Kicking off the installation process
–
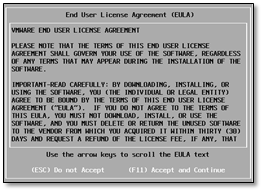
Figure 17 – Accepting the EULA
–

Figure 18 – Scanning for hardware
- In my case, the installer detected two drives, the USB stick and an internal 250GB disk drive. Using the arrow keys, select the drive where you want ESXi installed. Press Enter.
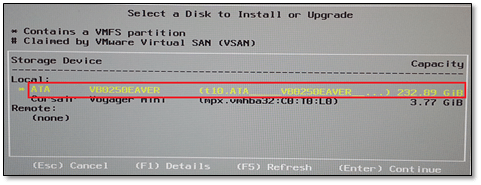
Figure 19 – Choosing the disk on which ESXi will be installed
- Specify the keyboard layout. The default layout is set to US Default. Change as needed and press Enter to continue.
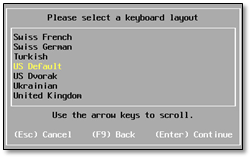
Figure 20 – Setting the keyboard layout
- Set the password for the root account. Use the arrow keys to move between the Root password and Confirm password fields. Press Enter to accept.
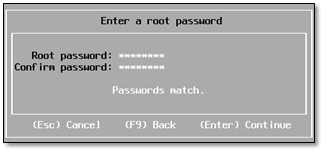
Figure 21 – Setting the password for the root user
–

Figure 22 – Acquiring additional information
- Press F11 to confirm the drive selection. If ESXi is already installed, you are prompted to upgrade the current version or preserve it.
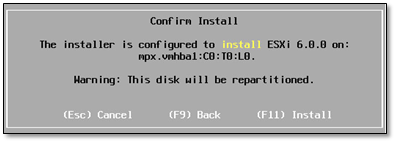
Figure 23 – Final confirmation before kicking off the installation process
–

Figure 24 – Installation progress
- The installation takes a few minutes to complete after which press Enter to reboot the server.
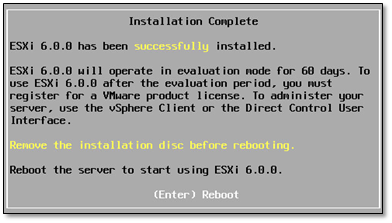
Figure 25 – ESXi successfully installed
–
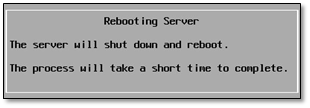
Figure 26 – Post-installation reboot
–
- While the ESXi host is booting up, it will acquire an IP address assuming a DHCP server is present in your network. In production environments, stick to using static addresses or DHCP reservations to avoid situations where the host picks up a different address than what was intended. In our case, the server acquired an IPv4 address from the DHCP server which is fine since we’re just testing.
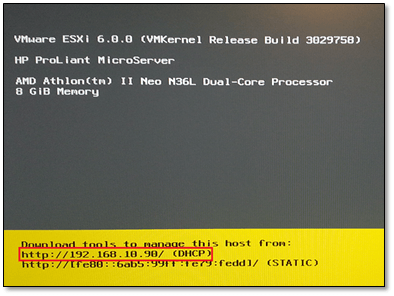
Figure 27 – ESXi console screen (DCUI)
Finalize the installation
We now finalize the installation. Pressing F2 at the console screen (DCUI) brings up a number of options.
- Log in using the root account. Select Configure Management Network from the menu and press Enter. Here you can view or change ESXi’s network settings along other options.
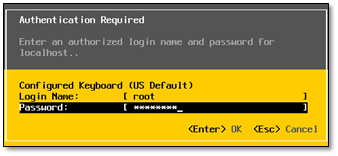
Figure 28 – Logging in to ESXi
–
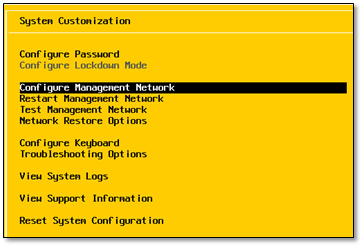
Figure 29 – The System Customization menu
- Select IPv4 Configuration and change the IP address assignment method from DHCP to static. Press Enter to commit the change.
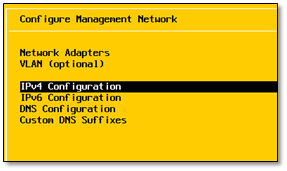
Figure 30 – IPv4 configuration menu
–
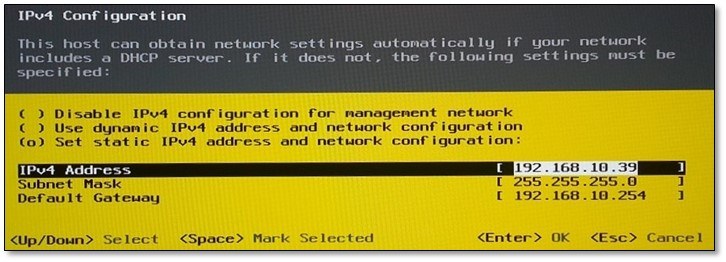
Figure 31 – Assigning static IP network details
–
- If you’re not using IPv6, go to Configure Management Network and select IPv6 Configuration. Disable it by highlighting Disable IPv6 (restart required) using the arrow keys. Use the spacebar to toggle the option on or off. Press Enter to commit the change. Note that this requires a server reboot.
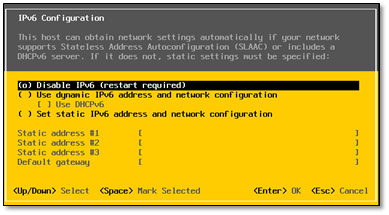
Figure 32 – Disabling IPv6 on ESXi
–
- Next, verify that the DNS settings are correct. I assigned static addresses for both the primary and secondary DNS servers. To do this, select DNS Configuration from Configure Management Network and edit as required. Press Enter to save.

Figure 33 – Setting DNS and hostname
–
- At the end I’m reminded about the pending reboot on account of disabling IPv6. Press Y to reboot the server.
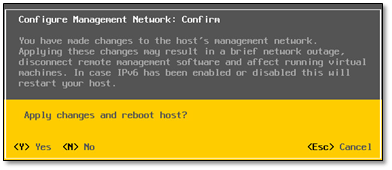
Figure 34 – Pending reboot following the removal of IPv6

Figure 35 – ESXi rebooting
–
Once ESXi is up and running, you can go ahead and create your first virtual machines. However, before doing so, I’d like to demonstrate how to tweak ESXi a little bit more.
Configure ESXi using the vSphere client
The vSphere (thick or C#) client is a management tool used to configure ESXi and virtual machines amongst other things. to this effect, we need to install it. Using any browser, go to https://<ESXi IP address>. Alternatively, you may download the client from here. As per Figure 36, click on vSphere Client for Windows to download the client installer. Install it as you would normally do with any other software package.
Update (21/6/2017): Since this post was published, VMware have released the ESXi host client which is ESXi embedded meaning you no longer need to install a separate management client.
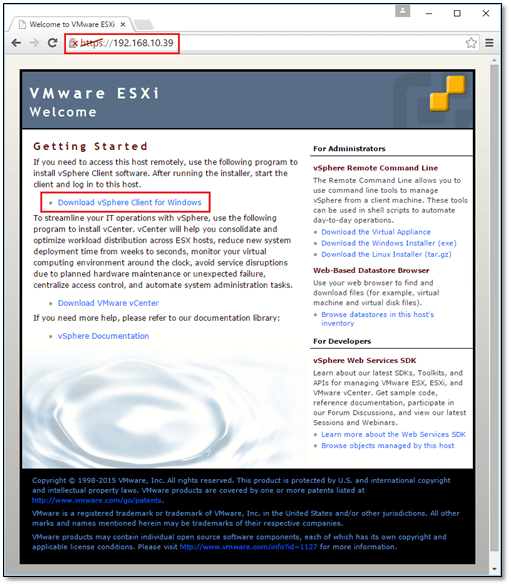
Figure 36 – Using the browser to download the vSphere Client from the ESXi server
–
- After you install the client, run it and type in the ESXi host IP address and root credentials. Press Login.
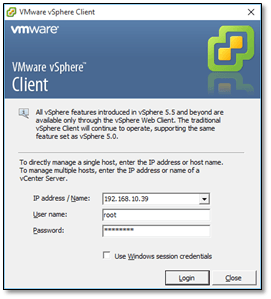
Figure 37 – Logging in ESXi with the vSphere client
–
- Press Ignore to acknowledge the certificate warning.
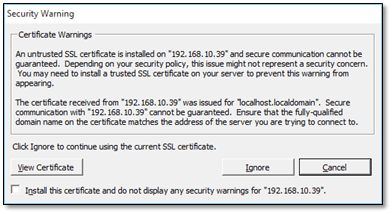
Figure 38 – Certificate security warning
–
- Press OK to accept the evaluation notice. The 60-day trial period starts now.
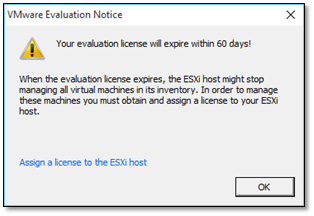
Figure 39 – 60 day evaluation notice
–
- At this point it’s looking pretty bleak but this is normal since we have not created any virtual machines yet.
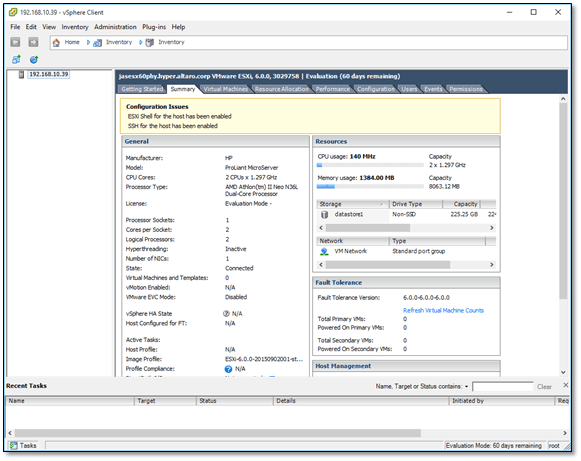
Figure 40 – ESXi summary screen using the vSphere Client
–
Note: Familiarize yourself with the various Hardware and Software settings under the Configuration (see Fig. 41). I’ve selected Storage to see if a Datastore has been created. A datastore is where the files making up a virtual machine will reside each in its own folder. Also worth looking at are the Networking and Network Adapters settings.
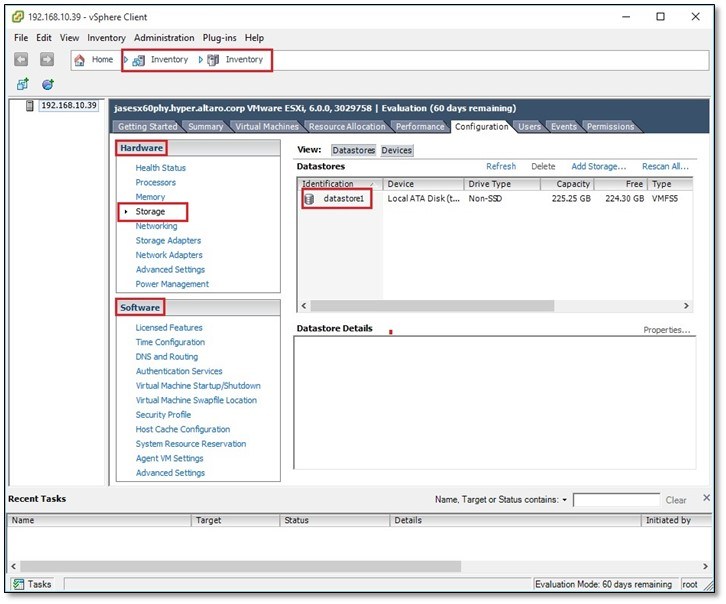
Figure 41 – Displaying the ESXi server’s various settings
–
- Time to create our first virtual machine. Right-click on the ESXi host’s IP address (or hostname) and select New Virtual Machine or just press Ctrl-N. Follow the VM creation wizard. As per Fig. 42, I created a VM called my first vm.
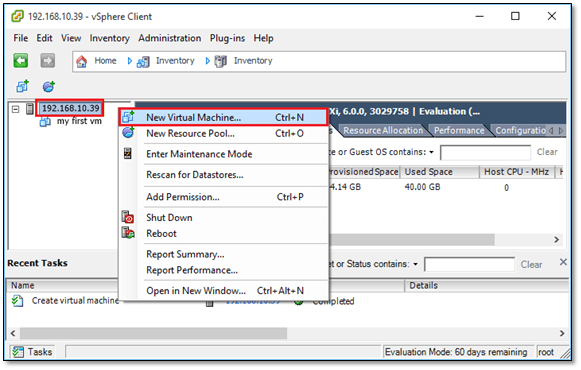
Figure 42 – Creating a virtual machine
Wrap Up
Despite not being officially supported, our HP server seems to be handling ESXi pretty well. Notwithstanding, compatibility is key here so make sure that all your components tick the required boxes before you go on and install ESXi. To reiterate, never ever install ESXi on non-compliant hardware that is used in production, or live, environments for all the reasons above mentioned.


Not a DOJO Member yet?
Join thousands of other IT pros and receive a weekly roundup email with the latest content & updates!


27 thoughts on "How to install vSphere ESXi on a bare metal server"
But , if my hardware not compatible? How me installing esxi?
Hi,
Well, that’s the whole point of the article. You’d still be able to install ESXi on hardware that is not listed in the compatibility list but using such systems in live environments should be highly discouraged for reasons mentioned in the article. Hope this helps.
Regards
Jason
Hi I am a network admin my boss has tasked me with setting up esxi on our server to host our vms. I have added my servers static ip in the client as instructed by the directions above, but I must create the vms on the laptop I am using now? do the vms use the servers hardware or the laptops which has this client installed? is there a way to manage this client from the server? and can our local machines access this? thank you.
The client is just a tool that allows you to connect to ESXi to perform your management tasks. So if you wanted to create a VM, you would do it through the client and it will connect out to the ESXi server and build the VM on the ESXi server. Multiple laptops can install the client and they will need to just supply the credentials to login and manage ESXi.
Hi there. I’m glad I found your guide as I have a N40L which is in need of some use. When I run the installer I’m told that it can’t find any suitable network devices in the box. Have you added another network adaptor to the machine or is it all running stock?
Thanks
Jon
Hi Jon,
Glad you found the post useful. Yes, I believe the nic came with the box. I’d check for you but the server hence since bit the dust.
Not sure if you’re aware about this. HP provides custom ESXi images here for the Proliant series so you could try going down this route.
If that fails, you’d have to plug-in a supported nic or inject the required drivers using something like ESXi-Customizer which even though no longer supported may still do the trick.
Hope this helps.
regards
Jason
Thank you Jason for your detailed explanation, really helped me a lot 🙂
Regards
Glad you found it useful!
regards
Jason
Thanks for the post, very helpful!
To complete the article: The procedure is the same as in the version 6.5, except that in 6.5 we are obliged to connect via web to manage it since the Windows vSphere Client is no longer supported.
Extracted from: http://www.sysadmit.com/2016/12/vmware-esxi-instalacion-paso-paso.html
Hey, glad you found it useful. You’re right about 6.5. In fact, I have an article lined up for publishing on the topic. VMware have also included new features related to nested ESXi in 6.5, even though technically, it is still officially unsupported.
Jason
Hello,
Great article, well written.
Can you help me with some clarifications on a subject since my networking skills are so humble:
I have a Dell PowerEgdge T320 and I want to install ESXi on bare metal, having some nice vms on it :), but I’m having trouble understanding how can I access my VM’s remotely.
I have a static IP from my ISP, I have only one network PCI on the server, I have a wireless router and a home desktop.
The questions are:
1. I must set my IP on the router(ip, default geteway, netmask, etc), letting the router(…aka DHCP server? ) to give an dynamically alocated IP for server and Desktop?…And if so….how can access the ESXi managing console remotely (from a hotel room for example)?
2. Can I connect remote thru SSH on various virtual machines and if so…:(using intuition: ) have a port (lets say 4971)set up for the server on router, and forwarding the ssh port(of the in-question vmachine 22) to the 4971 port?
P.S.: I will install ESXi 6.0.
Keep up the good work and all the best.
Hi,
Thanks. The easiest solution would be to set up a VPN especially if your router supports it natively. That way, you don’t have to play around with natting and can access anything on your home network effortlessly from anywhere. Alternatively you can use something like pfSense (http://resources.intenseschool.com/pfsense-series-installing-pfsense-in-vmware/).
Hope this helps.
regards
Jason
Thank you very much for the article.
Here’s another tutorial on how to install pfsense on vmware esxi v.6.X:
http://www.sysadmit.com/2017/04/vmware-esxi-instalar-pfsense.html
Glad you like it. Article on pfsense looks good even when translated.
Thanks
Jason
Thanks for this amazing article I have another question. How will I add vcenter or the other machines to my DNS server? The domain controller placing where? Will I include this ESXi on a vcenter which is already is in the environment? I’m a bit confused actually and of course, you are the best Jason!
Hi Bogac,
Thank you for the kind comment.
If you have a domain controller running DNS in your environment, you can create the necessary A and PTR records in advance before installing ESXi / vCenter Server. After installing ESXi, set it to point to the domain controller running the DNS server. You can configure ESXi network settings directly from the DCUI console. Same thing with vCenter. If you wish to manage ESXi with vCenter, it’s just a simple matter of adding ESXi hosts using the vSphere Web or HTML5 client.
You can also join both vCenter and ESXi to Active Directory if that’s what you want. I’ve written a few posts on this which you can find on our blog. Just search for Active Directory.
Hope this helps.
Jason
Jason thanks, as a beginner in this system administration area I found this blog is really helpful. I will manage a server basically in another country in 2-3 weeks with VMware tools so I have to learn how to do it from beginning to end.
This is great. I am expecting to receive a bare metal server into which I am supposed to install above. I will be following your article since it is easy to follow and straight forward. Thanks my guru.