Save to My DOJO
Table of contents
VMware vSphere Replication is a disaster recovery solution that allows you to replicate virtual machines on the same vCenter Server instance or to other instances within the same site, across sites and even to vCloud Air, the latter being VMware’s IaaS offering. The software is distributed as a SUSE Linux appliance (OVF) and fully integrates with vCenter Server once deployed via vSphere Web Client. It works with both versions of vCenter Server – Windows and appliance – and comes readily licensed with vSphere Essentials Plus kit, vSphere Standard, Enterprise and Enterprise Plus and the vCloud Suite editions.
From an architectural standpoint, a vSphere Replication appliance runs fully integrated with vCenter Server where it registers itself as an extension. A main component, vSphere Replication Server handles all replication processes. Multiple servers can be deployed for load balancing purposes in large environments. When replicating between two sites managed by a different vCenter instance, the vSphere Replication appliance must be installed on both vCenter instances. You can also choose to replicate a VM to the same vCenter Server.
Once a replication connection is established, practically any VM can be configured for replication. It is possible to seed the first replica to reduce bandwidth utilization and replication times. Once the source VM and replica are in sync, it is only changed blocks in the VM’s VMDKs that are replicated. For every VM configured for replication, you can independently set a recovery point objective (RPO) ranging from 5 minutes to 24 hours which determines the maximum allowable data loss. You can also set a retention policy for multiple point in time (MPIT) replica instances. This gives you a maximum of 24 snapshots for every replicated VM.
The following diagram (source: VMware), depicts two possible replication scenarios. The one on the left, depicts a replication setup between two vCenter Server instances hosted at different sites. The one on the right, depicts a scenario in which replication is confined to a single vCenter instance with one vCenter Replication appliance managing two vCenter Replication Servers for load balancing.
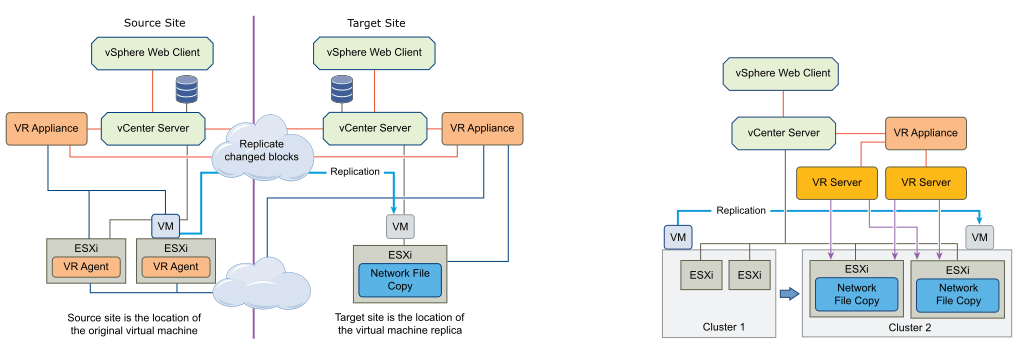
vSphere Replication scenarios
Note: Unlike fault tolerance protected VMs, a replicated VM does not spawn automatically on the target site in case of failure. Instead, it is up to you to recover it from the replica. For further details, please refer to the VMware vSphere Replication 6.5 documentation site.
Today’s Post
In today’s post – 1 of 2 parts – I’ll being going over the steps taken to set up replication between two vCenter Server instances. My environment consists of two vCSA 6.5 instances each managing nested ESXi 6.5 hosts. Network-wise, both vCenter Servers are running on the same network. However, for replication to work across different networks, WAN links, etc., there are a number of network ports that the appliance needs access to as per this KB article.
You’ll find detailed information on vSphere Replication here and here.
Setting up vSphere Replication
Step 1 – First off, download the ISO file from my.vmware.com.
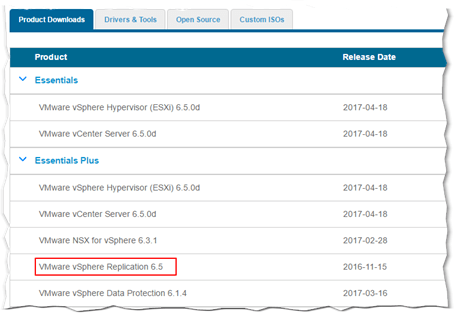
Downloading the vSphere Replication ISO from VMware’s site
Step 2 – Mount the ISO as a drive. Using the vSphere Web Client, log on the vCenter instance designated as source, that is, the one hosting the VMs you wish to protect.
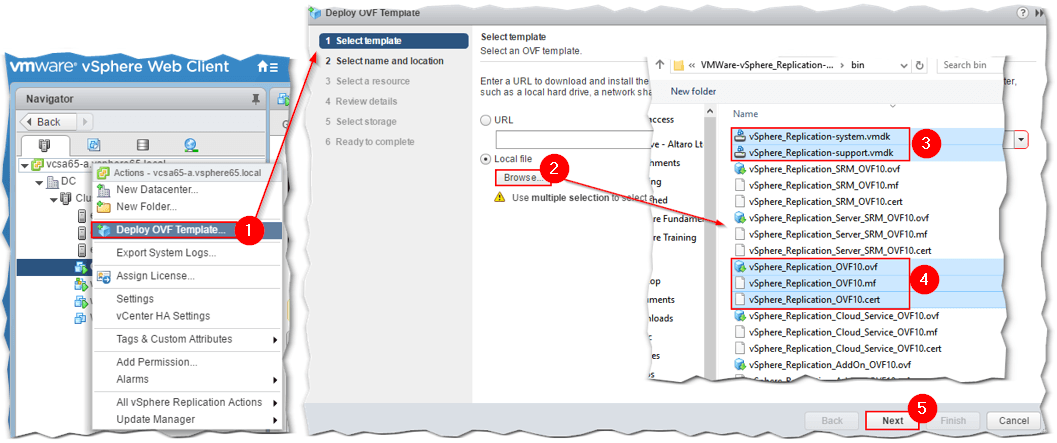
Step 3 – Right-click on the vCenter Server name and select Deploy OVF Template. Unlike standard OVF deployments, here you’ll need to select 5 files. These include the two VMDKs (3) and the correct OVF, MF and CERT files (4) as shown next.
Step 4 – Proceed with the deployment wizard as follows:
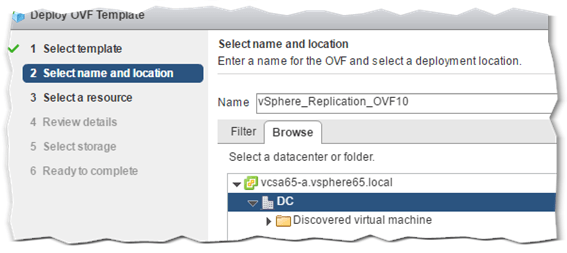
- Select the datacenter where the appliance will be deployed to.
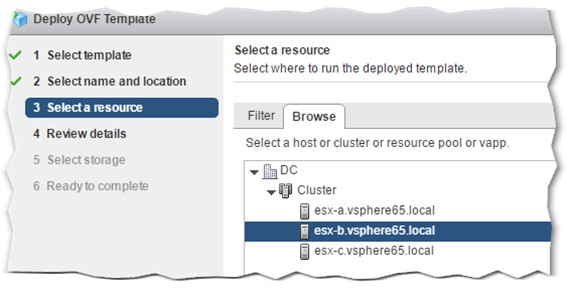
- Select the ESXi host where the appliance’s VM will be created.
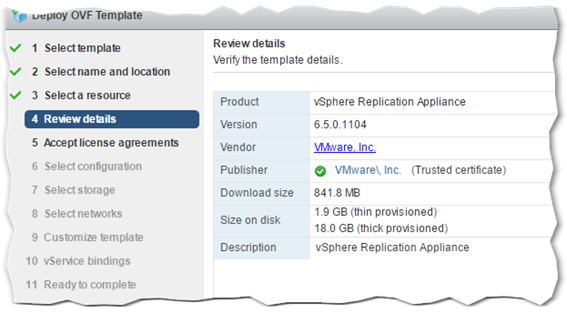
- Review the OVF template details just to make sure you’re deploying the correct component and version.
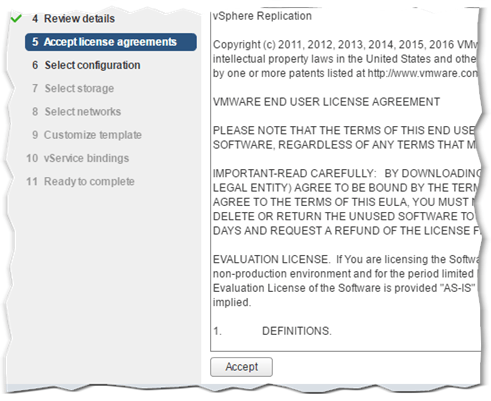
- Accept the EULA.
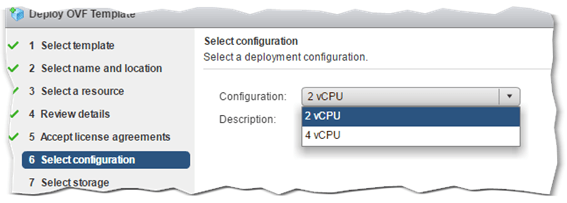
- Choose the configuration type. Here, you have two options to choose from. Quoting VMware: “Selecting higher number of vCPUs ensures better performance of the vSphere Replication Management Server, but might slow down the replications that run on ESXi host systems that have 4 or less cores per NUMA node. If you are unsure what the hosts in your environment are, select 2 vCPUs.“
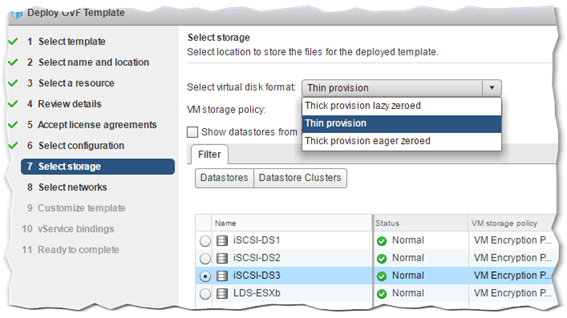
- Select a datastore and the appliance’s VM disk provisioning mode.
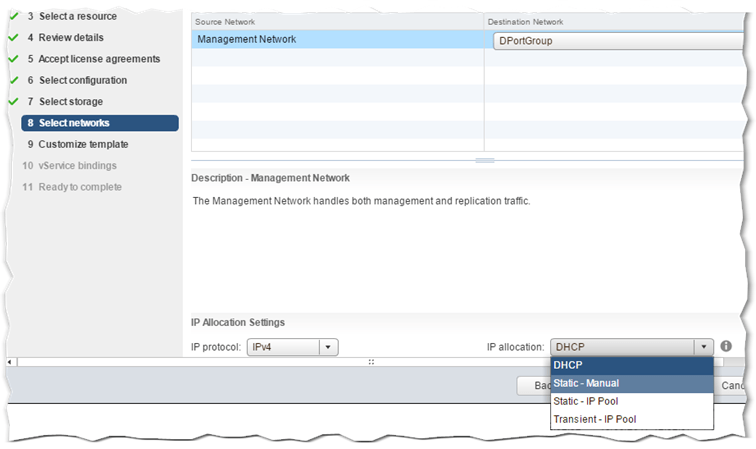
- Select the portgroup (network) the appliance will connect to. Also, set the desired IP version (4 or 6) and the method used to assign TCP/IP settings. I selected Static – Manual settings for this example which is what you’ll probably select anyway.
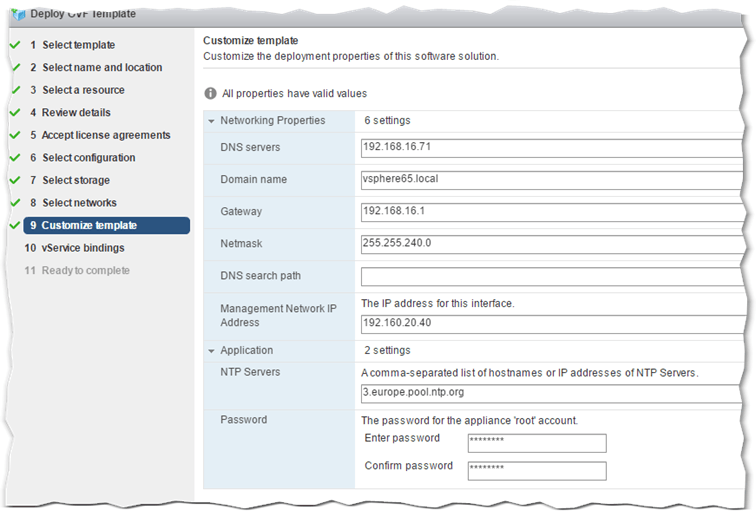
- Configure the appliance network. All settings are obligatory save for the DNS Search Path.
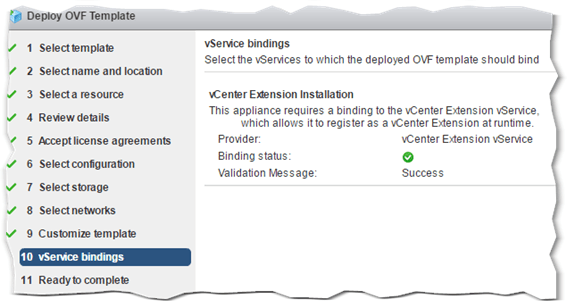
- This is just a screen telling you that the appliance will bind to vCenter as an extension.
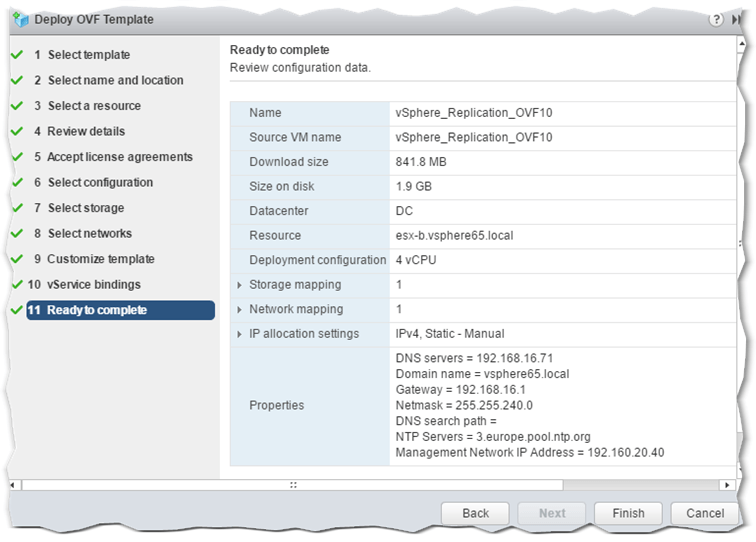
- Final chance to review the appliance’s configuration before committing. Press Finish to deploy.
- As always, you can follow the deployment progress from vSphere Web client.
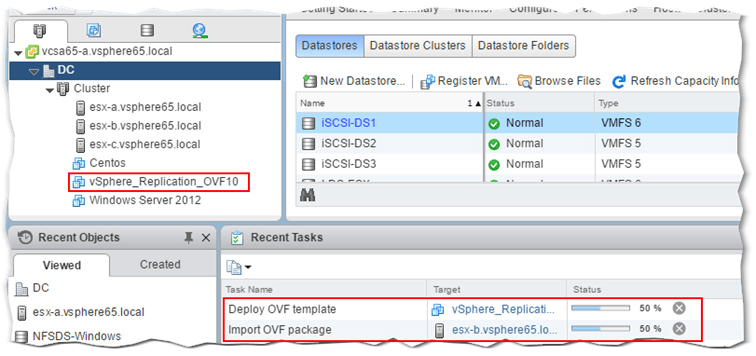
Step 5 – Once the deployment completes, go ahead and power up the appliance.
Step 6 – Using a browser, navigate to http://<appliance ip address>:5480. From VAMI, do the following:
- Select the Configuration tab (2) under VR (1)
- Type in the password for the SSO administrator account (3).
- Click on the Save and Restart Service button (4)
- Accept the SSL certificate when prompted to (5)
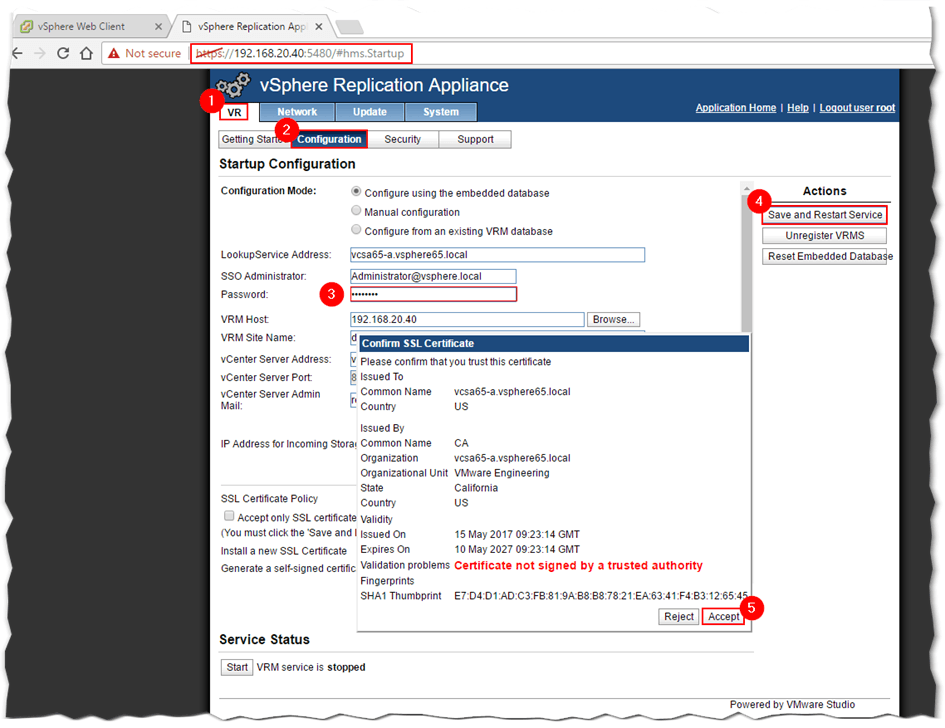
Using VAMI to configure the vSphere Replication appliance
Note: You might run into some issues if the vCSA is not correctly registered with the lookup service. Check this KB and this KB for further details.
You’ll know that the appliance registered successfully when the VRM (vSphere Replication Management) service status is shown as running.
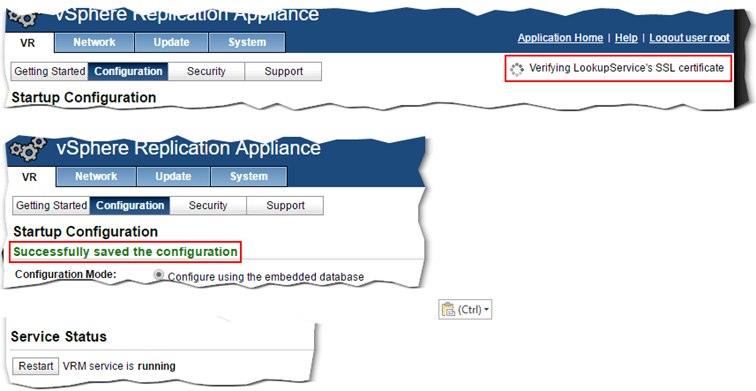
Successfully registering a vSphere Replication Appliance with vCenter Server
Step 7 – Log out of vCenter Server and log in back again. This will load the new vSphere Replication extension, the icon for which should show up on the Home screen.

A vSphere Replication icon is added to the Home screen in vCenter Server
Step 8 – Repeat step 3-7 on the target vCenter Server.
Step 9 – Assuming that the appliance was successfully installed at both ends, it’s now time to configure a replication connection between the two vSphere Replication appliances. To do so, log in the source vCenter Server and click on the vSphere Replication icon under Home. Right-click on the vCenter Server name listed and select Connect to Target Site from the All vSphere Replication Actions menu.
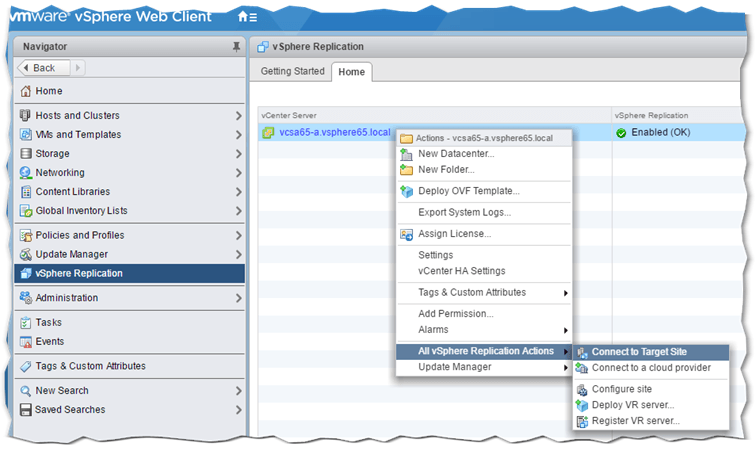
Setting up a replication connector to the target site
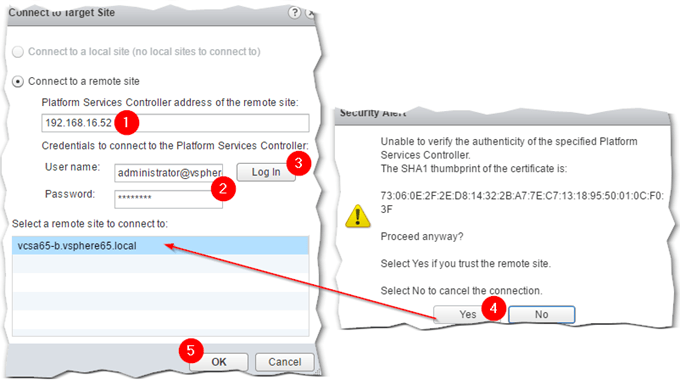
- Type in the IP address of the Platform Services Controller of the remote SSO domain (the one the target vCenter Server participates in) and the corresponding admin credentials. Press Yes to accept the SSL certificate and you should be ready to go.
Step 10 – To ensure that the connection between the two vSphere Replication appliances is established, click on the vCenter Server name in Navigator (1). Click the Configure tab and navigate to vSphere Replication (3) -> Replication Servers (4). You should see a Connected icon under the Status column. The same applies to verifying the connection, this time from a vCenter Server viewpoint. Just select vSphere Replication -> Target Sites. See here for more details.
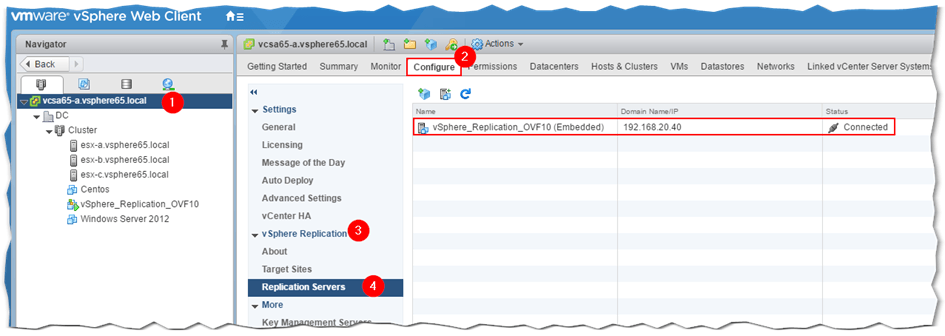
An established connection between two vSphere Replication appliances
In case of a dropped connection, try re-establishing it by pressing on the Reconnect … icon as shown next. You’ll need to supply the credentials for the PSC at the remote site.

Re-establishing a lost connection
That’s all there is to setting vSphere Replication between vCenter sites which will undoubtedly bolster your disaster recovery contingency plans. This reminds me to list the use cases and benefits. I’ve chosen to reproduce them from VMware’s literature as follows:
vSphere Replication use cases
- Data protection and disaster recovery within the same site and across sites
- Data center migration
- Replication engine for VMware vCloud Air Disaster Recovery
- Replication engine for VMware vCenter Site Recovery Manager
vSphere Replication features and benefits
- Simple virtual appliance deployment minimizes cost and complexity.
- Integration with vSphere Web Client eases administration and monitoring.
- Protect nearly any virtual machine regardless of operating system (OS) and applications.
- Only changes are replicated, which improves efficiency and reduces network utilization.
- Recovery point objectives (RPOs) range from 5 minutes to 24 hours and can be configured on a per–virtual machine basis.
- Compatibility is provided with VMware vSAN, traditional SAN, NAS, and local storage.
- Quick recovery for individual virtual machines minimizes downtime and resource requirements.
- Optional network isolation and compression help secure replicated data and further reduce network bandwidth consumption.
- Support for Microsoft Volume Shadow Copy Service (VSS) and Linux file system quiescing improves reliability of recovered virtual machines.
Conclusion
Setting up vSphere Replication isn’t particularity difficult although the deployment process can be somewhat finicky. Replication takes place at the host level. This means that vSphere Replication is storage agnostic, meaning any type of storage architecture is supported be it NAS, SAN, DAS and even vSAN. Additionally, the solution will not cost you an extra dime if you’re already running a vSphere Essentials Plus Kit, enterprise editions of vSphere and even the vCloud suite. It goes without saying, that vSphere Replication should complement an existing Disaster Recovery strategy as opposed to relying solely on it.
In part 2, I’ll show you how to set up replication for a VM and how to recover from a failed VM scenario by spinning up a replica of it.
Go to Disaster Recovery with vSphere Replication part 2
[the_ad id=”4738″][the_ad id=”4796″]


Not a DOJO Member yet?
Join thousands of other IT pros and receive a weekly roundup email with the latest content & updates!


4 thoughts on "Disaster Recovery using vSphere Replication – Part 1"
We have this setup and are getting Warnings errors in Altaro:
The vSphere Changed Block Tracking (CBT) functionality needs to be reset before the backup can proceed. This operation has been re-queued so that Altaro can attempt the backup again after re-enabling the CBT feature.
If CBT is still in an invalid state on the second attempt, the backup will then be taken with CBT temporarily disabled. (Error code ‘VMWARECBT_100’)
Is this a known issue?
Hey Steven,
I recommend you check with Altaro support on this issue since it’s specific to the Altaro product. The support engineers are well versed with VMware and should be able to assist with your question.