Save to My DOJO
Welcome to the second part of the series covering Dell’s OpenManage suite for VMware. In How to install Dell OpenManage Server Administrator on ESXi, I showed you how to install the Dell OMSA VIB on ESXi instances running on Dell servers. The VIB alone achieves very little unless you are able to interact with it. That’s where the OpenManage Web server and the OpenManage Integration for VMware vCenter appliance come into play.
Without further ado, let’s start off by covering the process of installing the OMSA Web Server on a Windows box.
Deploying the OMSA Web Server
Download the latest edition from here. Once you do, run the downloaded executable. By default, it will deflate the archive contents to c:\openmanage.
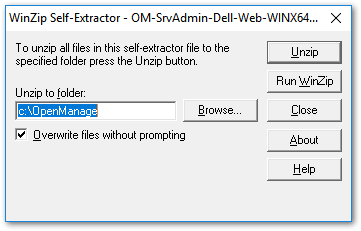
OMSA Web Server self-extracting installer
Now, navigate to C:\OpenManage\docs\install_guide\Windows\en and run index.html. The software’s documentation is displayed in a browser window. Pay some attention to the system requirements even though the installer will tell you if and where you fall short.
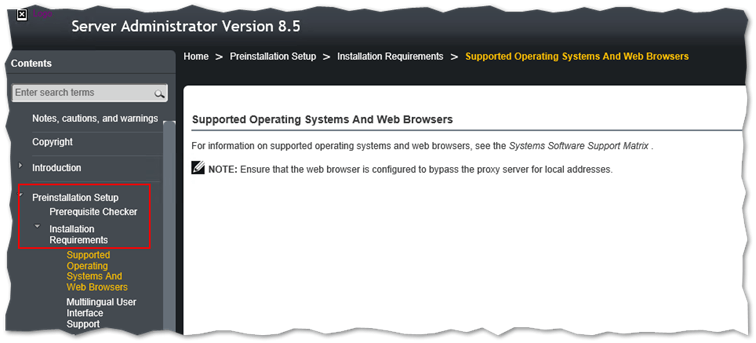
OMSA Web Server HTML-based documentation
Next, navigate to C:\OpenManage\windows and run setup.exe. The installer runs a check to verify that all the system requirements are met. Click on Install Server Administration to proceed or take remedial action by installing any missing requirements.
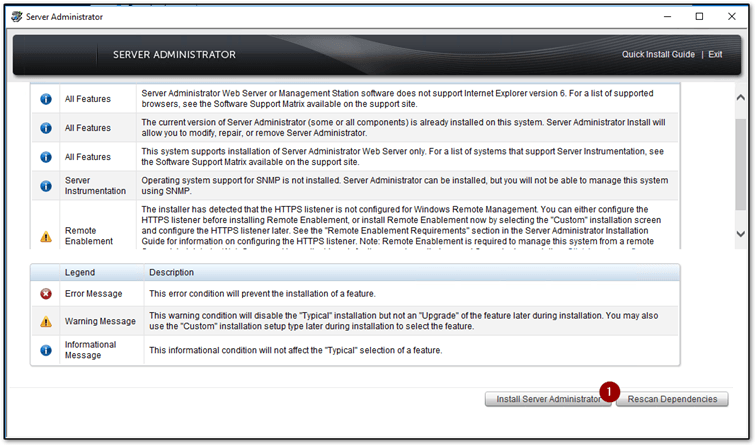
System requirements and dependency checker
Follow the self-explanatory wizard to finish installing the web server. Once the installation completes, navigate to https://<OMSA Web Server IP address>:1311.
On the login form, type the hostname or IP address of an ESXi instance running the OMSA VIB. Supply the root credentials or equivalent ones. Tick on the Ignore certificate warnings since the login attempt may fail otherwise.
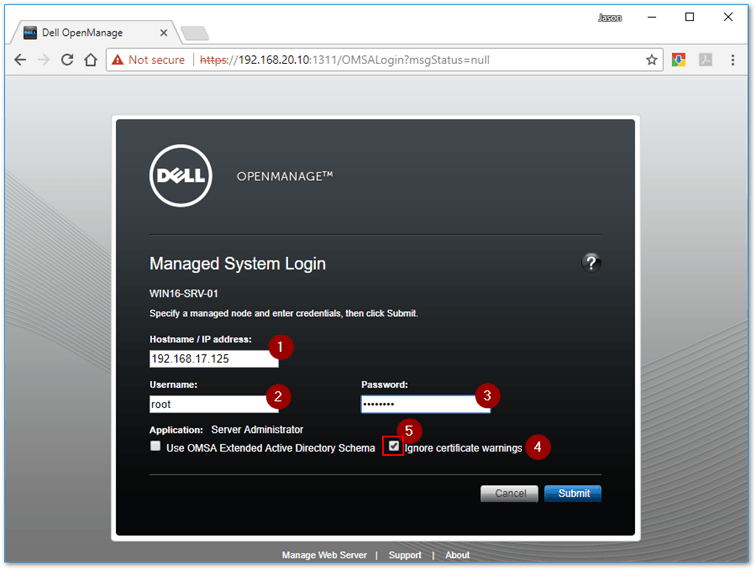
Use the ESXi host credentials to access OpenManage nodes, that is hosts running the OpenManage VIB
As can be seen in the next video, a wealth of information about your Dell server is exposed via an intuitive UI which can also be used, to a lesser extent, to alter system settings.
Deploying the OpenManage Integration for VMware vCenter appliance
This appliance needs vCenter Server installed and necessitates of the vSphere Web client for deployment. The functionality provided, as is the ability to update the firmware, goes beyond what’s available in OMSA Web server. The installation is also more complex as I discuss next.
First off, download the latest edition of the appliance from here. This version provides support for vSphere 6.5 U1 which is what I have installed for this post.
Next, using a Windows machine, extract the download ZIP file and run Dell_OpenManage_Integration.exe as administrator. Run the wizard and follow the instructions as per the set of screenshots shown next. The sequence of steps and clocks, all redundant if I may add, is Next -> Accept EULA -> Next -> Install -> Finish.
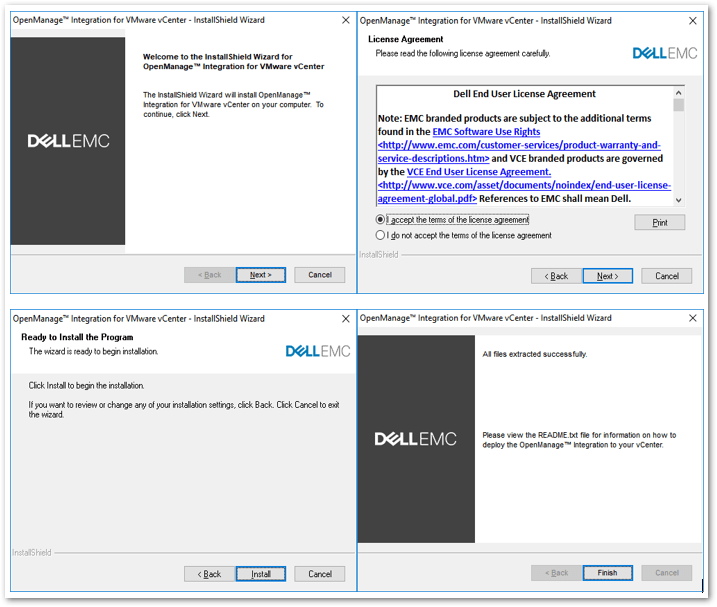
The self-extracting installer for OM Intergration for VMware vCenter
The installer simply extracts the OVF contents to the parent folder. You will then deploy the Integration appliance to a vCenter Server as per standard procedure.
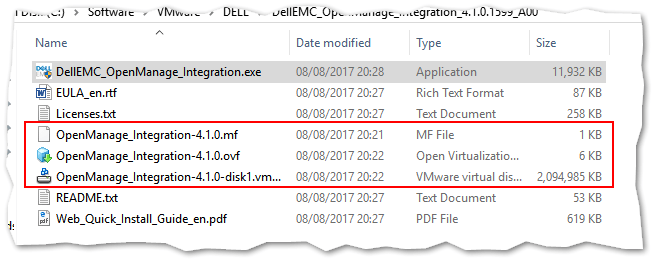
The 3 self-extracted components comprising the appliance
Using the vSphere Web client, right-click on a host you want the appliance deployed to and select Deploy OVF template.
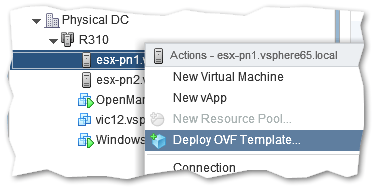
Deploying the appliance using the vSphere Web client
Click on Browse and navigate to the folder containing the OVF contents. Select all 3 files – OVF, VMDK, and MF – and click on Next.

When deploying the appliance using the vSphere Web client, make sure to select all 3 files
Select a name for the OpenManage appliance and the location where you want it installed. Press Next.

Selecting a deployment location
Select the ESXi host you want the appliance installed on and press Next.
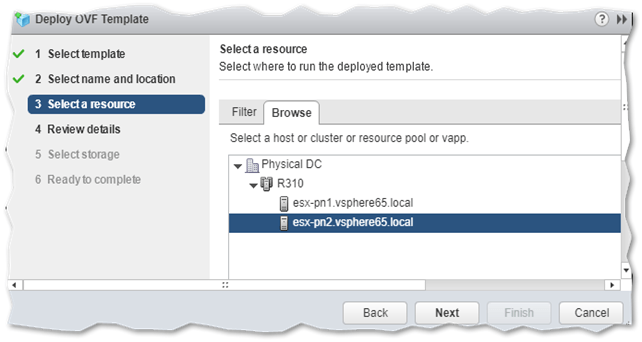
Selecting a target ESXi host
Review the appliance deployment details and click Next.
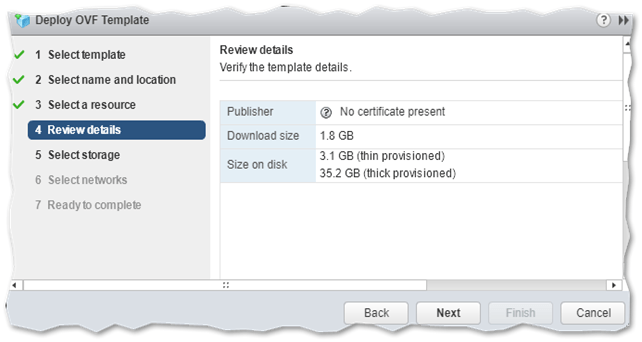
OVF deployment review details
Choose between Thin and Thick disk provisioning and select the appropriate storage policy if applicable. Press Next.
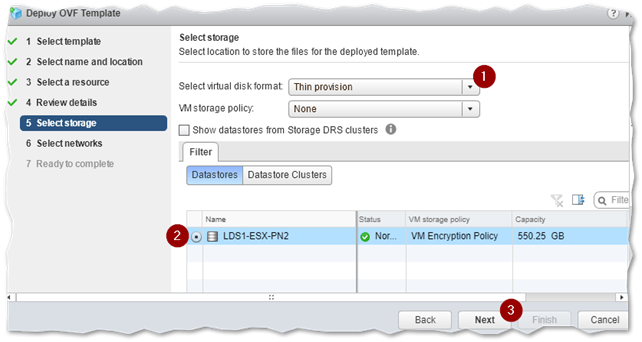
Selecting the appliance storage type and datastore
Select a network the appliance will connect to and press Next.
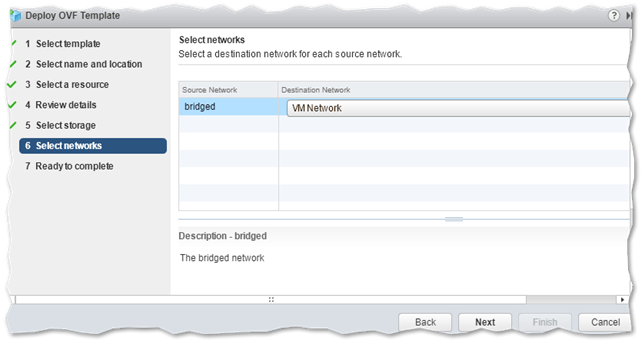
Selecting the network the appliance will connect to
Review the final settings and press Finish to start deploying the appliance.
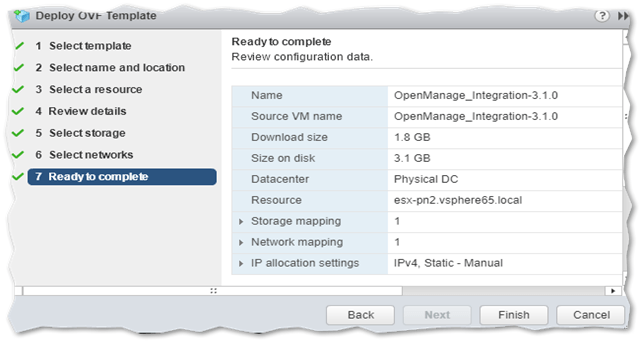
Kicking off the OVF deployment process
The OVF deployment may take a while depending on the performance of your host. Regardless, wait for the Deploy OVF template and Import OVF package tasks to complete.
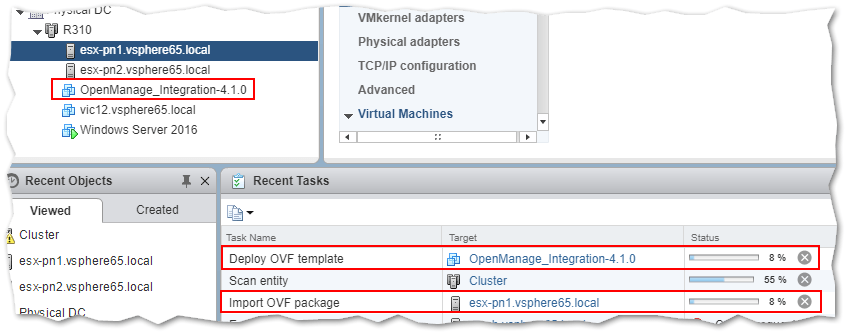
Appliance deployment in progress …
Configuring the appliance
Once the deployment tasks compete, proceed to power up the appliance’s VM. Initially, the VM will reboot at least a couple of times while it self-configures and creates an evaluation license. When the login prompt displayed – assuming you are remote consoled to the VM – type admin and press Enter.
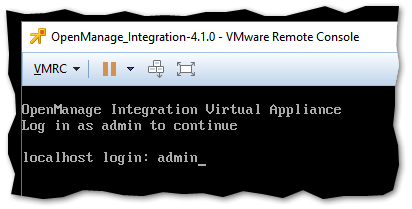
Logging in the appliance using remote console
Set a password for the admin user. The minimum password length is set to 8. Complexity is also enforced.

Setting the appliance’s admin password
A dialog is then displayed from where one can set the appliance’s time, network configuration and hostname. Start by configure the appliance’s network settings. Clicking on Network Configuration, highlight the network interface and click on Edit.
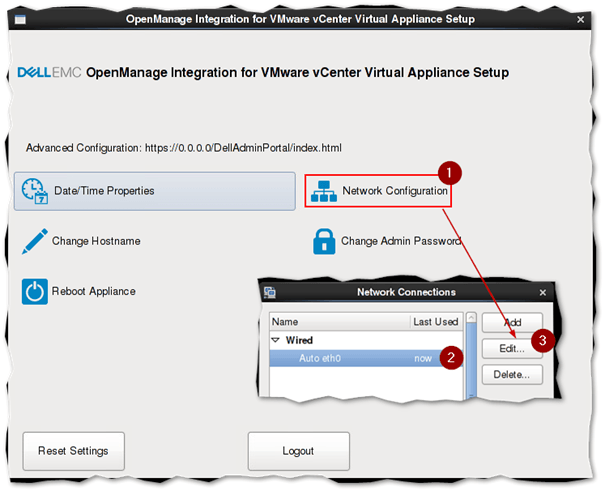
Setting the appliance’s network configuration
Change to the IPv4 Settings tab. While setting up the network interface, you should preferably set the allocation method to Manual (2) rather than DHCP. Then click on Add and type in the Address, Netmask, and Gateway values for the interface. Optionally, set the DNS Servers and Search Domains values as shown next. IPv6 is disabled by default. Click on Apply when ready
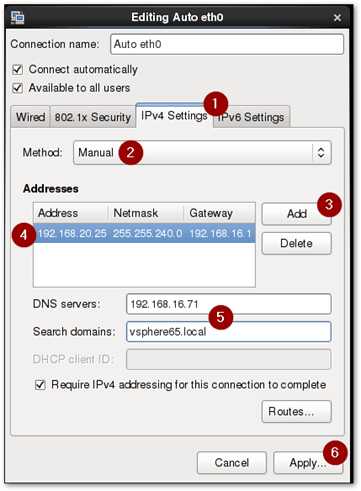
Configuring the network interface
It’s a good idea to set the appliance’s hostname. Before doing this, make sure you have created the relevant lookup entries on your DNS server so the hostname can be resolved.
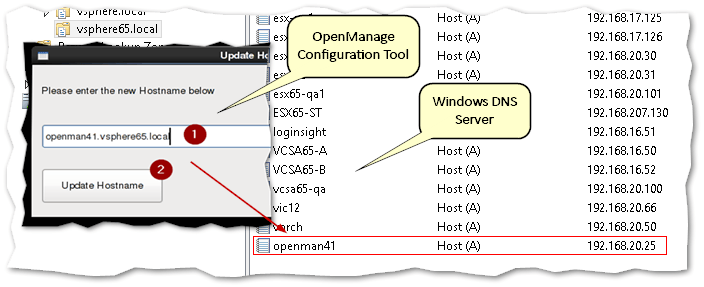
Setting the appliance’s hostname after creating the relevant DNS entries
Click on Reboot Appliance on the main screen to ensure that the configuration settings are applied.

Reboot the appliance after you’ve finished setting it up
Note: Do not skip the reboot step. In my case, the DNS settings, for instance, were applied only after the appliance was rebooted. This is important, as the next step will fail if you’re registering vCenter using via its FQDN.
Registering with vCenter Server
Once the OpenManage appliance is back online, you should now be able to https to the appliance as shown next.
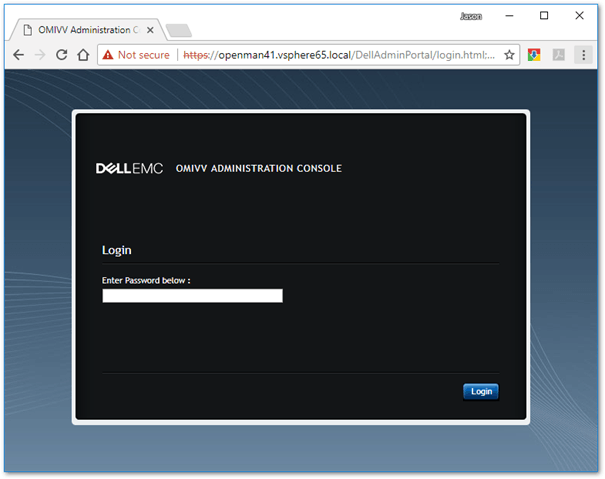
Accessing the Integration appliance via its web console
This next step will register OpenManage with vCenter Server. After you log in using the admin password previously supplied, click on Register New vCenter Server. The Register a new vCenter dialog is displayed.
Type in the hostname name or IP address of your vCenter Server. Note the recommendation of using the vCenter Server’s FQDN rather than the IP address (2). Under vCenter User Account, supply a valid set of credentials – ex. [email protected] – to grant permissions to the appliance to register. Pressing Register completes the process.
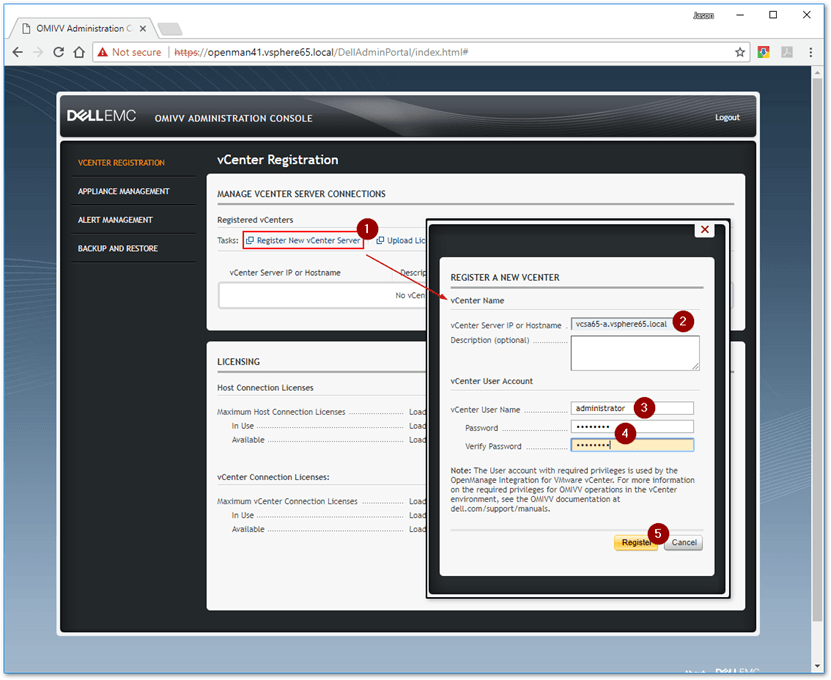
Registering a vCenter Server instance
Assuming the network settings provided are correct, the appliance will register with vCenter as shown next. You can unregister at any time.
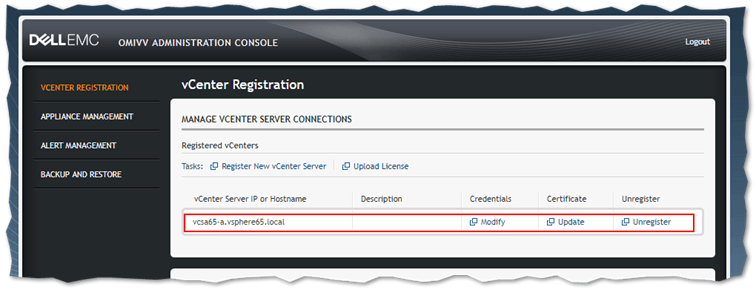
vCenter Server registration status
At this point, you have the option to deploy a standard license or stick with the evaluation license. The latter, as mentioned, gives you a 90-day trial. Have a look at the Appliance Management screen for a detailed view of the appliance’s status.
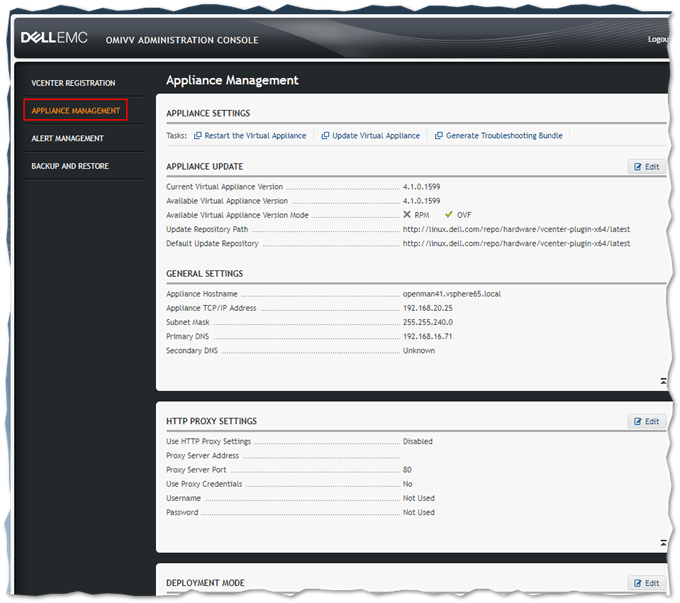
You can view and manage of the appliance’s settings and health from the Appliance Management page
Running the Appliance for the first time
Log back in vCenter Server with the vSphere Web Client. If you’re using a previously established session, log off first and log back in again. On the Home screen, you should now see the OpenManage Integration icon.
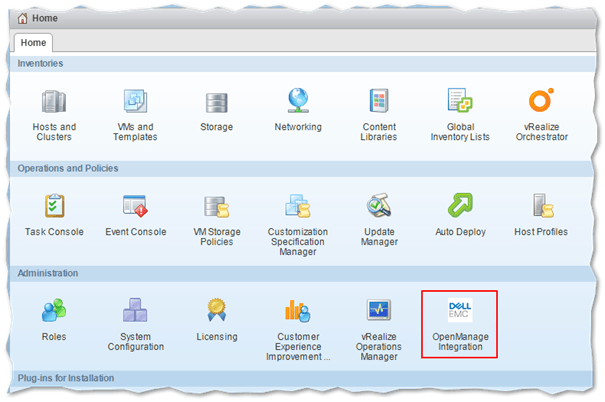
The OpenManage Integration icon is added to vCenter Server Home screen in vSphere Web client
Clicking on the OpenManage Integration icon, kicks off the appliance configuration wizard. Press Next on the Welcome screen.
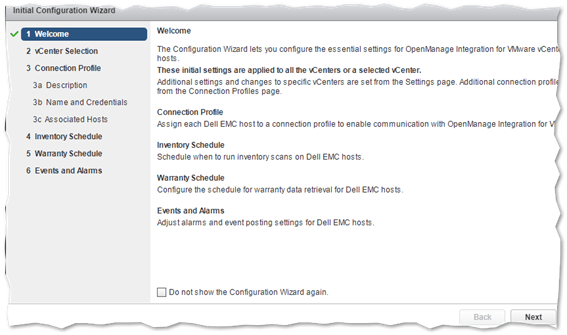
The appliance must be initialized the first time it used in vCenter
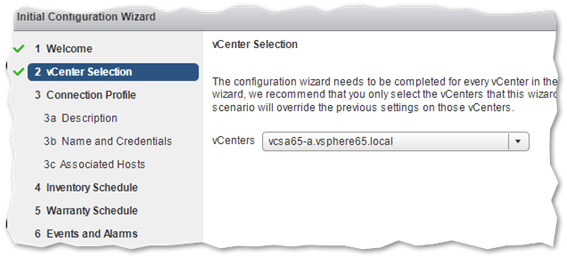
The previously registered vCenter Server instance is displayed in the vCenters drop-down box along with other vCenter Server you may have registered. Press Next to continue or go back and re-register vCenter Server as previously explained.
Selecting the vCenter Server instance against which the appliance is first initialized
The next step creates a connection profile. In a nutshell, a profile is an authentication object used to connect and talk to the Dell servers running ESXi. If you have iDRACs (management cards) installed on your Dell servers, it’s best to have them readily configured. Press Next to continue.
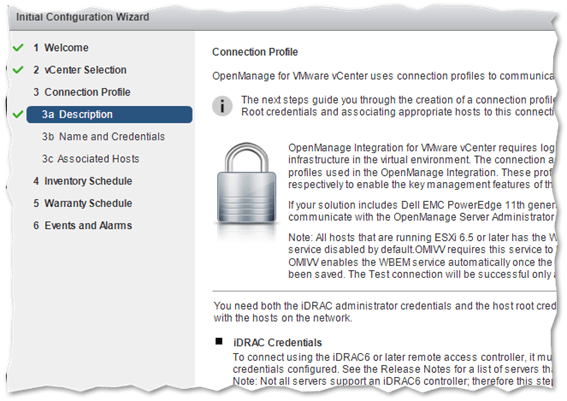
Setting up connection profiles
On the next screen, type a value for the Profile Name. The Description is optional. Under IDRAC Credentials and Host Root, supply the required credentials allowing full access the iDRAC and the ESXi host respectively. You can use Active Directory authentication if both components have been appropriately configured. Certificate checks should be skipped unless they have been appropriately configured. Press Next.
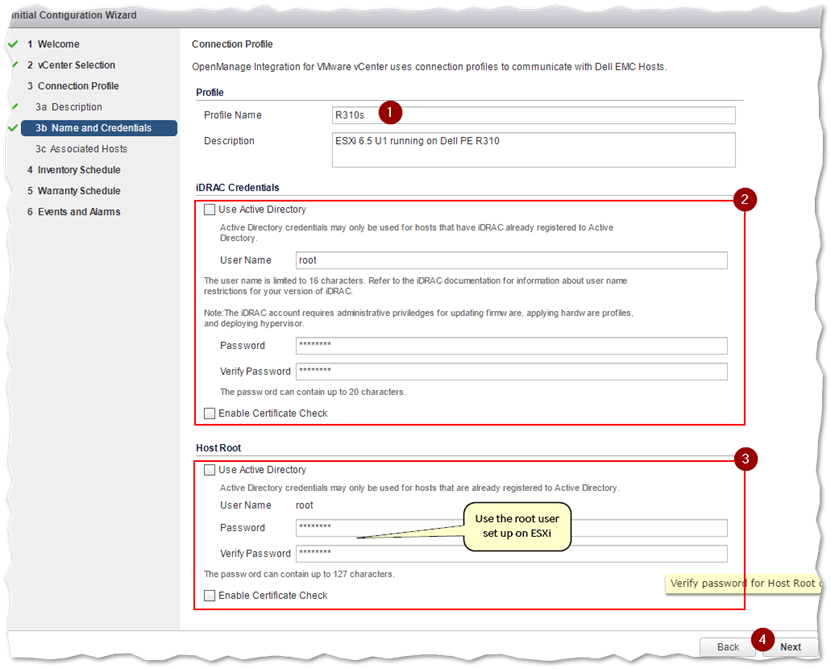
Populating a connection profile with ESXi and iDRAC credentials
On the Associated Hosts screen, select the ESXi hosts running the OpenManage VIB. Press Next to continue.
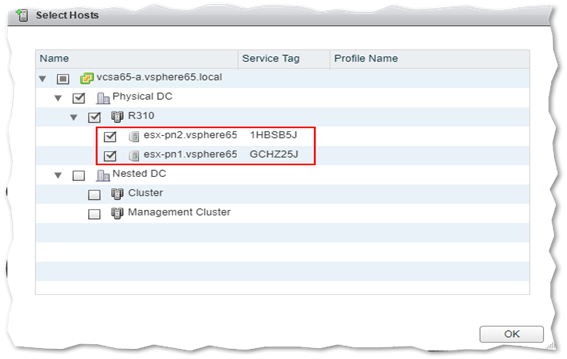
Selecting the ESXi host running the OMSA VIB
On the Inventory Schedule screen, tick on the Enable Inventory Data Retrieval option and set the times at which you want inventory information collected from the hosts. Here, I’ve set it to run every other day at 2AM in the morning. Press Next to continue.
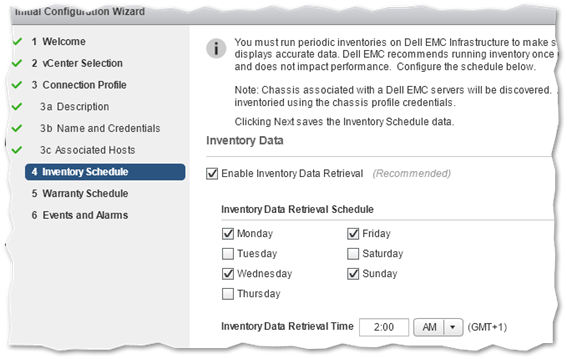
Setting an inventory collection schedule
Similarly, and optionally, you can configure Warranty Data retrievals from the Dell Online website. This pulls warranty information off the Dell site that match the service tag on your Dell servers. Press Next to continue.

Setting a warranty retrieval schedule
Finally, you can enable Events and Alarms for better monitoring. Be extra careful when enabling this option since you can inadvertently put hosts into maintenance mode if your cluster is set to Proactive HA event triggering. Pressing Finish completes the configuration process.
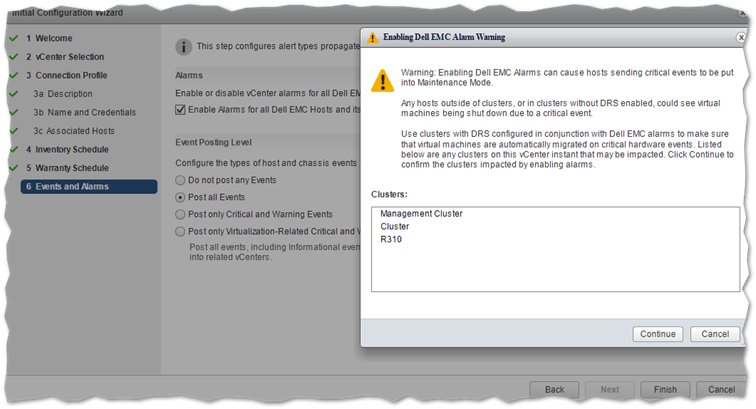
Enabling alarms for critical and warning events
Using the OpenManage Integration for VMware vCenter features
Due to post length restrictions, I’ll try and tack this subject in a future post as a tentative part 3 of this series. However, as a taster here, are some of the goodies you can expect.
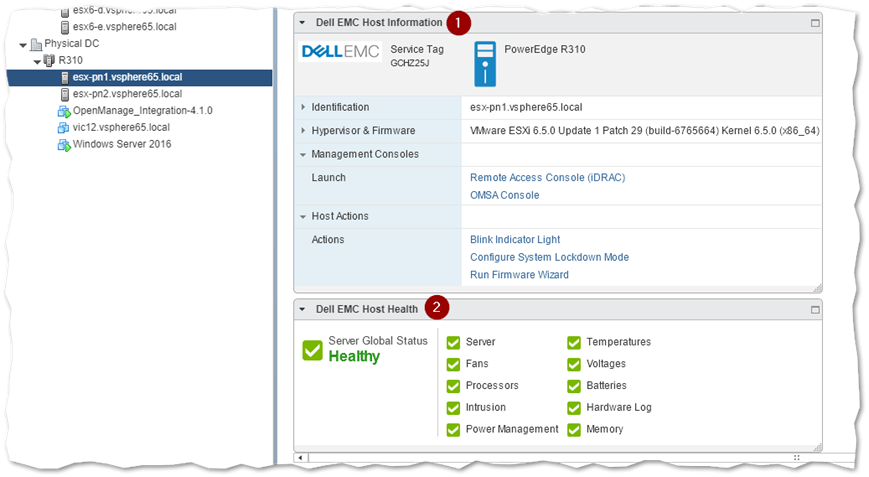
Using the vSphere Web client, select one of the ESXi hosts running on a Dell server and click on the Summary tab. Depending on your screen layout, you should be able to see two new panes; Dell EMC Host Information and Dell EMC Host Health. From the first pane, you can run a number of tasks which also included updating hardware firmware on your Dell Server. The second pane gives you a quick glance at your server’s health.
This last video, courtesy of Dell, provides a quick intro on the features and benefits of OpenManage Integration for VMware vCenter.
https://www.youtube.com/watch?v=GddcvdD1jAw
Conclusion
In this 2-part series, I covered how to install Dell’s OpenManage Server Administrator on ESXi hosts and subsequently, the OMSA Web Server and OpenManage Integration for VMware vCenter appliance, two components which allow you to manage your Dell servers using a dedicated web console and the vSphere Web client respectively. The appliance provides advanced functionality that includes scheduled updates, firmware updates and more. It can be freely evaluated for 90 days after which you must purchase a standard license. One major benefit is that you can now manage your Dell based ESXi hosts directly from vSphere Web client. Try as I may, I could not get this to work with the latest vSphere (HTML5) client so I will update accordingly if this changes anytime soon.


Not a DOJO Member yet?
Join thousands of other IT pros and receive a weekly roundup email with the latest content & updates!
More in this category


About the Author
Jason Fenech


458 thoughts on "How to deploy Dell OpenManage server components for VMware"
Great write up, two comments
The OMIVV plugin is not yet available for the vCenter HTML5 console, it is scheduled on the roadmap.
The OMSA VIB is not necessary anymore with later generation servers as everything is handled Out-of_band directly to the iDRAC.