Save to My DOJO
Table of contents
Welcome to the second part of this PowerCLI Primer series. Today, you will learn how to populate a freshly deployed vCenter Server using PowerCLI. This includes creating a datacenter, a cluster and joining a number of previously installed ESXi hosts to vCenter. I’ll also provide examples on how to manage VMs and templates.
Make sure to read part one of the series if you’re completely new to PowerCLI. There you’ll learn how to install PowerCLI and on how to establish connection to ESXi and vCenter Server using PowerCLI cmdlets.
For this post, I’m using the latest version of PowerCLI, v6.5 Release 1 and a freshly installed vCSA 6.5 instance.
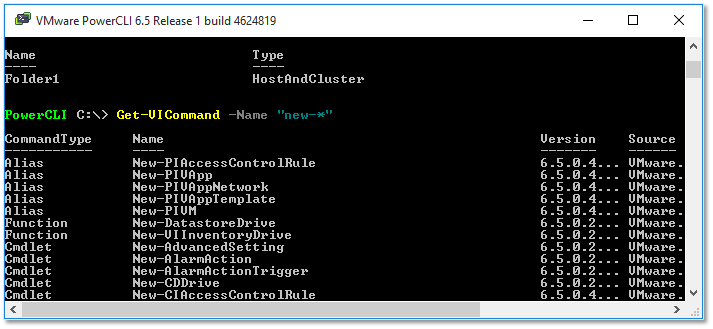
PowerCLI 6.5 Release 1
Populating vCenter Server
Creating a Datacenter
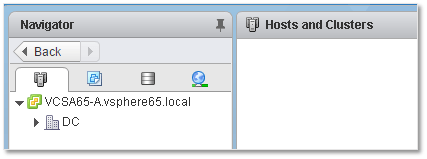
A datacenter is generally the first object you will create after deploying vCenter Server. The only caveat here is to use Get-Folder -NoRecursion to tell the New-Datacenter cmdlet to create the datacenter object under root since this being a fresh installation of vCenter.
Example 1 – Create a datacenter called DC as the first root object.
New-Datacenter -Location (Get-Folder -NoRecursion) -Name "DC"
Creating a Cluster
This step, although optional, is generally the next in line as it allows you to enable DRS and HA in your vSphere environment.
Example 1 – Create a cluster called Production under datacenter DC.
New-Cluster -Name Production -Location DC
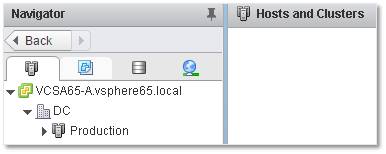
Note: For the location parameter, you can also use Get-Datacenter -name “DC”.
Adding ESXi hosts to vCenter Server
Once you’ve created a datacenter and a cluster, the next step is to add the ESXi hosts. The -force parameter ignores any errors which might interfere with the addition process.
Example 1 – Add a single ESXi host to datacenter DC.
Add-VMHost 192.168.16.68 -User root -Password password -location DC -force
Example 2 – Add multiple ESXi hosts to datacenter DC.
@("192.168.16.68","192.168.16.69","192.168.16.70") |
ForEach-Object {Add-VMHost $_ -User root -Password password -Location DC -force}

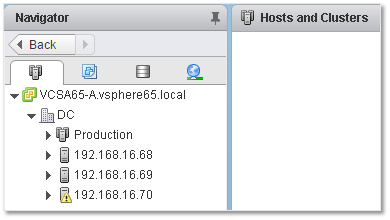
Note: @(“192.168.16.68″,”192.168.16.69″,”192.168.16.70”) is just an array of host IP addresses. The syntax for it may differ since I used the strict form. What we’re doing here is piping “|” the contents of the array into the Add-VMHost cmdlet processing every element in succession. The example works because the password for root is the same for all three ESXi hosts otherwise you would omit the User and Password parameters and enter the credentials manually for every host.
Moving hosts to a cluster
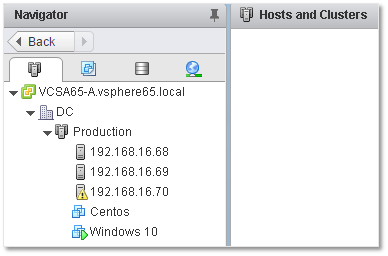
Use the next command to move the ESXi hosts to the cluster. You would probably add the ESXi hosts to the cluster right from the start but the following example dictated otherwise!
Move-VMHost @("192.168.16.68","192.168.16.69","192.168.16.70") -location Production
Powering up and shutting down a VM
Now that the required ESXi hosts have been added to vCenter Server, I can manage any preexisting VMs as I please. In my case, I only have two VMs to go by.
Example 1: Powering up a VM called Centos.
get-vm -Name "Centos" | Start-VM -Confirm:$false
Example 2: Shutting down a VM called Windows 10. If the VM name includes whitespace, make sure to enclose it within inverted commas.
get-vm -Name "Windows 10" | Stop-VM -Confirm:$false

Note: The -Confirm:$false bit suppresses any prompting which comes in handy when fully automating a given task.
Cloning a VM
To clone a VM, you’ll use the New-VM as per the following example. The -VM parameter requires a VM object hence the use of (Get-VM -name Centos). Similarly, -ResourcePool is mandatory and in this example (Get-VMHost 192.168.16.68) is used to retrieve a host object corresponding to host 16.68.
New-VM -Name CentosClone -VM (Get-VM -name Centos) -ResourcePool (Get-VMHost 192.168.16.68)

Creating a new VM
The New-VM cmdlet is primarily used to create new vms, though we’ve seen that it can be used for cloning as well. In this example, I’m creating a new VM called NewCentos that will resided under cluster “Production” and datastore “iSCSI_LUNa”. I’ve also specified that the VM will have 1 vCPU, 2GB of RAM and a 10GB disk provisioned in thin mode. The guest OS is specified by the GuestID parameter.
New-VM -Name NewCentOS -ResourcePool (Get-Cluster -Name "Production") -Datastore iSCSI_LUNa -NumCPU 1 -MemoryGB 2
-DiskGB 10 -NetworkName "VM Network" -DiskStorageFormat Thin -GuestID otherGuest64
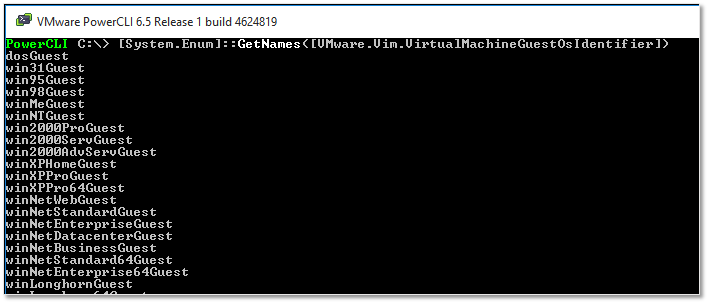
Run the following command, to enumerate all the possible guestID values your environment supports.
[System.Enum]::GetNames([VMware.Vim.VirtualMachineGuestOsIdentifier])
Deleting a VM
To delete a VM, you first fetch its corresponding object which you then pipe into the Remove-VM cmdlet. If you omit the DeletePermanently parameter, the VM is simply removed from the inventory meaning it will still reside on a datastore.
Example 1: Delete a VM called NewCentos.
get-vm NewCentos | Remove-VM -DeletePermanently -Confirm:$false
Example 2: Delete a bunch of VMs by piping an array of VMs to the Remove-VM cmdlet.
get-vm @("VM1","VM2","VM3") | Remove-VM -DeletePermanently -Confirm:$false
Converting a VM to a template
A useful vSphere construct is a template which allows you to deploy VMs from it. You will first create a VM, configure it and install any required software. Once you’re done, you can convert it to a template which is then used to create perfect duplicates of the original VM. In the following example I’m converting a VM called Centos into a template called Tmpl-CentOS.
Example 1: Convert a VM to a template.
Get-VM -Name Centos | Set-VM -ToTemplate -Name Tmpl-CentOS -Confirm:$false
In the next example, I create a VM using the template just created.
Example 2: Create a VM from the template. The new VM will reside under cluster Production and on datastore iSCSI_LUNa.
New-VM -Name CentOSnew -Template Tmpl-CentOS -ResourcePool "Production" -Datastore iSCSI_LUNa

Putting it all together
Instead of executing every single statement separately, it makes more sense to tie everything together into one single script. To illustrate this idea, I’ve put together a simple PowerCLI script borrowing from some of the examples above. The script when run will populate a freshly deployed VCSA with a DC and Cluster adding a number of ESXi hosts in the process. Remember that you should save the script as a .ps1 file and execute it from a PowerCLI shell. Change the variables in the first section according to your environment’s parameters.
#Change variables accordingly
 $VCSA="192.168.16.50"
 $usrVCSA="[email protected]"
 $pwdVCSA="password"
 $nameDC="DC"
 $nameCluster="Production"
 $addESXi=@("192.168.16.68","192.168.16.69","192.168.16.70")
 $usrESXi="root"
 $pwdESXi="password"

#Connect to vCenter Server
 Connect-VIServer -Server $VCSA -User $usrVCSA -Password $pwdVCSA -ErrorAction Stop | Out-Null

#Create Datacenter
 New-Datacenter -Location (Get-Folder -NoRecursion) -Name $nameDC

#Create Cluster
 New-Cluster -Name $nameCluster -Location $nameDC

#Add ESXi hosts to cluster
 $addESXi | ForEach-Object {Add-VMHost $_ -User $usrESXi -Password $pwdESXi -Location $nameCluster -force}
The process of running the script is captured in this video below. The vSphere Web Client gives a glimpse on how of the different objects are created.
Conclusion
I hope that this PowerCLI primer series gave you the impetus to give PowerCLI, and PowerShell, a good try. Once you get used to it, you’ll wonder how you ever managed to get by without it. Of course, I only covered a fraction of what can be achieved. The PowerCLI reference is a good place to go to if you want to learn about all the available commands. Try writing one-liners or scripts that replicate tasks you usually carry out using a vSphere client. You’ll become good at it in no time at all!
[the_ad id=”4738″][the_ad id=”4796″]


Not a DOJO Member yet?
Join thousands of other IT pros and receive a weekly roundup email with the latest content & updates!


