Save to My DOJO
Table of contents
Now that you’ve installed PowerCLI and learned how to connect to an ESXi host or vCenter Server, its time for the magic to happen. If you’ve never had any experience with PowerShell command line before, you might be thinking what now? How do I know what to type in? Don’t sweat it, PowerCLI is very easy to use and even has a built in help system. Just like Jeffery Snover, inventor of PowerShell, says, “its like programming with hand grenades”. Here are a few tips and tricks to help you get started.
Screen Buffer Size
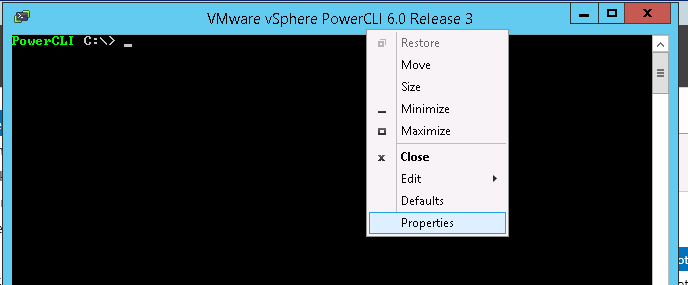
One setting you might want to change from the default configuration is the screen buffer size. This setting basically configures the amount of lines that are displayed within the PowerCLI window. If you happen input a command that displays a numerous amount of lines, the information can possibly be cut off at the top. The screenshot below shows a good example of this. Notice the information in the display has been trimmed off at the top and the side bar is at the highest position which means we can no longer view any previous information:

- Unable to see the initial information since the buffer size is too small.
To change this, simply right click on the top of the window and select Properties:
- The properties setting will allow you to modify the display settings of the PowerCLI window.
Click on the Layout tab and change the height of the Screen Buffer Size to a larger number. I like to go with 3000:
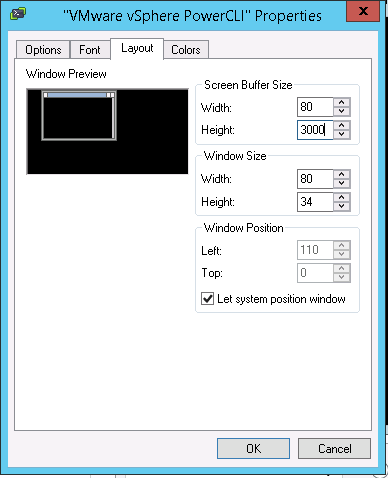
Change the Screen Buffer Size to modify the amount of lines displayed.
Click OK, now if we run the same command again, all of the information is displayed fully. PowerCLI will save this setting so the next time it is opened up on the same machine it will retain the screen buffer size value.
Using Get-Help on PowerCLI
PowerCLI has its own built in help system and it’s awesome! It works by using the Get-Help cmdlet followed by the name of the cmdlet you’d like to obtain more information on. In the example below we lookup the help information of the cmdlet Get-Command. The syntax looks like the following:
Get-Help Get-Command
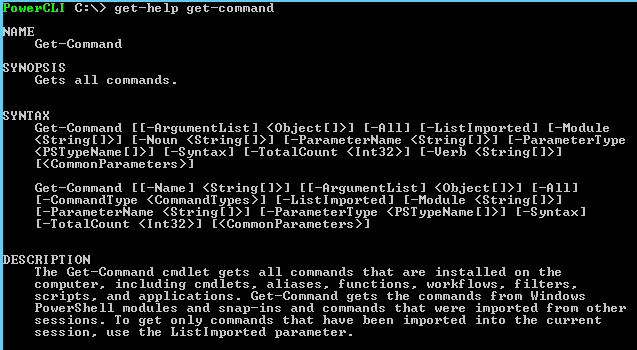
Use Get-Help to obtain information on a cmdlet.
This gives us all sorts of information such as the different parameters and the value types that they take as well as the description of what the cmdlet does. It even goes above and beyond by providing examples of how to use the cmdlet if we include the –example parameter:
Get-Help Get- Command -Example
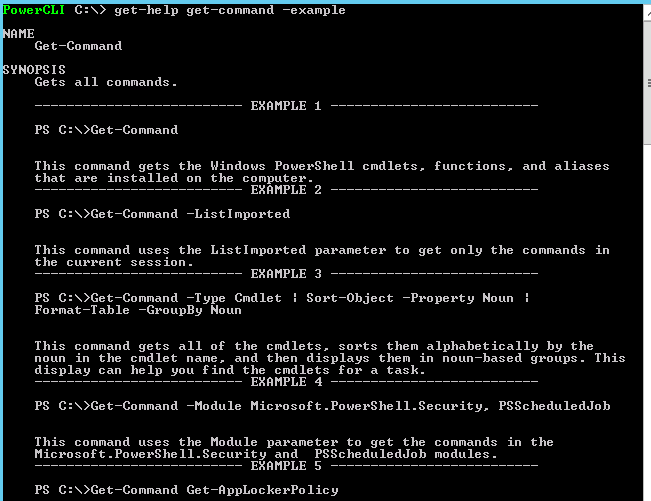
Get examples of the cmdlet being used.
If you want to view all the help information including the examples, description, parameters, etc.., use the –full parameter:
Get-Help Get-Command -Full
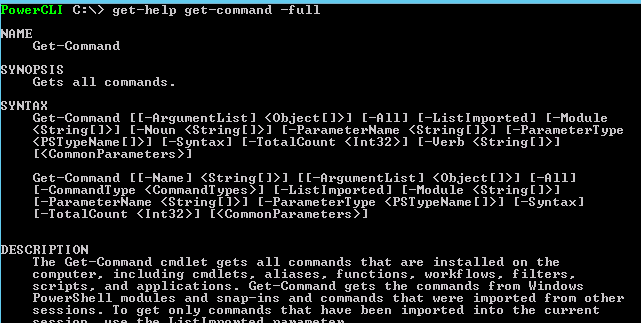
Use -full to view all the contents of the help file.
All of the information appears right in the shell display without having to open up a web browser and manually search for the information. If you really want to improve your skills with PowerCLI and PowerShell in general, it is a good idea to use the help system first before “Googling” for your syntax or answer. The more familiar you are with using the help system, the better you will become at using PowerCLI.
Also note, new help files are created all the time for cmdlets, you can obtain the latest help files by using Update-Help:
Update-Help
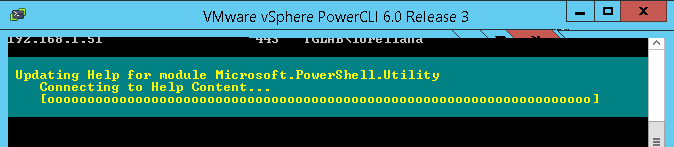
New help files are being updated and installed.
The newest help files for PowerCLI Modules will be downloaded and installed right on your computer.
How to use Get-Command
Get-Command is a great way to sift through the different cmdlets when trying to decide how you want to accomplish a task. For example, lets say we want to delete a snapshot on a VM. We need to figure out which cmdlet will perform this action for us. To do this simply use Get-Command with the –Name parameter and search for any commands that contain the word Snapshot. We also include the wildcard symbol (*) to clarify that we want anything with the word snapshot before or after. The syntax looks like the following:
Get-Command –Name "*snapshot*"
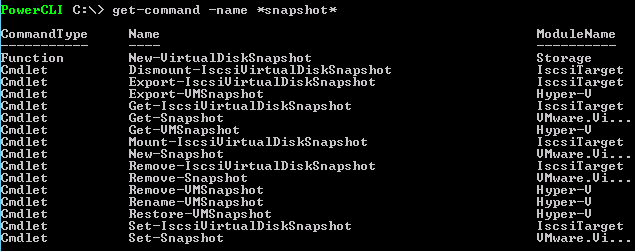
Search for any command that has the word Snapshot in it.
Now we an see a list of cmdlets that can allow us to perform various actions to snapshots. However, this is where it is important to pay attention. Under the “ModuleName” column you can see that the cmdlets listed are a part of different PowerShell modules. The ones you will want to use with VMware are the modules that have the “VMware” name in them. So if we want to use a cmdlet from the list to delete a snapshot from one of our ESXi VMs we would utilize the Remove-Snapshot cmdlet.
If we wanted to view all cmdlets that are available with the VMware modules we could use the -Module parameter and specify any module that starts with “VMware” by using the following syntax:
Get-Command -Module VMware*
Using Out-GridView
The Out-GridView is super useful when using the shell to sort through information on the fly. To use it simply pipe (|) your commands to the Out-GridView cmdlet. In the example below we will use Out-GridView with the syntax we were using before to get all cmdlets that contain the word “Snapshot”. The Syntax would look like this:
Get-Command –Name *Snapshot* | Out-GridView
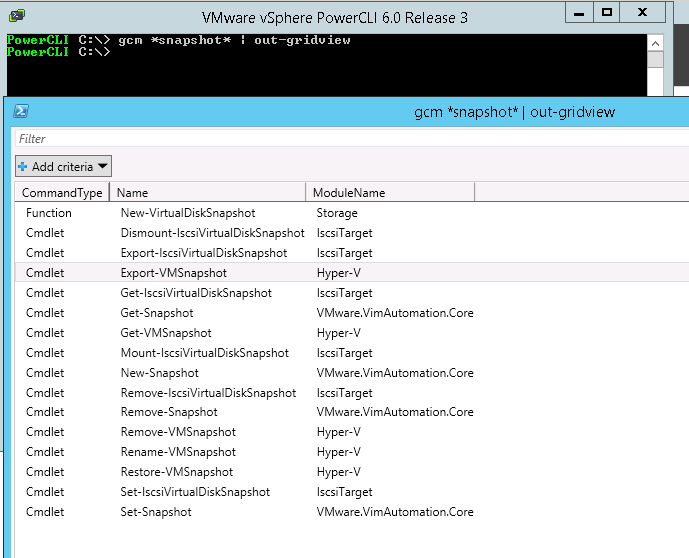
Out-GridView displays the information in a separate GUI window.
A GUI window appears that allows us to filter and sort the information displayed by using the window as opposed to typing in filter commands. Lets say we want to filter out our current results with cmdlets that also contain the word “VM” in their name. We can do this by simply clicking the Add Criteria button, checking the Name check box, and clicking Add:
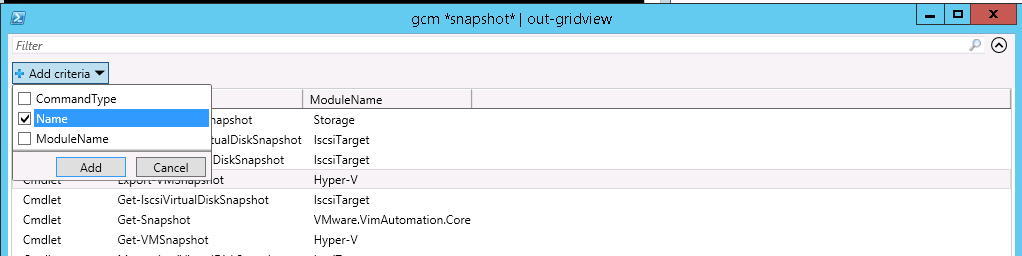
Use the filter to sort information on the fly.
Now we have a filter in place that is filtering out our data for anything that contains the name VM:

The Cmdlets are filtered by anything that contains the name “VM” in it.
We could even modify our filtering method by clicking on the contains link which becomes a drop-down box with multiple options:
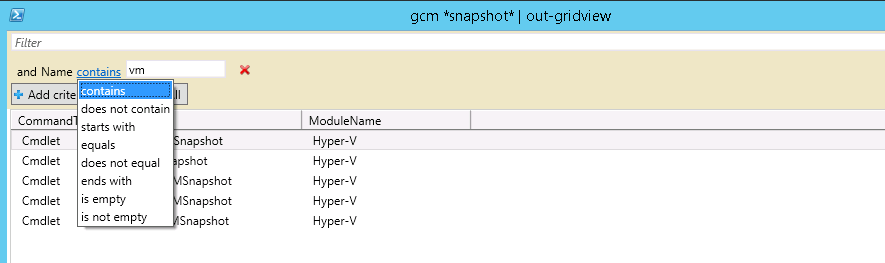
You can filter information by various methods.
This example is pretty simple, however if you were filtering through large amounts of data it can be extremely beneficial. The screenshot below shows an example were I filtered out all my VMs that had CPUs greater than or equal to 6:

I used Out-GridView to filter out VMs in my environment that have 6 CPUs or more.
For more help be sure to check out the PowerCLI page on the VMware Community website. It is a great resource for documents and discussions that can provide assistance with any questions you might have.
[the_ad id=”4738″][the_ad id=”4796″]


Not a DOJO Member yet?
Join thousands of other IT pros and receive a weekly roundup email with the latest content & updates!
More in this category


About the Author

Luke Orellana


3 thoughts on "VMware PowerCLI Part 2: Basic Use and Syntax"
Very well written and easy to understand. Thank you.