Save to My DOJO
VMware PowerCLI is a PowerShell interface for managing vSphere. It allows IT Pros to not only perform all vSphere administrative tasks, but also automate them.
For example, let’s say you have a 50 node ESXi cluster and need to make a change to one of the iscsi configurations on each host. You could either manually make the change on each node spending a few hours, or use PowerCLI to change the setting for all nodes in a matter of minutes.
Making host or VM changes isn’t the only way PowerCLI can be used. It can also be used for quickly gathering data. There are scripts available such as the VMware Health Check script that will email an HTML report on the status of various items on each host like VMs with enabled snapshots or data stores that are almost full. Automation is now starting to become a crucial part in IT administration, and with PowerCLI and PowerShell becoming more advanced with each release, we are able to automate more and more. PowerCLI also provides integration with applications like vRealize Operations and cloud platforms like vCloud Air making it easier and easier for IT Pros to automate their environments.
PowerCLI Licensing Limitations
It is important to understand that there are limitations to PowerCLI based on the licensing for your ESXi environment. Hosts that are using the free vSphere license can only use PowerCLI in “read only” mode. This means that you can only use commands that gather information, so commands that are used to make a change like Set-*, Add-*, New-*, or Remove-* will not work. Any paid version of ESXi licensing will be enough to provide full access to all of PowerCLI’s functions and features.
Prerequisites for PowerCLI
There are two prerequisites that are necessary in order to install the latest version of PowerCLI (version 6.0 Release 3):
Windows PowerShell 3.0 or higher
.Net Framework 4.5 or 4.5x
To verify which version of PowerShell is installed on your system, simply open up a PowerShell prompt and type the following command:
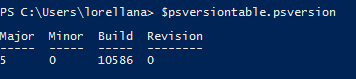
Major 5 shows that PowerShell 5.0 is installed.
The Number under the “Major” column will display the current version. So, in the example above the “Major” column shows a value of 5 which indicates that PowerShell 5.0 is installed.
To verify if .Net Framework 4.5 or higher is installed, left click on the Start Menu and select Run. Enter regedit.exe to open up the Registry Editor. In the Editor, navigate to the HKEY_LOCAL_MACHINE\SOFTWARE\Microsoft\NET Framework Setup\NDP\v4\Full subkey. If the “Full” subkey exists then we know that .Net Framework 4.5 or higher is installed on the OS and we meet the requirement for installing PowerCLI:
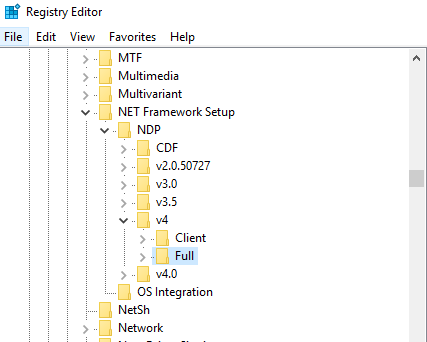
Use the registry editor to find the version of .net Framework installed.
Server 2012 and Windows 8 and newer OS versions already come with .Net Framework 4.5 installed as well as Powershell 3.0 and higher. If you would like to run PowerCLI on Windows 7, Windows Server 2008 R2, or Windows Server 2008 you will need to install Microsoft .Net Framework 4.5. The download for the full version of Microsoft .NET Framework 4.5 is available here. Run the setup file and click through the installation wizard to install. Once completed, PowerShell 3.0 will need to be installed which is included in the Windows Management Framework 3.0 package. Download Windows Management Framework 3.0 here and run through the installation. It will require the OS to be running the latest service pack in order to install, so a service pack update may be needed.
How to Install PowerCLI
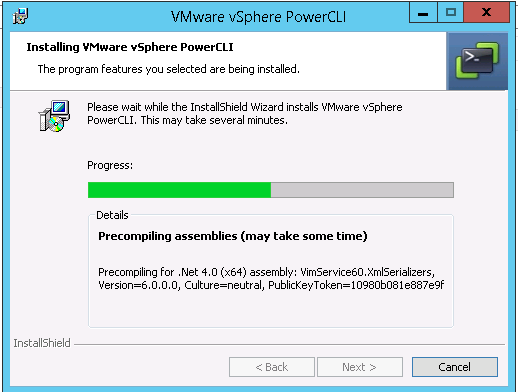
Once all pre-requisites are met, you can now install PowerCLI. You can download the installer from My.Vmware.com. You will need to login with your My VMware account in order to get access to the download. The setup it easy, just open the setup file and follow the installation wizard to complete the installation:
Installation wizard for installing PowerCLI.
Connecting PowerCLI to vCenter or a Stand-Alone Host
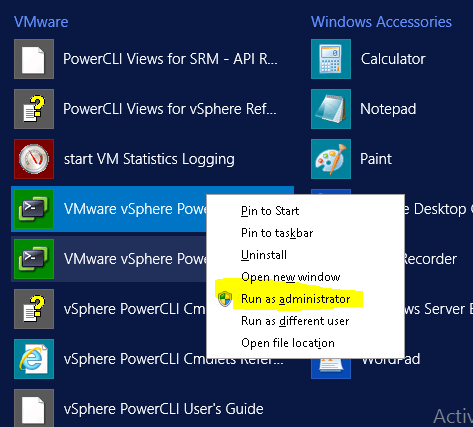
After PowerCLI is installed you can now open it by navigating through the Start Menu. Make sure to run as Administrator or you might get some PowerShell errors when first launching it:
Server 2012 R2 Mesh Interface.
The first time you open PowerCLI it will prompt you if you’d like to participate in the VMware Customer Experience Improvement Program (CEIP), this basically allows VMware to collect technical information about your VMware environment to help them improve their products. Enter “J” to participate or “L” to not participate:
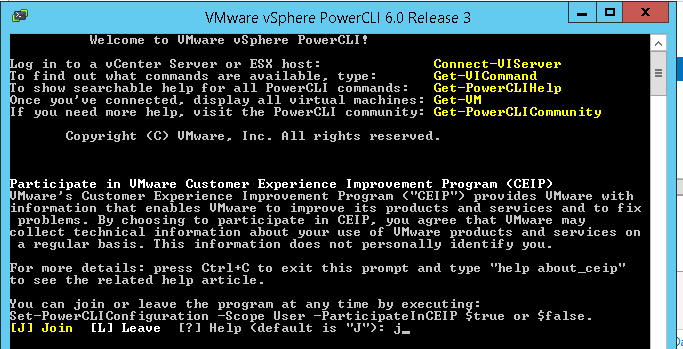
Choose to participate in CEIP.
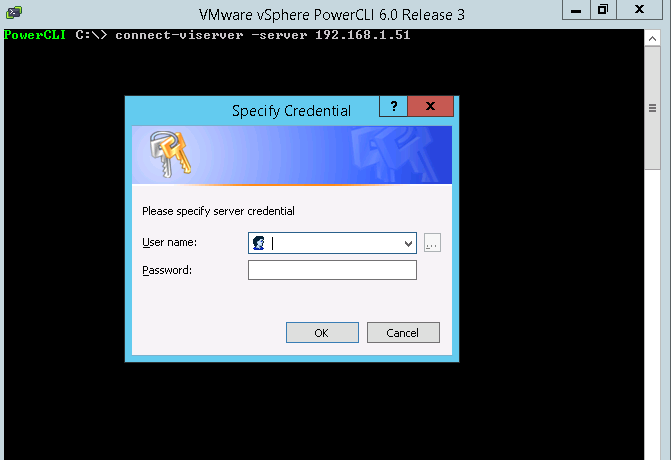
Finally we can now connect to our ESXi environment. We can connect to a single ESXI host or a vCenter server. First, we will connect to a vCenter Server. To establish a connection we simply use the Connect-VIServer cmdlet with the –Server parameter:
Connect-VIServer –Server 192.168.1.51
A prompt for login credentials will appear, input the proper credentials and click OK:
Specify Credential window in PowerCLI.
The connection info will be displayed and you will now have an established PowerCLI session to the vCenter Server:
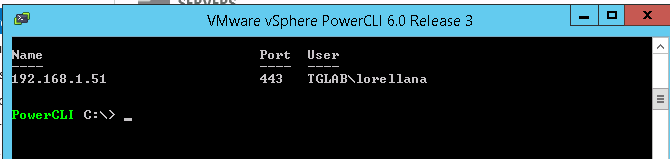
PowerCLI displays the connection info to show a connection has been established successfully.
If we wanted to connect to a Stand-Alone host, we would follow the same syntax and input the IP address of the host as the value for the -Server parameter:
Connect-VIServer –Server 192.168.1.10
Connecting to a single stand-alone ESXi host.
Input the proper credentials to the host and click OK. The connection info will be displayed indicating that a PowerCLI session to the host has been established:
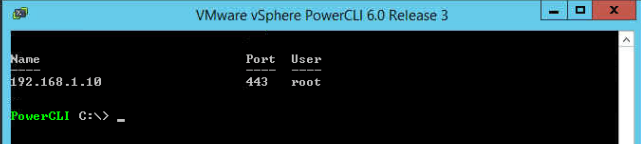
PowerCLI displays the connection info to show a connection has been established successfully.
Be sure to check out my next post where I will be going over basic commands and how to find your way around when using PowerCLI.
[the_ad id=”4738″][the_ad id=”4796″]


Not a DOJO Member yet?
Join thousands of other IT pros and receive a weekly roundup email with the latest content & updates!
More in this category


About the Author

Luke Orellana

