Save to My DOJO
Table of contents
In part 1 and part 2 of our previous posts on source control, we went over what Git is and how to use it with web-based source control hosting services such as GitHub. GitHub is awesome, it’s simple to use and allows for a large number of contributors to collaborate on scripts together. However, it does come with a price tag. So, if you want to get started with some sort of source control in your environment, but don’t have the funds to outright buy into GitHub there are other free options available such as GitLab. When I was working in a previous position, some fellow co-workers and I started up an Automation Team, where we would routinely meet and create different “Automation Projects” that we could work on as a team. We ended up installing a GitLab server and using it to collaborate on various projects. It worked very well.
What is GitLab?
GitLab is a web-based hosted source control utility like GitHub, but it offers some features and functionality that are separate from GitHub. One of the biggest differences is that with GitLab you can host your own on-premise server. The “core” version of GitLab is free, however, to get all the bells and whistles that come with GitLab, you must set up a paid subscription. Below, we will walk through how to get a GitLab server set up in your environment.
Git Lab Pre-Requisites
GitLab runs on many different platforms such as Docker, Azure, Kubernetes, and Linux. For this demo, we will go over how to install it on Linux since this is currently the most common setup.
To get started, download Ubuntu 16.04 here.
NOTE: While this demo uses Ubuntu 16.04, the instructions below should also work for the current LTS release of Ubuntu 18.04 here. Other distros will have a similar installation procedure based on their package management system.
You can install it on a physical server or a hypervisor (recommended). For the sake of time and the scope of this article, we won’t go over the steps for installing and configuring Ubuntu. If you are new to Linux, follow this guide to install and configure Ubuntu.
Once you have a working functional install of Ubuntu and can verify that you can connect to the internet. Run the following command to get the latest updated packages:
sudo apt-get update
 You will get prompted to input your password. Once this is completed we will need to install openssh and ca certificates. So will type in the following syntax:
sudo apt-get install curl openssh-server ca-certificates

If you are going to use an SMTP relay server of your own then you can skip the next step, otherwise run the following command to install postfix, we will turn the Ubuntu server into an email relay server.
sudo apt-get install curl postfix
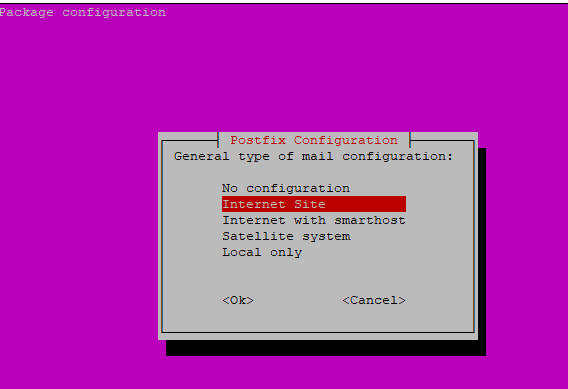
You will get a message to configure the type of mail configuration. Select “Internet Site”:
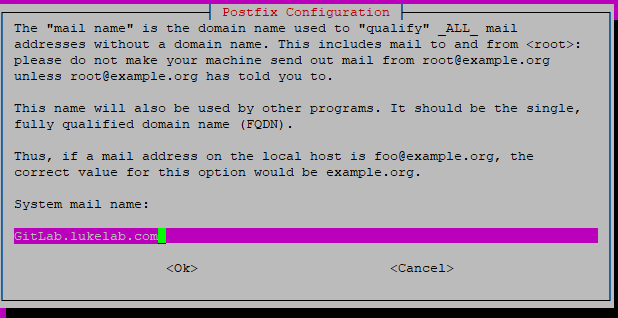
The next screen, use your servers internal or external DNS name depending on if this will be an internal or external facing server:
The postfix install will complete.
Installing GitLab
We need to add the GitLab package repository:
curl https://packages.gitlab.com/install/repositories/gitlab/gitlab-ee/script.deb.sh | sudo bash
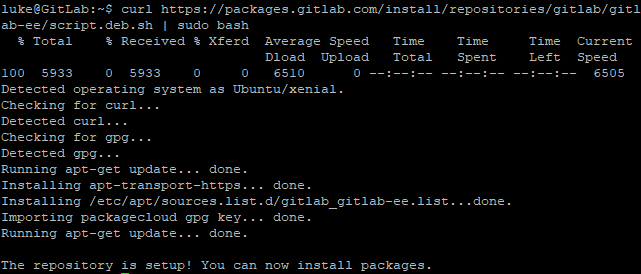
Now we will install GitLab, now the syntax will be different for each person, the gitlab.lukelab.com will be different, replace it with whatever domain name you are going to use to access the GitLab Web UI. The commands below will install GitLab and configure it with the domain name that is specified in the External_URL field:
sudo EXTERNAL_URL="http://gitlab.lukelab.com" apt-get install gitlab-ee

If you want to install https with your GitLab server, follow these instructions.
Configuring GitLab
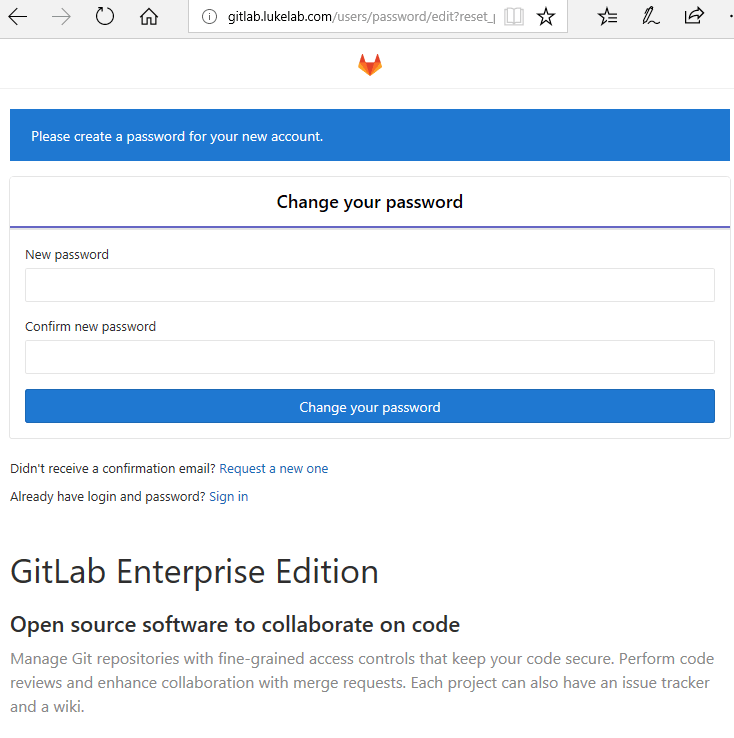
Now that GitLab is installed lets test the website by going to the site we specified in the directions above. We will be redirected to a page that allows us to configure the root password:
Once that’s done, log in with root. Scroll down to “Add People”:
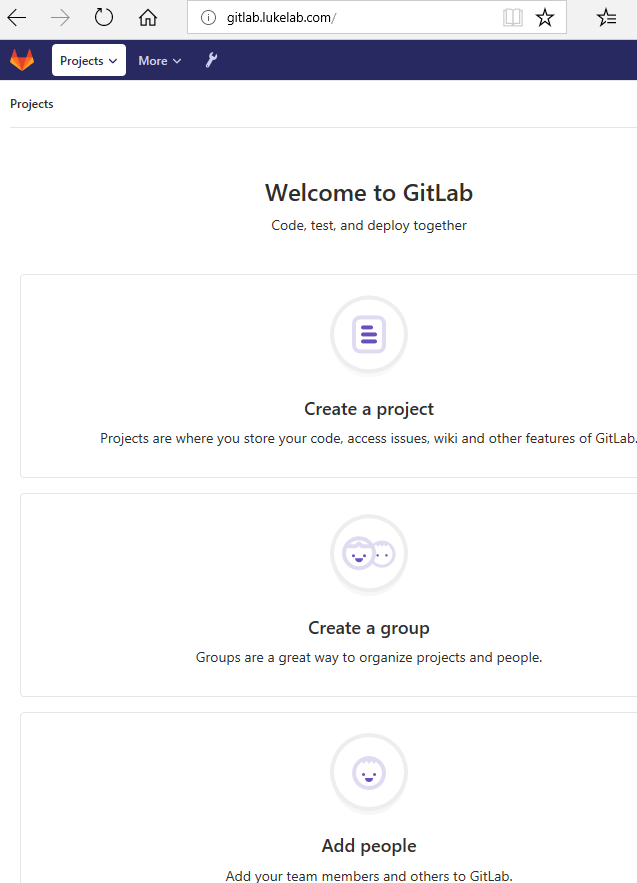
Fill out the information for your user account and input an email. Now you can log in with your user account and create multiple users as well.
Now we are all set! Keep in mind this is the core edition of GitLab which is free, there are many other bells and whistles that you can take advantage of. Check out the different options here.
Now that we have GitLab set up, we can now use GitLab like we did with GitHub in our previous posts to create a source control repository for our scripts. Since we have demonstrated how to implement a free web-based source control utility into your business, there is no excuse for not using a source control to manage your PowerShell scripts. It has a steep learning curve, but there are so many benefits such as change tracking and team collaboration on scripts that make it worth the time to set it up and learn how to use it.
Have you tried Gitlab in your own environment and would like to share your experience?
Thanks for Reading!


Not a DOJO Member yet?
Join thousands of other IT pros and receive a weekly roundup email with the latest content & updates!


