Save to My DOJO
Hello once again everyone!
I hope you’ve enjoyed our “Containers for MSPs” series thus far, because we’re far from done with it! There is much MUCH more to talk about! We’ve covered quite a few basics thus far, but now it’s time to start getting into some more practical “hands-on” type of stuff for the next few posts as we start working with Docker. Let’s start by looking at what we’ve covered already.
Containers for MSPs at a Glance
Part 1 – What are Containers?
Part 2 – Platforms for Running Containerized Workloads
What is Docker?
If you’ve been following this series, you’ll know that we touched on this in part 1. We also went on to explain how containerization is a form of kernel virtualization in that the containerized application gets its own usermode, but shares the underlying kernel of the host. However, there is an exception there for Hyper-V Containers, which we’ll be covering in a later post. For those that haven’t been with us since the first post, a quick refresher is in order. It’s important that everyone working through this article have a basic understanding of what Docker is before we move on.
Docker is the underlying engine that provides the kernel virtualization I mentioned above. It runs on multiple platforms and allows Devs and System Admins to easily run containerized applications. You can almost think of them as VMs, except they’re not as isolated, and are much more lightweight.
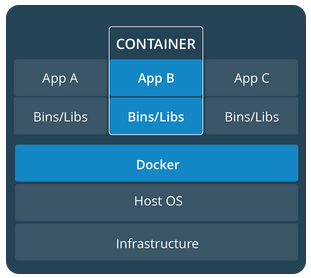
*Above Image from docs.docker.com
Installing Docker
Your first steps with docker will likely be the installation, and depending on your platform, the steps can vary. This article will focus on installing Docker on a Windows Server 2019 container host (A container host is simply a definition for a machine setup to run containers). Other platforms have their own installation methods:
Windows and Mac – Operating systems such as Windows 10, and MacOS, you can simply download docker and install it like any other application
Linux – If you’re running a linux distribution, you’ll want to use your install package manager, to download and install docker. Ongoing maintenance will be much easier this way
As mentioned above, we’ll be focusing on installing docker on a Windows Server 2019 box running in Server Core mode, so there will be limited access to GUI utilities. With that in mind we’ll be doing the installation using PowerShell!
Installing Docker on Windows Server 2019
NOTE: while this how to covers the installation on a 2019 container host, there are some known issues with 2019 image availability and bugs in the latest release. The below can just as easily be run on a 2016 container host as well, and likely with a higher degree of success until the current issues with 2019 builds are resolved by Microsoft.
Login to your Server Core instance, access the CLI and enter a PowerShell prompt.
Run the following commands:
Install-Module -Name DockerMsftProvider – Repository PSGallery -Force
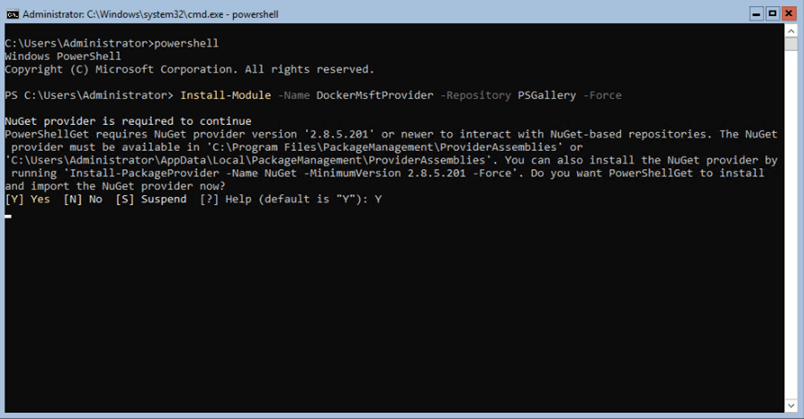
IMPORTANT: Make sure you press Y to install the NuGet Provider
Install-Package -Name docker -ProviderName DockerMsftProvider
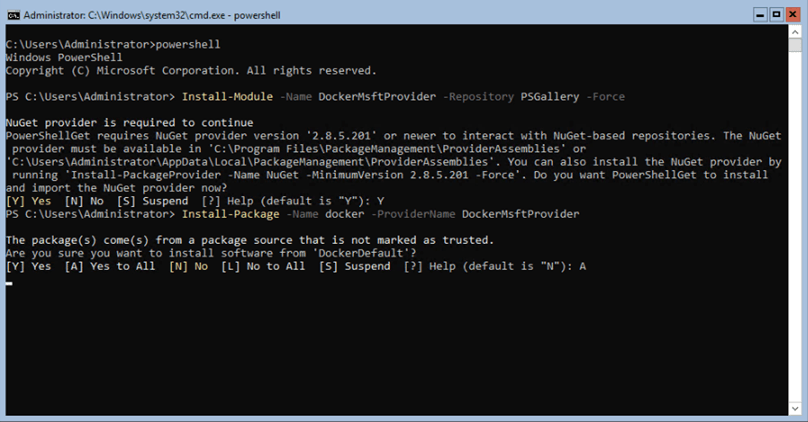
IMPORTANT: Make sure you select A here to accept all the necessary package installs for this step
Restart-Computer -Force
At this point you’ll let the machine reboot.
Once your container host has rebooted, open up PowerShell again and start the docker service
Start-Service -Name “docker”
Then let’s verify docker is running and look at its version information
Docker version
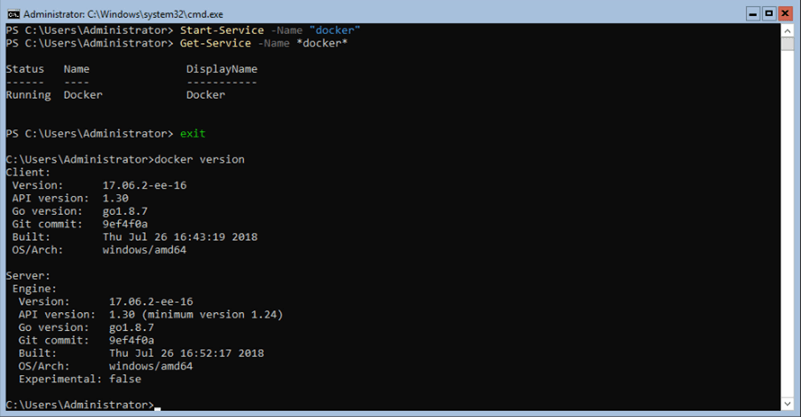
At this point docker is now running on your container host and ready to be used!
Running your First Container
NOTE: at the time of this writing the Windows Server 2019 Images have been pulled. As such you may have issues running some of the below commands on 2019 until they’ve been re-uploaded by Microsoft.
Now that we have docker running, let’s actually do something with it!
As mentioned in previous parts of this series, Docker and containers we originally intended for stateless workloads that would start, do their job, and be done. You can certainly run persistent workloads with data using Docker today, but we’ll be covering that use-case in a future segment. For today let’s just pick a simple docker image and run it.
Before we go further let’s set two definitions
Image: A container image in the docker world is a ultra-slim OS image with only the bits and prerequisites needed to run the contained workload. You can think of it as almost the old standard “gold-images” we used to create back in the day.
Container: A container instance that is created from an Image
To run a container, we first need to download an Image. Docker has the ability to do this built in using the docker pull command. However, before we can download an image, we need to know which image to download!
Docker has a public repository of images. Some of the images in this repo are built by companies, others are built by the community. Let’s search for one now!
Run the below command from your container host
Docker search nanoserver
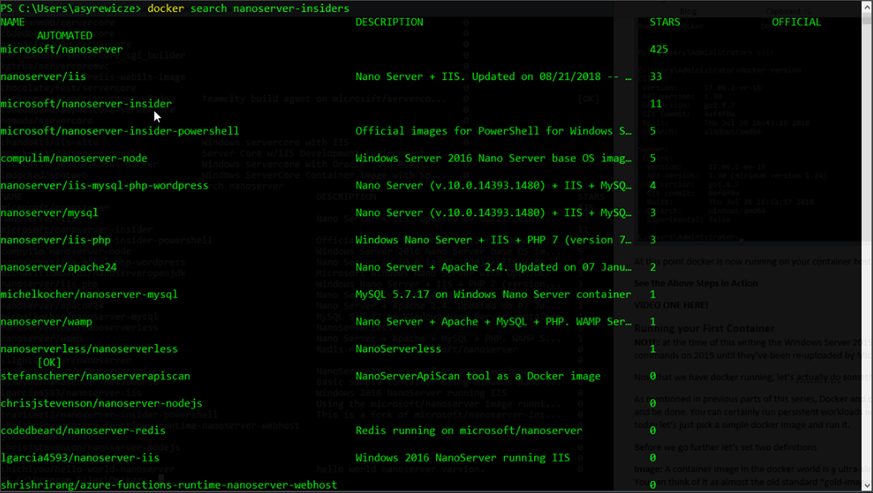
As you can see, we have multiple options available in the public repository. However, we’re going to install the option with the most popularity.
Docker pull Microsoft/nanoserver
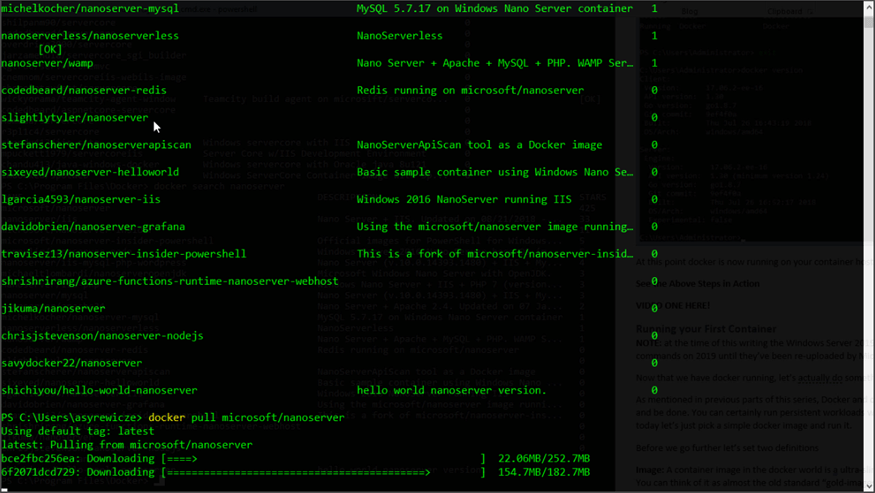
Docker will download the latest instance of this image for us and place it in our local repo. Let’s take a look by running the below
Docker image ls
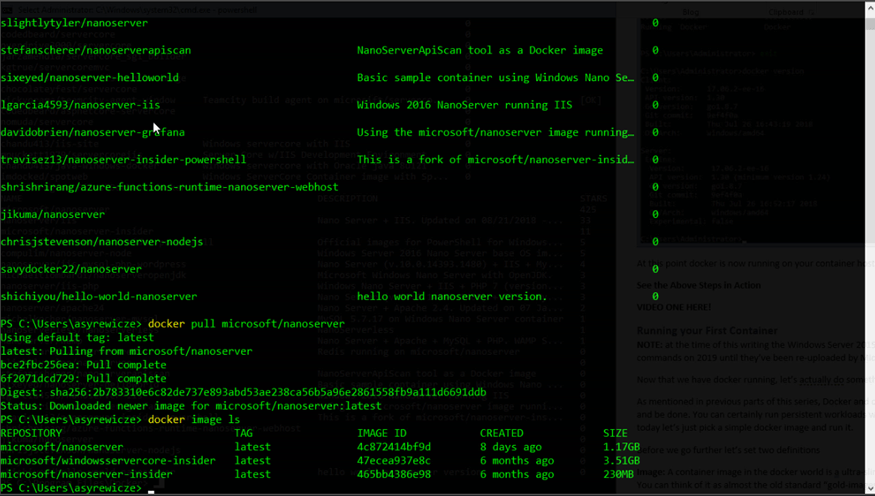
As you can see, we now have the image downloaded. Let’s run the nanoserver image we just download in interactive mode so you can play with it! We’ll use cmd as an example
Docker run -it Microsoft/nanoserver cmd
Now as you can see in the image below, we now have a running container instance of the Windows CLI on nanoserver! Feel free to run as many commands as you’d like!
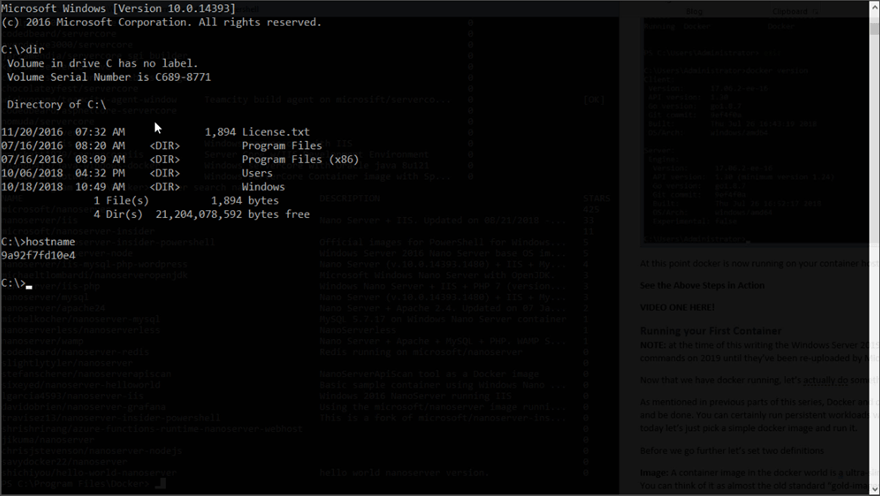
When done, simply type “exit” and the container will stop.
Congrats! You just ran your first container!
Wrap-Up
This is simply the first step in a long series of steps we’ll cover on getting you and your MSP on the right road to using containers! You’ll see throughout the length of this series how containers can quickly be spun up to address the needs of you customers and how they will ultimately make your life as the MSP much easier.
What are your thoughts on containers? Have you started evaluating them yet? What has your experience been like to date? Let us know in the comments section below!
Until next time!


Not a DOJO Member yet?
Join thousands of other IT pros and receive a weekly roundup email with the latest content & updates!


