Save to My DOJO
In this article, I will write about a familiar-sounding tool I regularly use to prepare custom images for Azure amongst other tasks – Hyper-V Windows 10. Windows 10 comes with the Windows Client Version of Hyper-V with it built-in so there is no need to download anything extra! It is the same Hyper-V you use within WindowsServer but with Windows 10 Hyper-V limitations, such as clustering features. We will look at how to enable Hyper-V Windows 10 and configure Hyper-V for Windows 10.
Operating System Prerequisites
First, let us check the prerequisites to install Hyper-V on Windows 10 One of the first considerations is the System Prerequisites, including licensing and supported editions of Windows 10.
Windows 10 Licensing
Not every license of Windows 10 has Hyper-V enabled. Only the following versions are eligible for Windows 10 Hyper-V.
- Windows 10 Professional
- Windows 10 Enterprise
- Windows 10 Education
You can find your installed Windows Version when using PowerShell with the following command.
Get-WmiObject -Class Win32_OperatingSystem -Namespace “rootcimv2” | format-list Caption, Version
The screenshot below shows the PowerShell output when determining if you can enable Windows 10 Hyper-V.

While Hyper-V is “free” in Pro, Enterprise, and Education editions, it means that a user who might otherwise be able to purchase Windows 10 Home would need to buy up on the Windows 10 edition to enable the Hyper-V Role. For home users who want to enable Hyper-V Windows 10, this requirement will need considering.
Let us follow up with the hardware prerequisites to install Hyper-V on Windows 10,
Hardware prerequisites
There are two parts to be considered. First the hardware configuration and second the BIOS and UEFI setup.
Hardware configuration
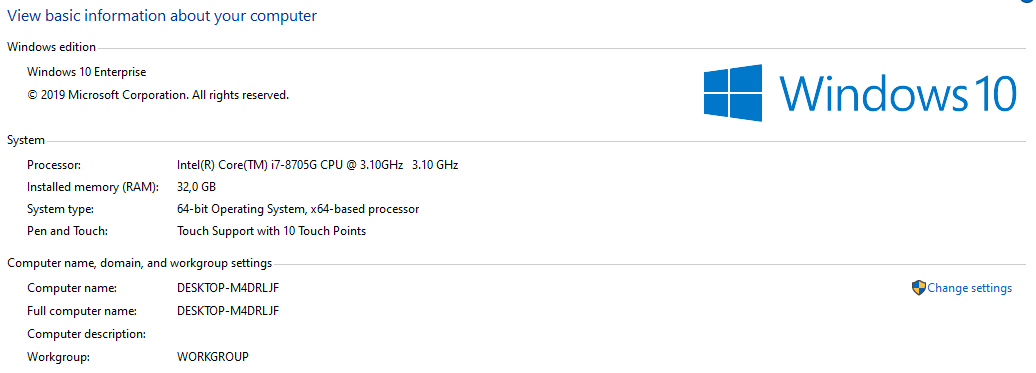
- 64-bit Processor with Second Level Address Translation (SLAT).
- CPU support for VM Monitor Mode Extension (VT-x on Intel CPU’s).
- Minimum of 4 GB memory. As virtual machines share memory with the Hyper-V host, you will need to provide enough memory to handle the expected virtual workload.
The screenshot shows my system as an example.
BIOS / UEFI Configuration
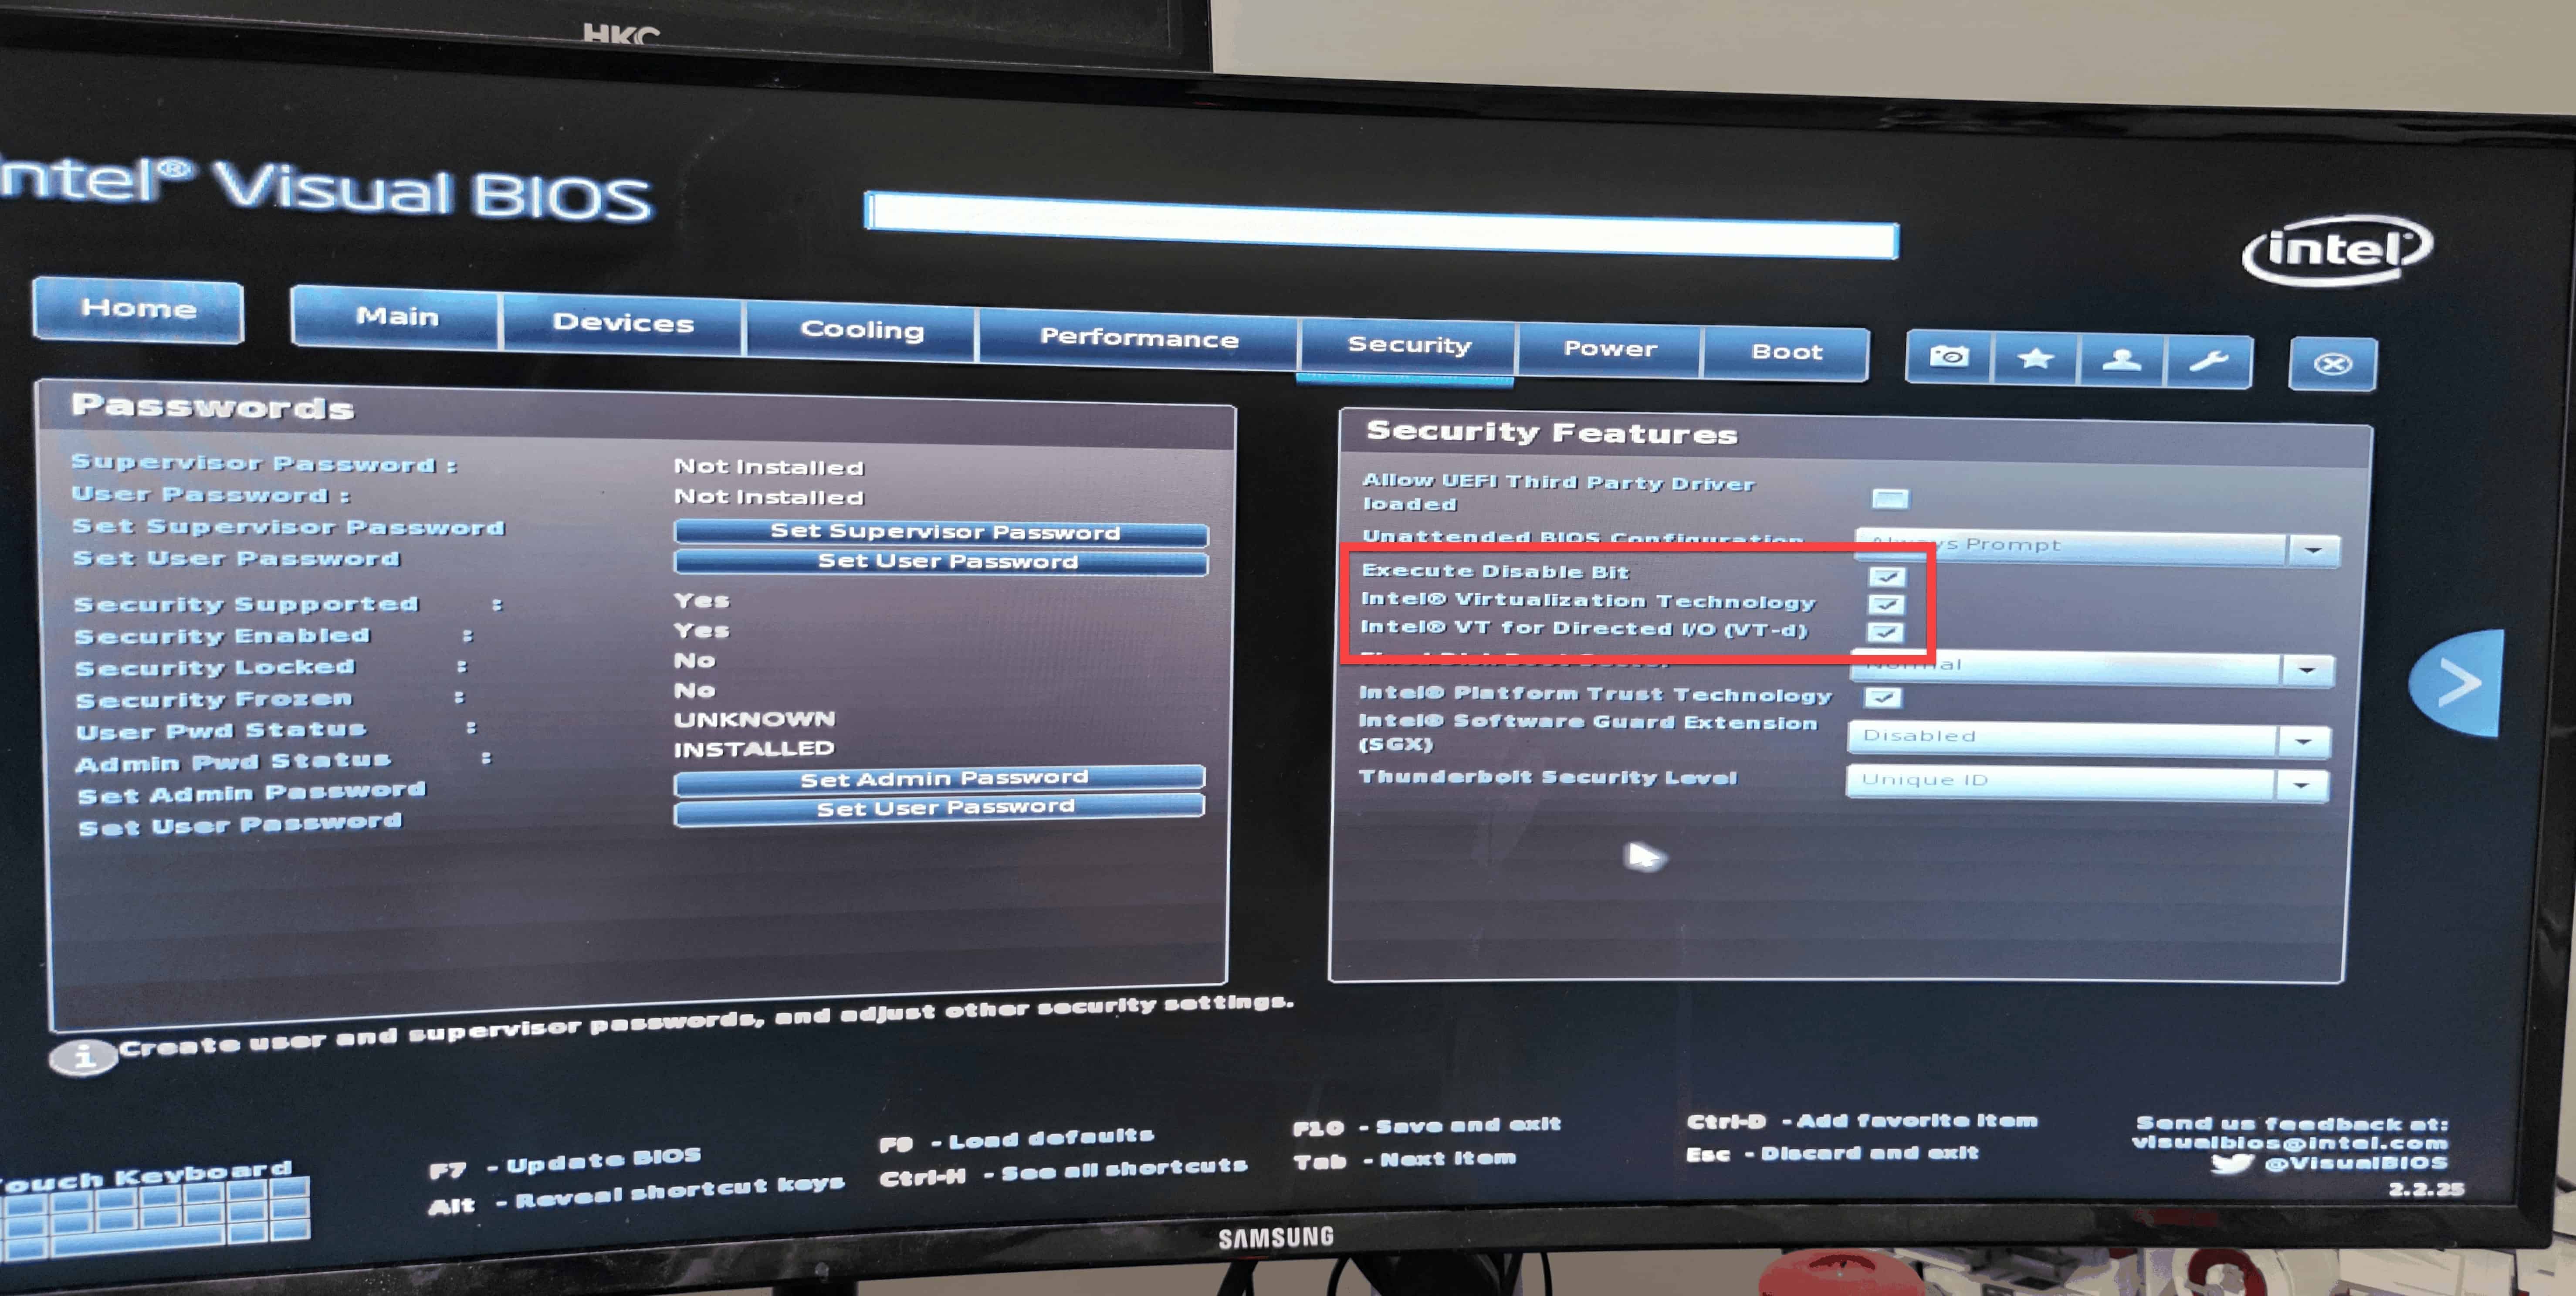
You need to enable two Options in your system BIOS / UEFI.
- Virtualization Technology – may have a different label depending on the motherboard manufacturer.
- Hardware Enforced Data Execution Prevention.
You can find these options in the CPU Settings of your system. See the screenshot below as an example.
How to check the hardware compatibility
To verify hardware compatibility in Windows, open the PowerShell and type systeminfo.

If all listed requirements in the output are showing “yes”, your system is compatible with Hyper-V.

How to install Hyper-V in Windows 10
When all hardware and license requirements are met, you can start the installation of Hyper-V in your Windows.
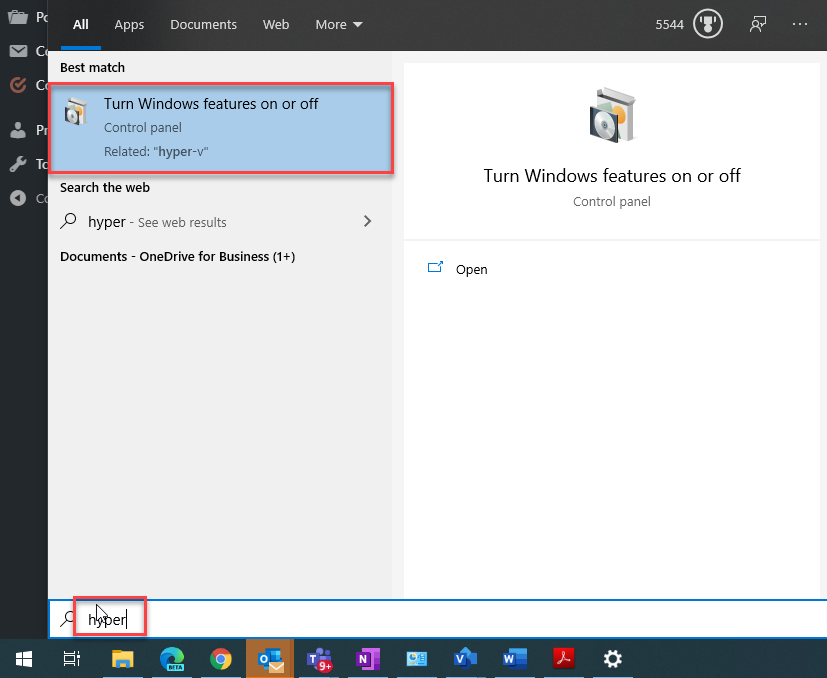
The easiest way is to search for Hyper-V in the Start Menu. It will then point to “Turn On or Off Windows Feature” Window in the Control Panel
Within the context menu, you enable the Hyper-V feature together with the Platform and Management Tools.
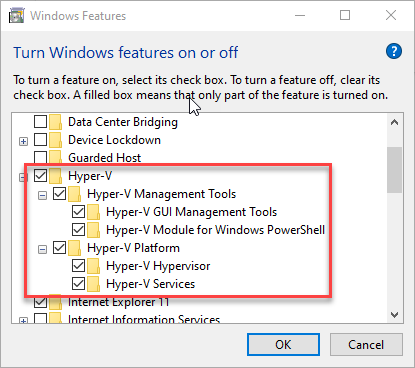
Afterwards, your system will require a reboot.
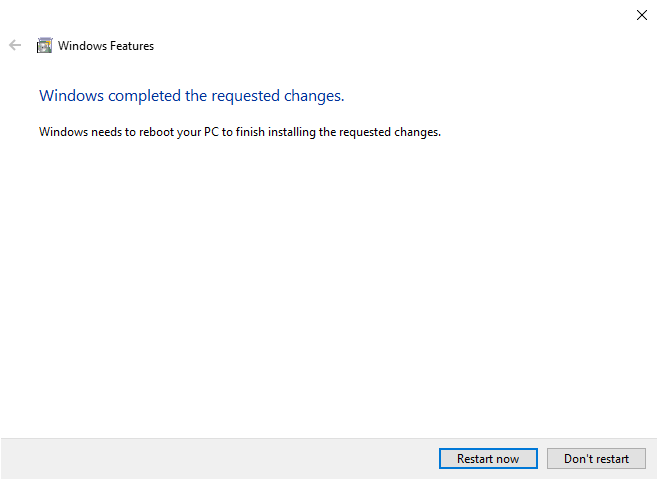
After the reboot, you should be able to open the Hyper-V Manager on your system and start to configure Hyper-V.
How to install Hyper-V on Windows 10 using PowerShell and other CMD utilities
Aside from the GUI method of installing the Hyper-V feature in Windows 10, you can also use PowerShell to enable the optional feature. This provides advantages for the purposes of automation, build processes, and generally seamless ability to enable Hyper-V Windows 10 or disable Hyper-V Windows 10.
To use Powershell to enable Hyper-V Windows 10, you use the following cmdlet:
- Enable-WindowsOptionalFeature -Online -FeatureName Microsoft-Hyper-V -All
In addition to using PowerShell, you can also use the CMD terminal and DISM to install Hyper-V on Windows 10 using the following command:
- DISM /Online /Enable-Feature /All /FeatureName:Microsoft-Hyper-V
Verifying the Hyper-V optional feature was enabled successfully
After you enable Hyper-V Windows 10 optional feature and reboot your system, you can easily verify the process to install Hyper-V on Windows 10 was successful. After installation, you should see the Hyper-V Manager listed.
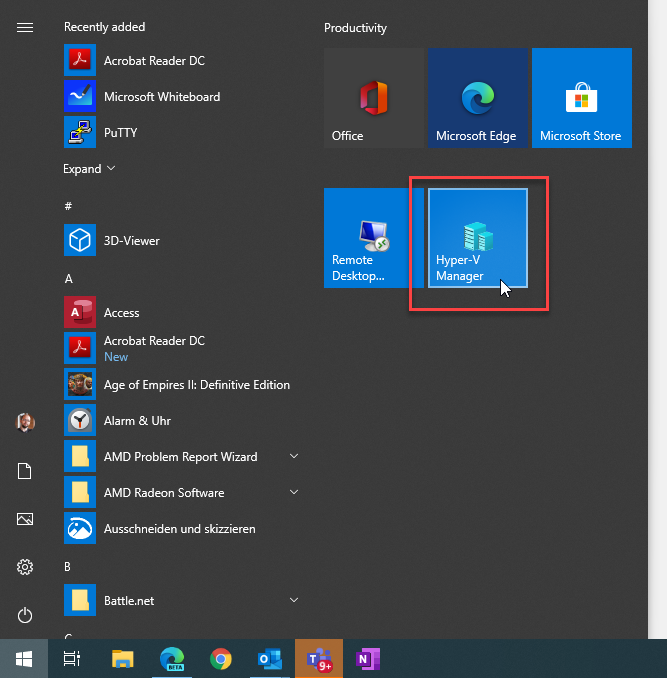
You can also use PowerShell to verify Hyper-V has been installed. To verify the Hyper-V optional feature is installed, use the following cmdlet:
- Get-WindowsOptionalFeature -Online | Where-Object {$_.State -eq “Enabled” -and $_.FeatureName -like “*Hyper*”} | Format-Table

After launching the Hyper-V Manager, you will see the familiar management interface to manage your Hyper-V installation. Hyper-V Manager provides the GUI management tool used to configure and administer your local Hyper-V machines. If you are wondering how to install Windows 10 on a Hyper-V virtual machine, you can do this using the Hyper-V Manager once the Hyper-V role is enabled. You can also perform many different actions, including:
- Creating a virtual machine
- Import Virtual Machine
- Changing Hyper-V Settings
- Managing Hyper-V virtual switches
- Managing and working with VHD and VHDX disks
- Managing the Hyper-V Service
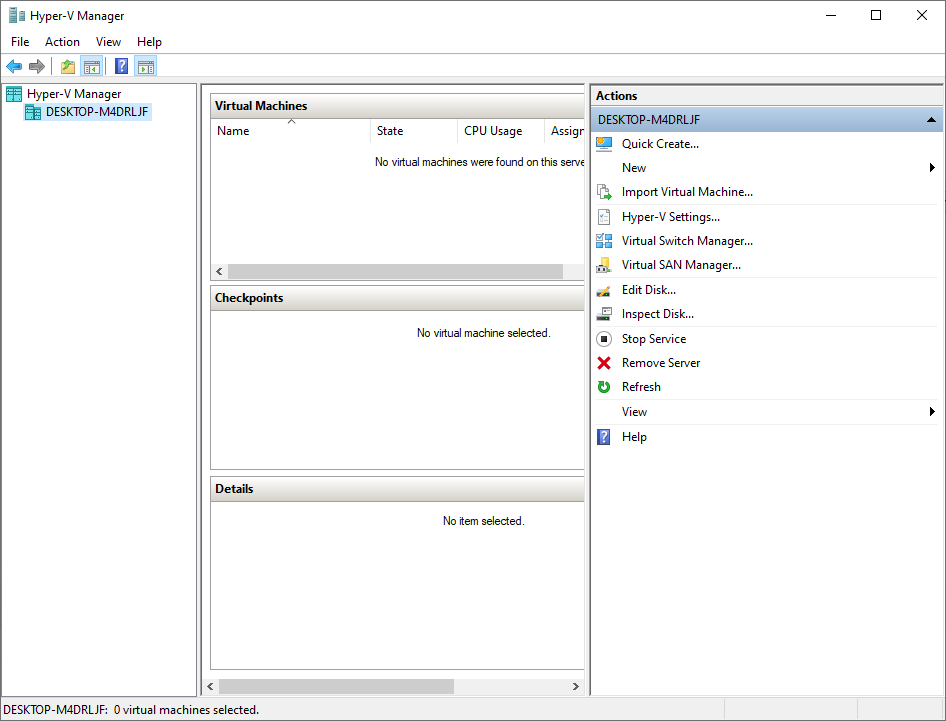
That’s all you need to do in order to install Hyper-V on your Windows 10 system and start to install Windows 10 on Hyper-V virtual machine
How to disable Hyper-V in Windows
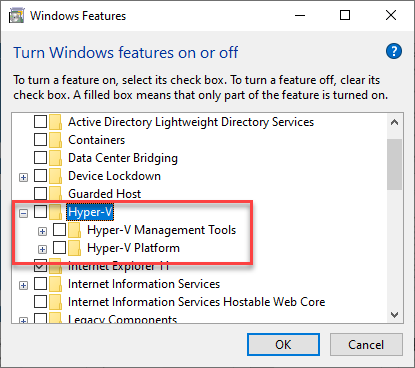
Disabling Hyper-V is again pretty simple. You go the back to the “Turn Windows Features on or off” section in the control panel.
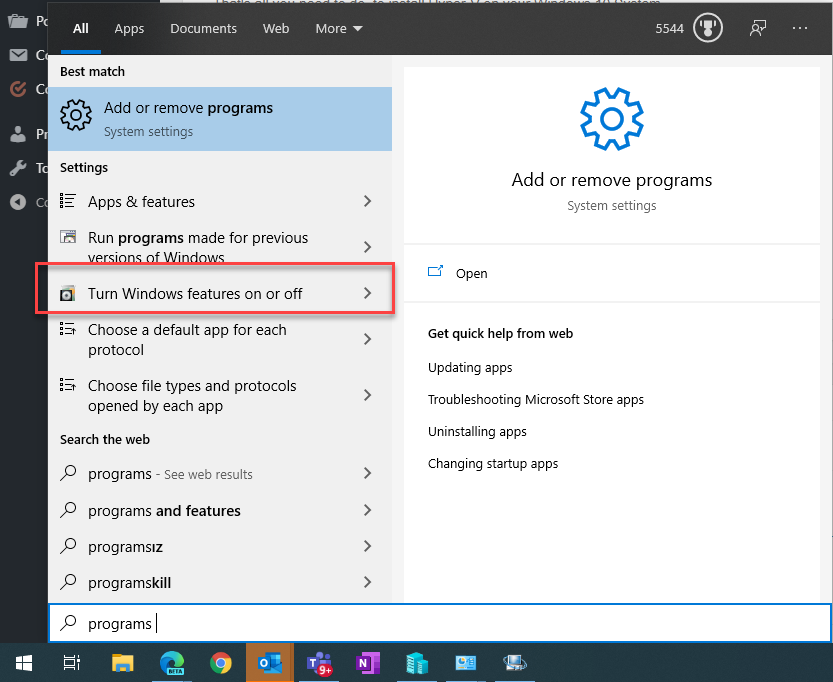
Remove the checkmark from the Hyper-V checkbox. This essentially performs a Hyper-V disable task on your Windows 10 host.
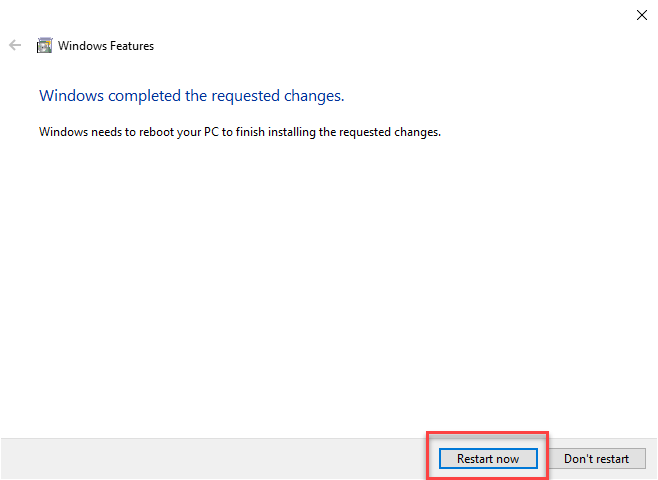
Reboot your Windows System and you are done.
How to disable Hyper-V in Windows 10 using command prompt
Again, as mentioned above for installing Hyper-V in Windows 10, you can also disable Hyper-V Windows 10 by using either PowerShell or the CMD terminal and the DISM command once again.
To disable Hyper-V PowerShell, run the following cmdlet:
- Disable-WindowsOptionalFeature -Online -FeatureName Microsoft-Hyper-V-Hypervisor
To disable Hyper-V Windows 10 command line, we can use the DISM tool to do that. Use the following command to disable Hyper-V Windows 10 using DISM:
- DISM /Online /Disable-Feature:Microsoft-Hyper-V
After performing the Hyper-V disable on your Windows 10 host, you will need to reboot for the changes to take effect.
To properly protect your Hyper-V virtual machines, use Altaro VM Backup to securely backup and replicate your virtual machines. We work hard perpetually to give our customers confidence in their Hyper-V backup strategy.
To keep up to date with the latest Hyper-V best practices, become a member of the Altaro DOJO | Hyper-V now (it’s free).
Closing notes
Hyper-V in Windows 10 can be a pretty good tool for some certain administrative or daily task e.g.:
- Spinning up a VM to test certain software
- Using VMs to open suspicious files
- Create an encapsulated work environment on your PC or Notebook when you work from home
- Create custom images for VDI environments like Citrix or Windows Virtual Desktop
- Open backups from VMs and extract certain files
- etc.
I hope the blogpost will help some of you to become familiar with Hyper-V Windows 10 and the management tools. If there is anything you wish to ask regarding Hyper-V Windows 10, let me know in the comments below and I’ll get back to you!


Not a DOJO Member yet?
Join thousands of other IT pros and receive a weekly roundup email with the latest content & updates!


6 thoughts on "How to Install or Disable Hyper-V in Windows 10"
Thanks for your help .