Save to My DOJO
Microsoft’s compact tool for VHD/X works by deleting empty blocks. “Empty” doesn’t always mean what you might think, though. When you delete a file, almost every file system simply removes its entry from the allocation table. That means that those blocks still contain data; the system simply removes all indexing and ownership. So, those blocks are not empty. They are unused. When a VHDX contains file systems that the VHDX driver recognizes, it can work intelligently with the contained allocation table to remove unused blocks, even if they still contain data. When a VHDX contains file systems commonly found on Linux (such as the various iterations of ext), the system needs some help.
Making Some Space
Before we start, a warning: don’t even bother with this unless you can reclaim a lot of space. There is no value in compacting a VHDX just because it exists. In my case, I had something go awry in my system that caused the initramfs system to write gigabytes of data to its temporary folder. My VHDX that ordinarily used around 5 GB ballooned to 50GB in a short period of time.
Begin by getting your bearings. df can show you how much space is in use. I neglected to get a screen shot prior to writing this article, but this is what I have now:
At this time, I’m sitting at a healthy 5% usage. When I began, I had 80% usage.
Clean up as much as you can. Use apt autoremove, apt autoclean, and apt clean on systems that use apt. Use yum clean all on yum systems. Check your /var/tmp folder. If you’re not sure what’s consuming all of your data, du can help. To keep it manageable, target specific folders. You can save the results to a file like this:
du /var/tmp > ~/var-temp-du
You can then open the /home/<your account>/var-temp-du file using WinSCP. It’s a tab-delimited file, so you can manipulate it easily. Paste into Excel, and you can sort by size.
More user-friendly downloadable tools exist. I tried gt5 with some luck.
As I mentioned before, I had gigabytes of files in /var/tmp created by initramfs. I’m not sure what it used to create the names, but they all started with “initramfs”. So, I removed them that way: rm /var/tmp/initramfs* -r. That alone brought me down to the lovely number that you see above. However, as you’re well aware, the VHDX remains at its expanded size.
Don’t forget to df after cleanup! If the usage hasn’t changed much, then I’d stop here and either find something else to delete or find something else to do altogether.
Zeroing a VHDX with an ext Filesystem
I assume that this process will work with any file system at all, but I’ve only tested with ext4. Your mileage may vary.
Because the VHDX cannot parse the file system, it can only remove blocks that contain all zeros. With that knowledge, we now have a goal: zero out unused blocks. We’ll need to do that from within the guest.
Preferred Method: fstrim
My personal favorite method for handling this is the “fstrim” utility. Reasons:
- fstrim works very quickly
- fstrim doesn’t cause unnecessary wear on SSDs but still works on spinning rust
- fstrim ships in the default tool set of most distributions
- fstrim is ridiculously simple to use
Usage:
sudo fstrim /
On my system that had recently shed over 70 GB of fat, fstrim completed in about 5 seconds.
Note: according to some notes that I found for Ubuntu, it automatically performs an fstrim periodically. I assume that you’re here because you want this done now, so this information probably serves mostly as FYI.
Alternative Zeroing Methods
If fstrim doesn’t work for you, then we need to look at tools designed to write zeros to unused blocks.
I would caution you away from using security tools. They commonly make multiple passes of non-zero writes for security purposes on magnetic media. That’s because an analog reader can detect charge levels that are too low to register as a “1” on your drive’s internal digital head. They can interpret them as earlier write operations. After three forced writes to the same location, even analog equipment won’t read anything. On an SSD, though, those writes will mostly reduce its lifespan. Also, non-zero writes are utterly pointless for what we’re doing. Some security tools will write all zeros. That’s better, but they also make multiple passes. We only need one.
Create a File from /dev/zero
Linux includes a nifty built-in tool that just generates zeroes until you stop asking. You can leverage it by “reading” from it and outputting to a file that you create just for this purpose.
dd if=/dev/zero of=~/zeroes
sudo sync
rm ~/zeroes
On a physical system, this operation would always take a very long time because it literally writes zeros to every unused block in the file system. Hyper-V will realize that the bits being written are zeroes. So, when it hits a block that hasn’t already been expanded, it will just ignore the write. However, the blocks that do contain data will be zeroed, so this can still take some time. So, it’s not nearly as fast as fstrim, but it’s also not going to make the VHDX grow any larger than it already is.
zerofree
The “zerofree” package can be installed with your package manager from the default repository (on most distributions). It has major issues that might be show-stoppers:
- I couldn’t find any way to make it work with LVM volumes. I found some people that did, but their directions didn’t work for me. That might be because of my disk system, because…
- It’s not recommend for ext4 or xfs file systems. If your Linux system began life as a recent version, you’re probably using ext4 or xfs.
- Zerofree can’t work with mounted file systems. That means that it can’t work with your active primary file system.
- You’ll need to detach it and attach it to another Linux guest. You could also use something like a bootable recovery disk that has zerofree.
If you mount it in a foreign system, run sudo lsblk -f to locate the attached disk and file systems:
[eric@svlmon01 ~]$ sudo lsblk -f
NAME                 FSTYPE   LABEL UUID                                   MOUNTPOINT
sda
├─sda1               vfat           0B5C-7619                              /boot/efi
├─sda2               xfs            49fd73af-c235-4710-af01-ce7ed53551a0   /boot
└─sda3               LVM2_mem       vspJpr-uLMl-S1AI-APIB-MamD-ywCN-jaMYkh
  ├─cl_svlmon01-root xfs            a78876ce-5934-4ef5-b54a-e21e1874488a   /
  └─cl_svlmon01-swap swap           6ef8887f-efb8-46cc-97c0-01c562f71c0a   [SWAP]
sdb
├─sdb1               vfat           6B97-17F3
├─sdb2               ext2           da72dfe7-7a97-4609-9f17-e334015696fd
└─sdb3               LVM2_mem       jwVhQ8-blRa-b0YA-CaQx-pJjA-RwgL-nv7Vni
  ├─sv--ubuntu--sb--vg-root
                     ext4           6bbb5960-ae3b-4627-a293-65c58e6e7890
  └─sv--ubuntu--sb--vg-swap_1
                     swap           db7df104-f09b-45af-a950-b91e3e44e9dc
sr0
Verify that the target volume/file system does not appear in df. If it shows up in that list, you’ll need to unmount it before you can work with it.
I’ve highlighted the only volume on my added disk that is safe to work with. It’s a tiny system volume in my case so zeroing it probably won’t do a single thing for me. I’m showing you this in the event that you have an ext2 or ext3 file system in one of your own Linux guests with a meaningful amount of space to free. Once you’ve located the correct partition whose free space you wish to clear:
sudo zerofree /dev/sdb2
Search!
In my research for this article, I found a number of search hits that looked somewhat promising. If nothing here works for you, look for other ways. Remember that your goal is to zero out the unused space in your Linux file system.
Compact the VHDX
The compact process itself does not differ, regardless of the contained file system. If you already know how to compact a dynamically-expanding VHDX, you’ll learn nothing else from me here.
As with the file delete process, I always recommend that you look at the VHDX in Explorer or the directory listing of a command/PowerShell prompt so that you have a “before” idea of the file.
Use PowerShell to Compact a Dynamically-Expanding VHDX
The owning virtual machine must be Off or Saved. Do not compact a VHDX that is a parent of a differencing disk. It might work, but really, it’s not worth taking any risks.
Use the Optimize-VHD cmdlet to compact a VHDX:
Optimize-VHD .svlmon1.vhdx -Mode Full
The help for that cmdlet indicates that -Mode Full “ scans for zero blocks and reclaims unused blocks”. However, it then goes on to say that the VHDX must be mounted in read-only mode for that to work. The wording is unclear and can lead to confusion. The zero block scan should always work. The unused block part requires the host to be able to read the contained file system — that’s why it needs to be mounted. The contained file system must also be NTFS for that to work at all. All of that only applies to blocks that are unused but not zeroed. The above exercise zeroed those unused blocks. So, this will work for Linux file systems without mounting.
Use Hyper-V Manager to Compact a Dynamically-Expanding VHDX
Hyper-V Manager connects you to a VHDX tool to provide “editing” capabilities. The options for “editing” includes compacting. It can work for VHDX’s that are attached to a VM or are sitting idle.
Start the Edit Wizard on a VM-Attached VHDX
The virtual machine must be Off or Saved. If the virtual machine has checkpoints, you will be compacting the active VHDX.
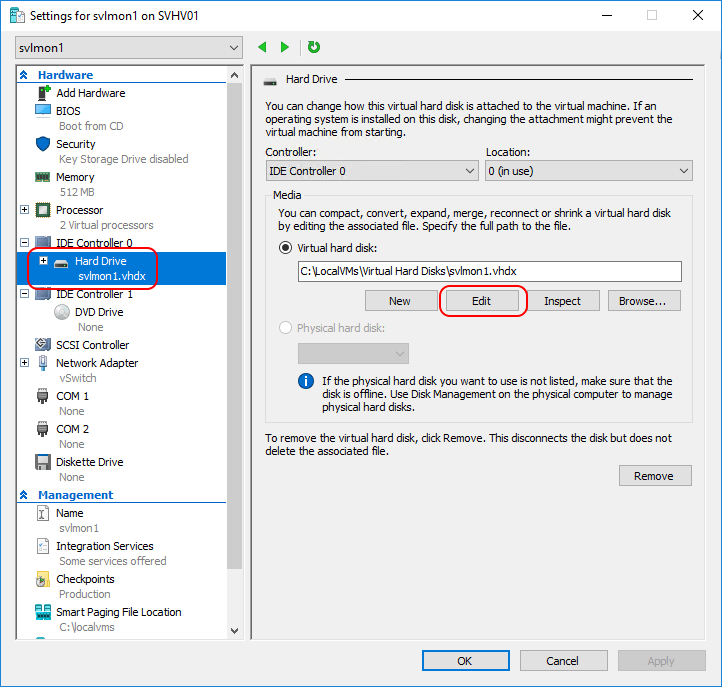
Open the property sheet for the virtual machine. On the left, highlight the disk to compact. On the right, click the Edit button.
Jump past the next sub-section to continue.
Start the Edit Wizard on a Detached VHDX
The VHDX compact tool that Hyper-V Manager uses relies on a Hyper-V host. If you’re using Hyper-V Manager from a remote system, that means something special to you. You must first select the Hyper-V host that will be performing the compact, then select the VHDX that you want that host to compact.
Select the host first:
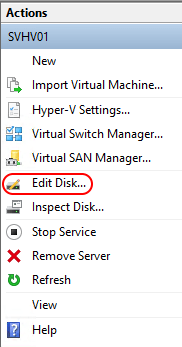
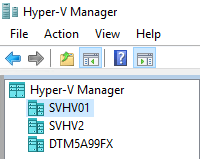 Now, you can either right-click on that host and click Edit Disk or you can use the Edit Disk link in the far right Actions pane; they both go to the same wizard.
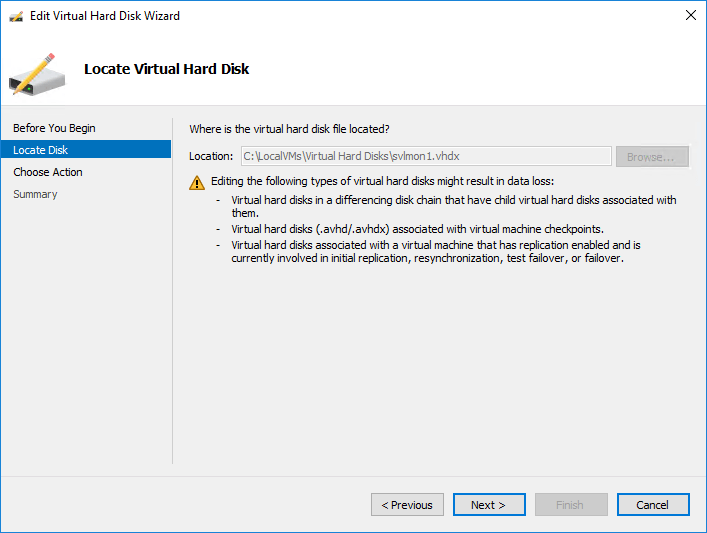
The first screen of the wizard is informational. Click Next on that. After that, you’ll be at the first actionable page. Read on in the next sub-section.
Using the Edit Disk Wizard to Compact a VHDX
Both of the above processes will leave you on the Locate Disk page. The difference is that if you started from a virtual machine’s property sheet, the disk selector will be grayed out. For a standalone disk, enter or browse to the target VHDX. Remember that the dialog and tool operate from the perspective of the host. If you connected Hyper-V Manager to a remote host, there may be delegation issues on SMB-hosted systems.
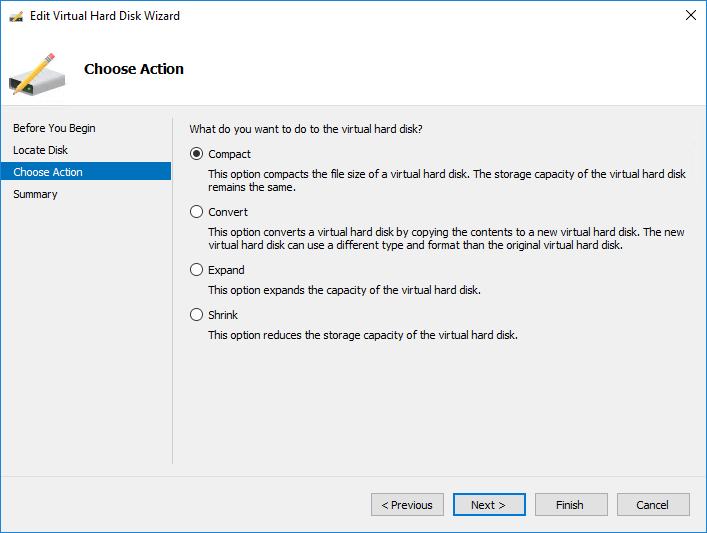
On the next screen, choose Compact:
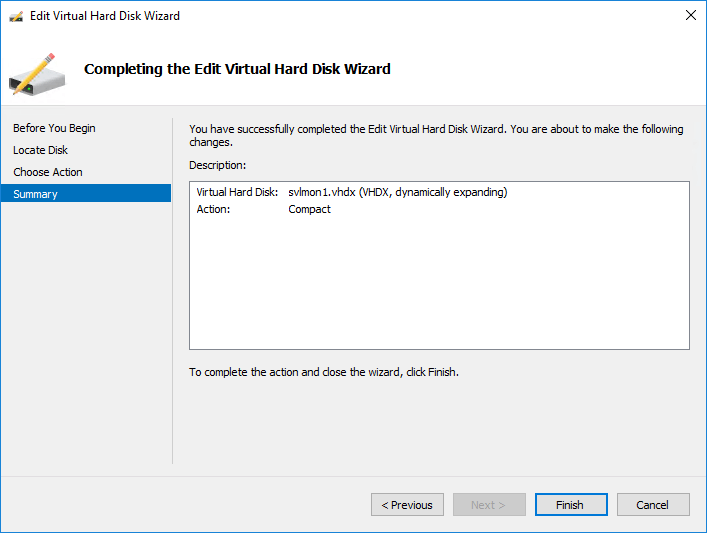
The final page allows you to review and cancel if desired. Click Finish to start the process:
Depending on how much work it has to do, this could be a quick or slow process. Once it’s completed, it will simply return to the last thing you were doing. If you started from a virtual machine, you’ll return to its property sheet. Otherwise, you’ll simply return to Hyper-V Manager.
Check the Outcome
Locate your VHDX in Explorer or a directory listing to ensure that it shrank. My disk has returned to its happy 5GB size:


Not a DOJO Member yet?
Join thousands of other IT pros and receive a weekly roundup email with the latest content & updates!



12 thoughts on "How to Compact a VHDX with a Linux Filesystem"
Your are using a Windows application to do the compact.
What about being inside Linux? With no Windows at all !
How the VHD/VHDX can be compacted from a linux command line or a linux GUI app ?
On windows there is also another command line tool ‘diskpart’ that can do the job “COMPACT VDISK” after selecting if (some also say after attaching it in read only)… but that is on a Windows machine, not on a Linux machine.
Just to clarify: How about the host be a Linux (not a Windows).
Or also better: Not all people use VHD/VHDX for holding an operating system virtualized machine virtual hard disk, … i use them for just data…
Let me explain why with a very simplified sample:
1.- I have a folder that has a los of sub-folders (deep greater than 10) with a lot of really small files (less than 64KiB each)
2.- The number of such files is much greater than a million (think on small LOGs of one second activity)
3.- Copying/Syncing such huge amount of files to USB 3.1 Gen 2 (10gb/s) external HDD is a real PAIN
4.- Copying a holder (VHD/VHDX) to such external disk is done in less than 20 minutes (a lot of gigabytes, near a full terabyte)
So i preffer insetad of letting the computer analize more than one million files to see what has changed, just copy thw whole thing at once… note that just only listing all files to /dev/null tooks near 15 minutes, while copying the whole container tooks only 20 minutes.
Also writting small files on any disk is very slow (under 1MiB/s on my high speed USB array), and doing so on just one normal HDD it goes under 5KiB/s.
For such sample, such LOG files may get deleted (aged more than five years ago, or whatever reason you want), so space used is not released, so there comes the need to compact.
It also would be great if it could be done as with CloneVDI does on Windows machines with VDI files (creating a copy and compacting at the same time).
Since of VHD/VHDX on internal disk array is irrelevant to me, but not on external media… copy times can be reduced a lot to external media is compacting on the fly can be done.
Theese are just samples of another way of thinking… far away from conventional use of VHD/VHDX used to just hold a virtual disk of a virtual machine…. they can also be used as just containers for a huge amount of small files, so you can manage all such huge amount in a fast way by using the container, not just each file as an unity.
Since i changed my mind and start using VHD/VHDX (and other formats as PFO, CFS, DAA, 7z) my BackUPs times to USB external media had reduced from full days (some times near a whole week) to just minutes (or not much more than one hour).
Real life: 25TiB VHDX that holds 100-200 million files (<64KiB each), near 50% free (taking arround 12TiB of data) … get copied to USB 3.1 Gen 2 (10gb/s) external array in just a little more than 2.7 hours.
I don’t know of any non-Windows application that will compact a VHDX. The VHDX file specification is open, so anyone could write one.
I understand your explanation for using a virtual disk for transport. I don’t know why you specifically chose VHDX.
dd if=/dev/zero of=~/zeroes
sync
rm ~/zeroes
And launched PS as admin
optimize-VHD -Path c:VMvirtual_machine.vhdx -Mode Full
It f**** works ! *_*
Just F**** thAnks !!!
Doing the Hyper-V Manager compact doesn’t always work. I’m not sure why, but it refused to compact zeroed space from the tail of the disk. No errors, just no change. (I even shrunk the partition then zeroed the space. I was desperate.)
Using the Powershell command actually did the trick, even after I’d re-expanded the partition and filesystem back to full size.
Great article. I tried the fstrim method and it left the vhdx at 26GB, then I applied the dd zeroes method and it shrunk 10GB more leaving it at 16.
Thanks!