Save to My DOJO
This is part 2 of our Azure Virtual Machines Guide following our previous article Introduction to Azure Virtual Machines. In part 1 we created a virtual network for our VM, now we will create a network security group and finally deploy our VM.
Creating the Network Security Group (NSG)
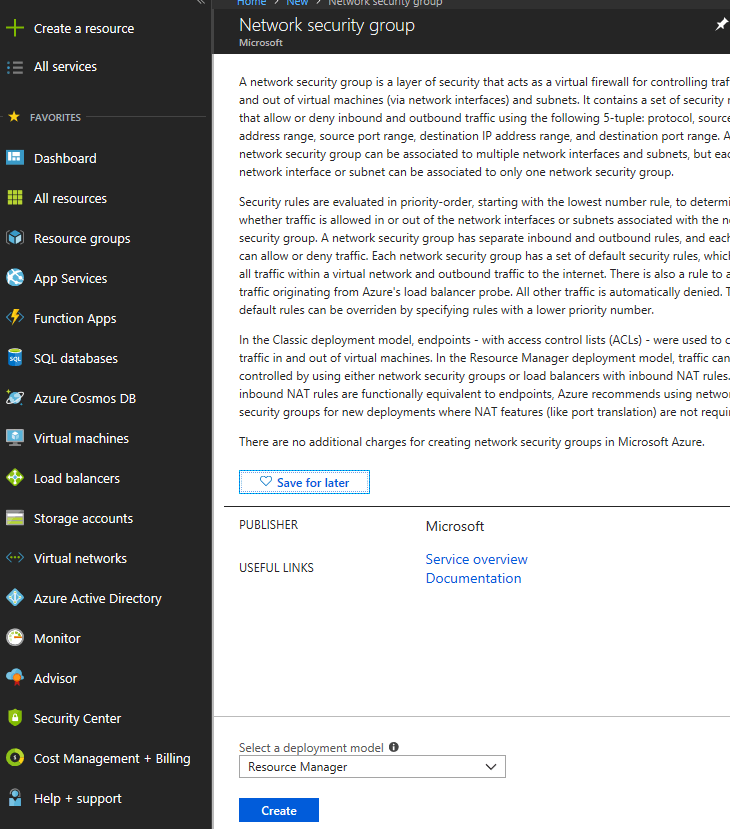
A network security group is like the firewall for our VM, it is required in order to provide any access to our VM, so it’s important we set this up before deploying one. To create one, we simply select Create a resource on the left-hand side of the Azure management portal and type in “Network Security Group”. We will be presented with the proper blade to create one, so click Create:
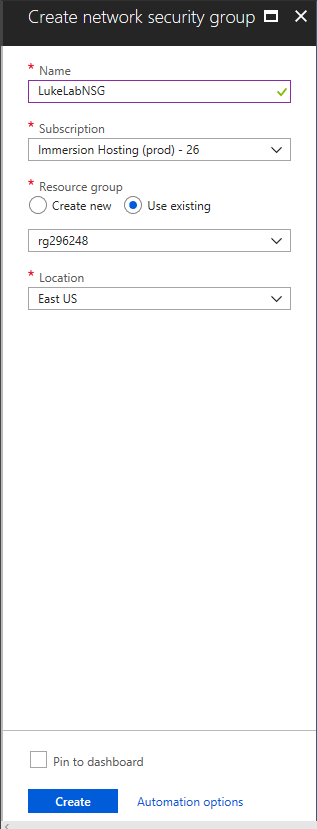
Now we need to fill in some fields to create our NSG. For this example I’ll name our NSG “LukeLabNSG”, then we will select the subscription that we want to use this NSG on as well as the resource group. Then we will select the location of the Azure data center that this NSG will be located at. Once everything is filled out we click Create:
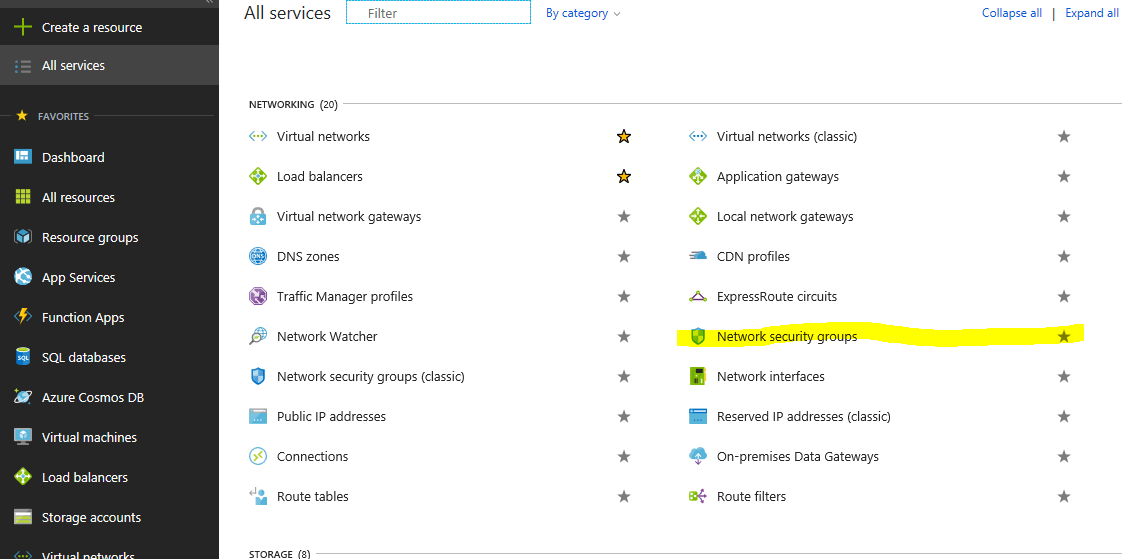
We wait for the NSG to deploy and once completed, we can view it by clicking on All Services on the left-hand side and selecting Network Security Groups:
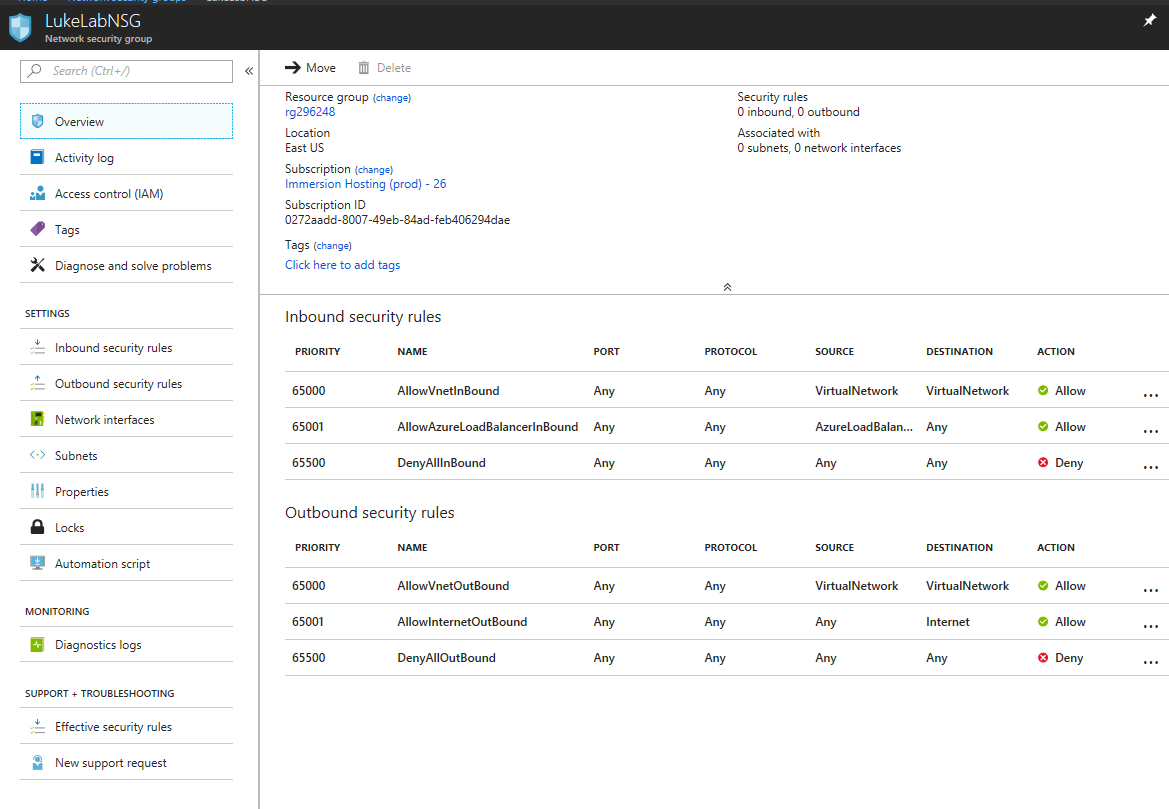
We can now see our new NSG, and we can further configure it by clicking on the name:

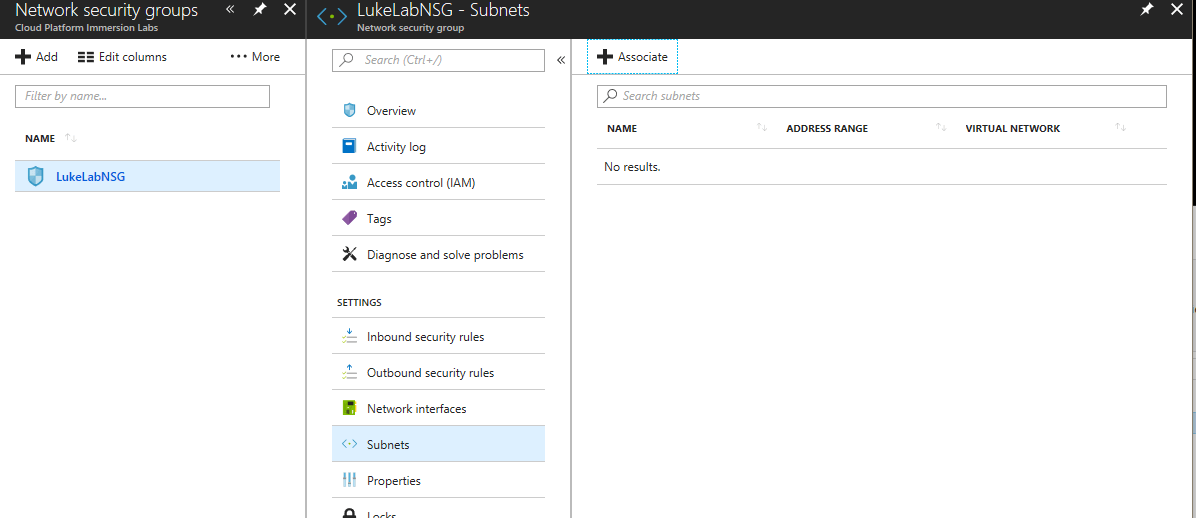
We need to assign a subnet to associate this NSG with, select Subnets on the left-hand side:
Now click the Associate button so we can find our subnet and the virtual network that we created in part 1. Remember, we created this when we set up the Virtual Network:
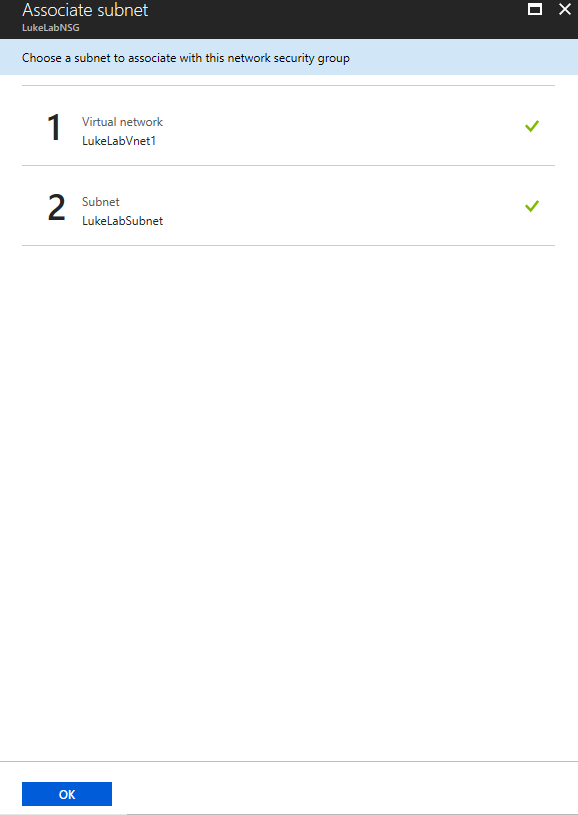
We can now see that we have the LukeLabVnet1 virtual network that we created and the LukeLabSubnet assigned to this network security group. Click Ok to configure:
Select Inbound security rules on the left-hand side. We want to enable RDP access to this VM so that we can connect to it. Also note that for the purpose of this demo we are going to allow RDP access via the public internet, however, for a production environment this is not best practice. In a production environment, you would set up a VPN connection and use RDP over the VPN as it is much more secure. To create our new rule we will select the Add button:

If we wanted to do any sort of advanced configuration of allowing specific ports we could input the information in these fields here, however since we are just doing RDP and it is a common port, Microsoft has already created a list of commonly used ports so that we can easily select enable them. To do this, we will click the basic button at the top: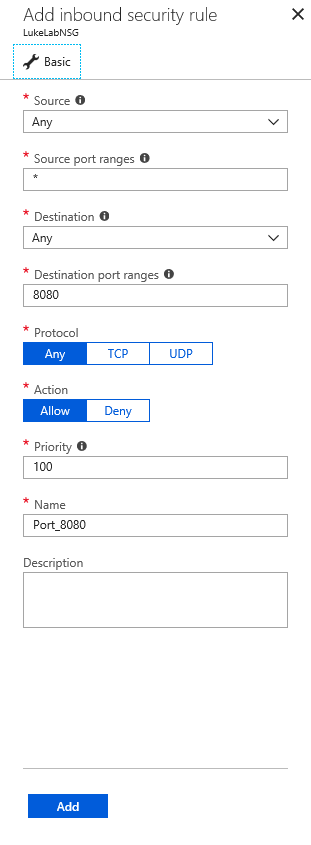
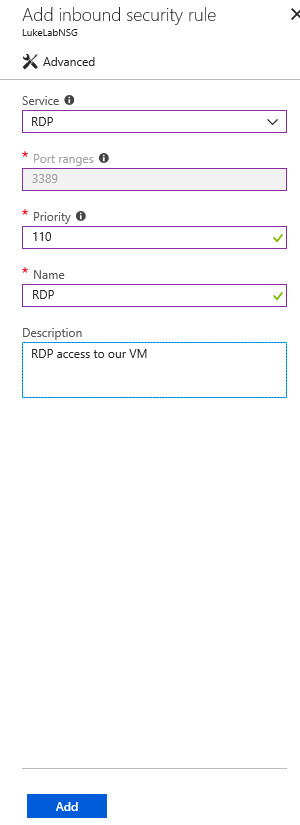
Now we simply select RDP from the Service drop-down list and the proper information will automatically be filled in. Then we put in a description of the rule and select Add. Also, note that Azure gives us the same warning about exposing RDP to the internet:
Now we’ve set up our NSG, we can finally deploy our VM.
Deploying a Virtual Machine
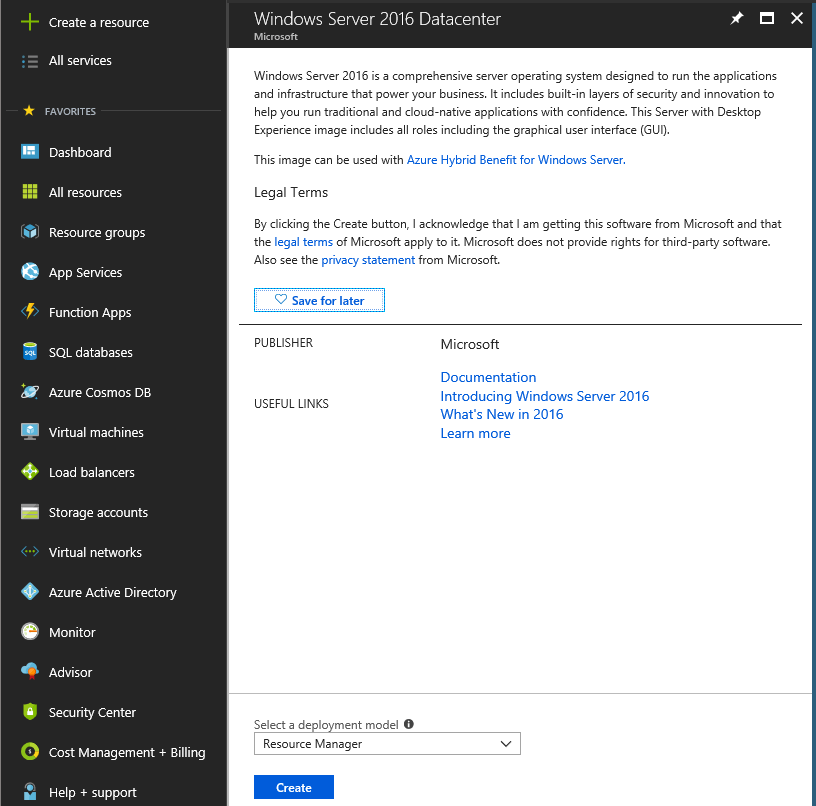
Now that we have our Virtual Network and Network Security Group created, we are ready to deploy the Virtual Machine. To do this, select the Create a resource button on the left-hand side and type in Windows Server 2016 Datacenter. Select the Windows Server 2016 Datacenter from the list and select Create:
Now we need to fill out the form shown here to configure our Virtual Machine. For the purposes of this demo, I named mine “LukeLabVM01”. You also need to give it a username and password (use a strong password!). We’ll select the resource group and the Azure data center location where this VM will be hosted at. “East US” in this case. Clicking Ok will then bring us to the next step: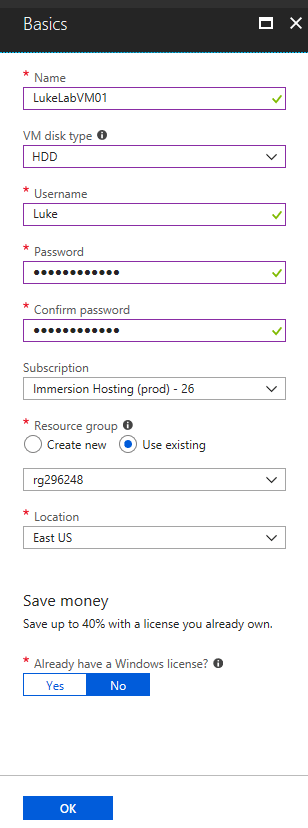
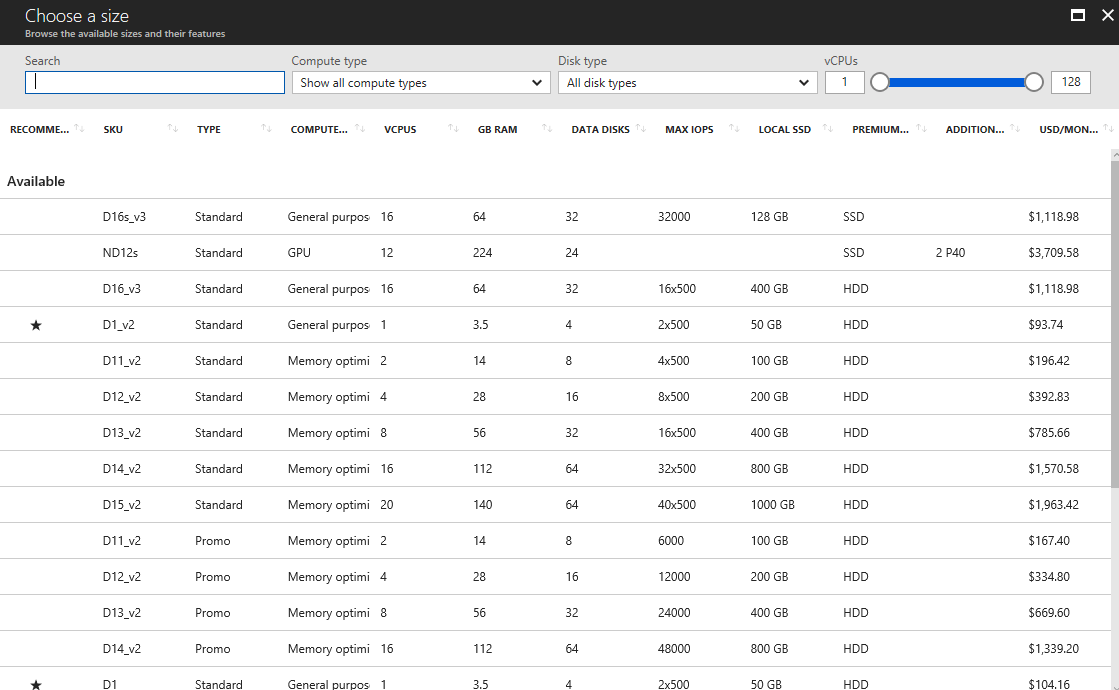
Select the compute size of the VM that you would like to deploy. The estimated pricing is on the right-hand side:
NOTE: The pricing shown here is for compute costs only. If you need a more detailed breakdown, take a look at the Azure Pricing Calculator
Now we need to fill in the last set of configuration settings. We need to create an availability set, this is very important to understand because it cannot be changed unless the VM is rebuilt. (I’ll be putting together a future post on working with availability sets, so stay tuned for that!). In this example, we’ve simply created an availability set here during the deployment process and named it LukeLabAS1. We then assign our virtual network and subnet that we created in part 1:
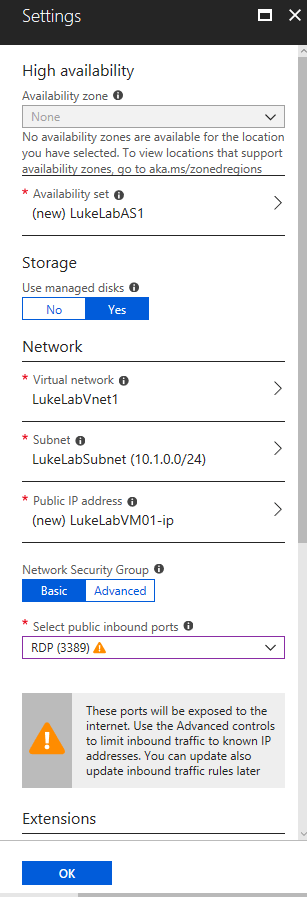
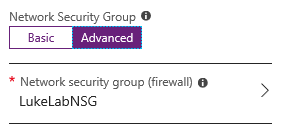
Under Network Security Group, click Advanced and select the NSG that we created in the previous steps. Then click OK to verify the settings:
If all of the settings pass the verification process, we now are given the option to deploy the VM. Click Create and we will need to wait for the VM to finish deploying.
Once the deployment process is finished, we can see the newly created VM under Virtual Machines. Click Start to power on the VM if it is not already running:

Then click on the VM name and select Connect at the top to get connected to the VM:

Azure gives us two options, SSH or RDP. In this demo we will RDP to the VM, so select the RDP tab and click on Download RDP file: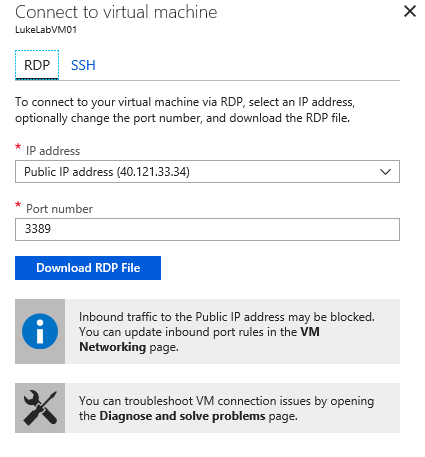
Once the RDP file is downloaded, open it up, select connect and input the credentials that we made when we configured the VM: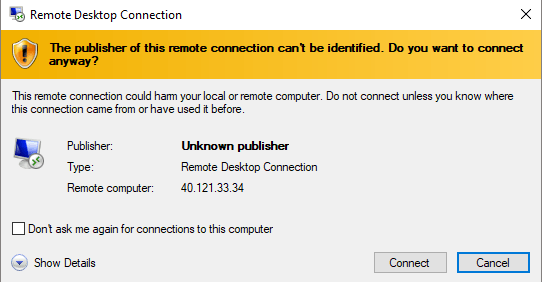
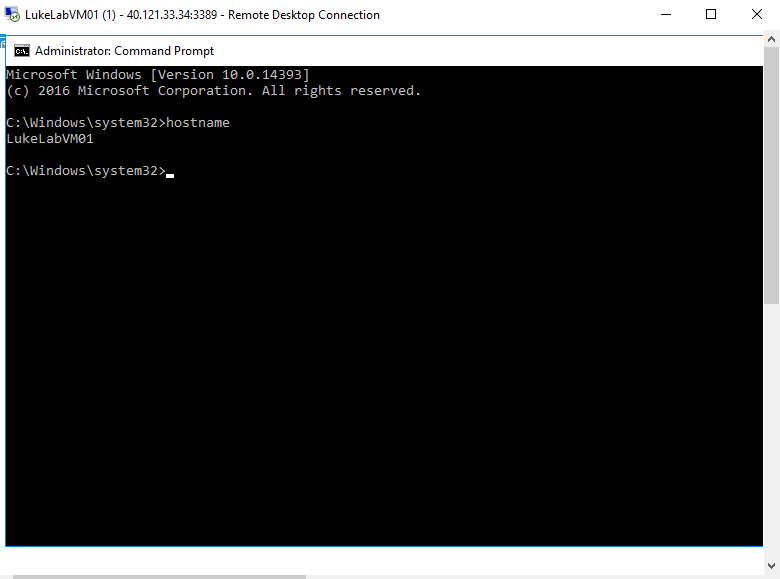
Now we have access to our VM, and I’ve verified that the hostname of the VM is the one we specified in the deployment settings by bringing up a command prompt:
Wrap-Up
The flexibility of the cloud allows us to stand up Virtual Machines very quickly and it can be a very advantageous solution for applications that need to scale out on massive levels, or situations where investing in hardware doesn’t make sense due to the longevity of the application. However, there is a steep learning curve when it comes to building and managing cloud resources and being aware of each component is critical to the success of running your workloads in the cloud.
What have your experiences with Azure VMs been like so far? Have you found they fit well in your playbook? Have you experienced difficulties? Have questions? Let us know in the comments section below!


Not a DOJO Member yet?
Join thousands of other IT pros and receive a weekly roundup email with the latest content & updates!


4 thoughts on "The Complete Guide to Azure Virtual Machines: Part 2"
what is azure virtual machine version 2 and version 3 . what is technical diffrence between V2 and V3
Hi Surendar,
Sorry for the rather late reply. Although not mentioned in these two blog posts I think you’re referring to the different generations of VM SKUs (Stock Keeping Units). For instance, the D series is now up to version 4 (Dsv1, Dsv2, Dsv3 and Dsv4). Overall it refers to different generations of underlying hardware and capabilities in Azure, for instance the Dsv3 runs on 2nd Generation Intel® Xeon® Platinum 8272CL (Cascade Lake), Intel® Xeon® 8171M 2.1GHz (Skylake), Intel® Xeon® E5-2673 v4 2.3 GHz (Broadwell), or the Intel® Xeon® E5-2673 v3 2.4 GHz (Haswell) processors (yep, could be any of those), whereas the Dsv4 runs on Intel® Xeon® Platinum 8272CL (Cascade Lake). See more here https://docs.microsoft.com/en-us/azure/virtual-machines/sizes.
Paul Schnackenburg, Altaro DOJO Technical Editor