Save to My DOJO
This blog post explains how to create an availability set in Azure and how to assign a VM to an availability set. If you want to get straight into the walkthrough you can skip straight to setting up an availability set but if you would like to learn the basics we will go through that first.
What is an Availability Set
An availability set in Azure is essentially your way of designing how available your cloud infrastructure is going to be in the event of unplanned or planned maintenance. Why do we care about maintenance if our workloads are in a public cloud? Well, just because your workloads are running in a public cloud doesn’t mean they don’t have maintenance windows or hardware failure like on-prem solutions. So if you don’t want your application servers all going down at the same time, you may specify with an availability set how your servers will handle both maintenance updates and hardware failures. We will demo how to create and apply an availability set in Azure. But first, there are some terms that we need to understand before we create our availability set.
Fault Domain
Assigning a VM to a separate fault domain will place it on a separate power and network resources. This is very important in the case of an unplanned outage due to power or hardware failure (yes this does happen). Make sure you do your homework and plan for “what ifs” when designing your cloud environment.
Update Domain
Just like on-prem infrastructure, cloud infrastructure needs to be patched and updated. Azure will only restart items in one update domain at a time. When the infrastructure assigned to the update domain is rebooted, it is given 30 minutes to recover before maintenance is initiated on a different update domain. So make sure you plan your update domains accordingly so you’re not taking down the entirety of your environment all at once.
Managed Disks
I don’t want all my storage to be on the same hardware device, how can I tell Azure to separate them? This is where managed disks come into play. By selecting the option to use Managed Disks when creating an availability set, you are essentially telling Azure to place each disk on isolated storage clusters to prevent a single point of failure. If you’re using VMs with unmanaged disks, Microsoft highly recommends converting them over to Managed disks if they are in an availability set.
Creating an Availability Set
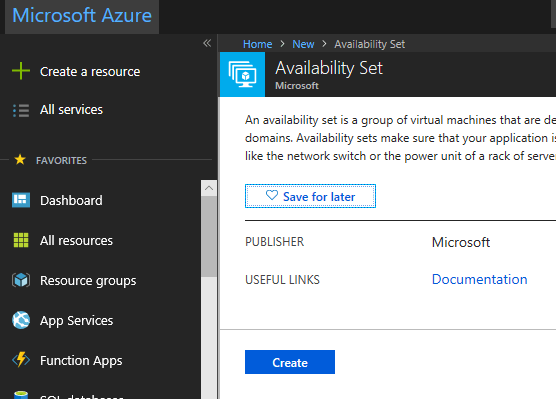
To create an availability set, login to the Azure portal and select Create a Resource in the upper left corner. Type in Availability Set and select it. Click on Create:
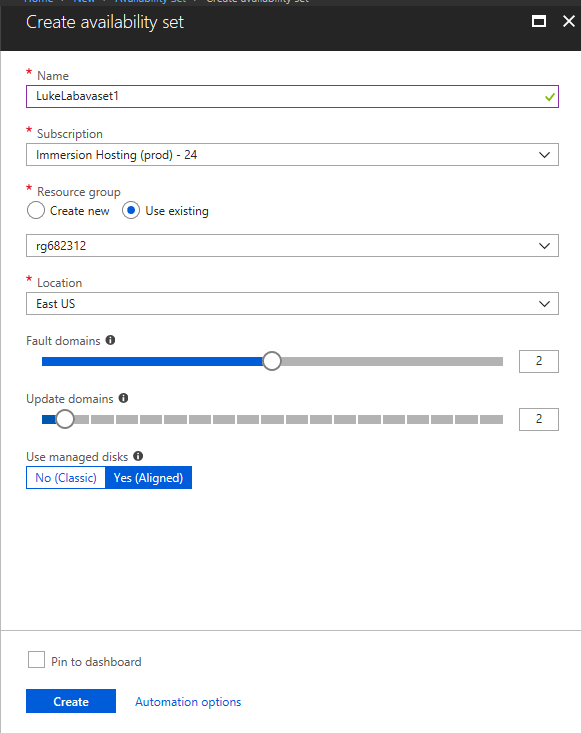
Now we can set up our availability set. In the example, I’ll name it “LukeLabavaset1”.
Select your subscription and resource group that you’d like to bind this availability set to, then select the location.
Now, here comes the important part. We need to specify the number of fault domains and update domains that we would like for this availability set. The way this works is the first VM gets assigned the first available fault domain and update domain which will be slot 0. Then, the next VM assigned to the availability set takes the next available slots. So it would get fault domain 1 and update domain 1. In our example, we are creating two fault domains and two update domains. If a 3rd VM was assigned to this availability set, the assignment rotation would start over, so it would get assigned to fault domain 0 and update domain 0. Select create to deploy this availability set:
Assigning a VM to an Availability Set
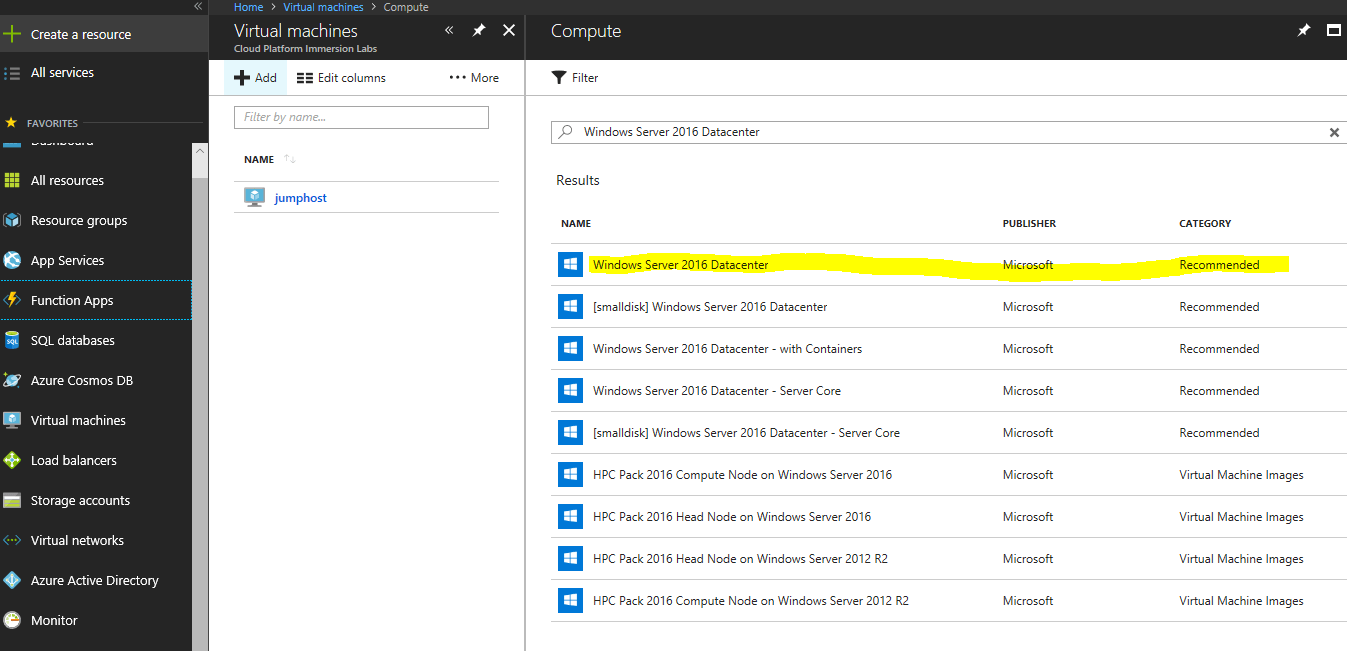
It’s important to note that a VM can only be assigned an availability set during the VM creation process. To create our VM, we will select Virtual Machines on the Favorites menu and click Add. We want to create a 2016 server, so we type in Windows Server 2016 and select Windows Server 2016 Datacenter:
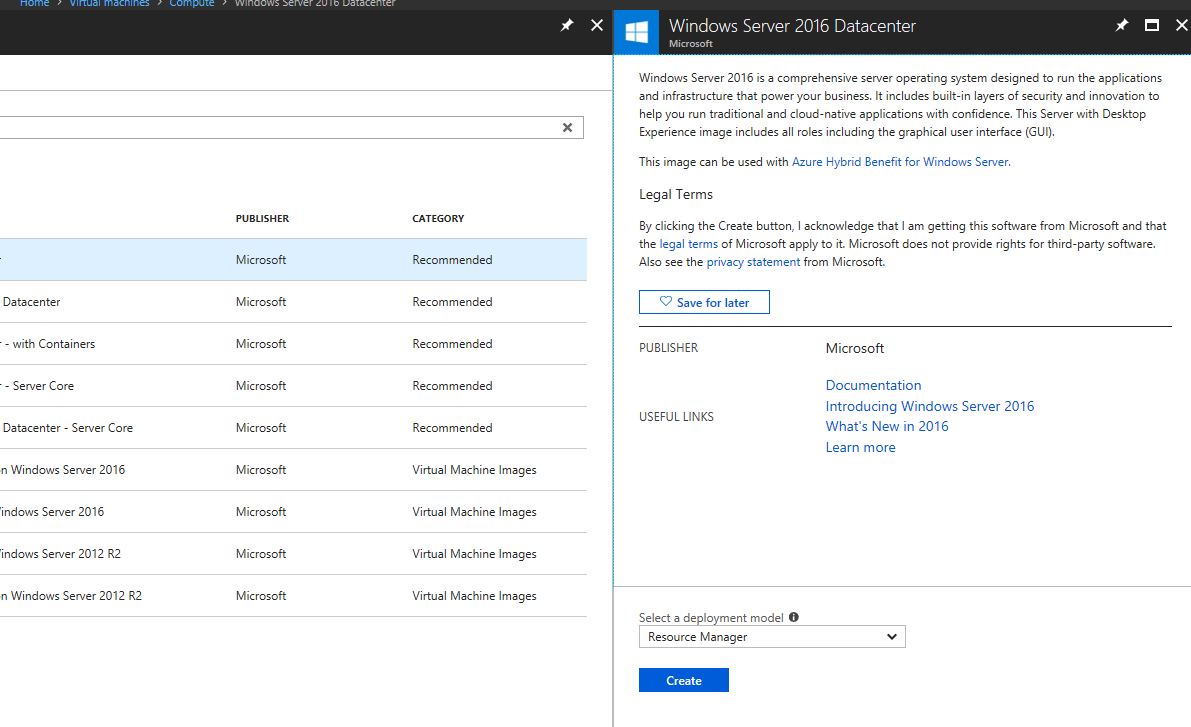
We get a new blade with details on the VM that we are deploying. Select Create to deploy:
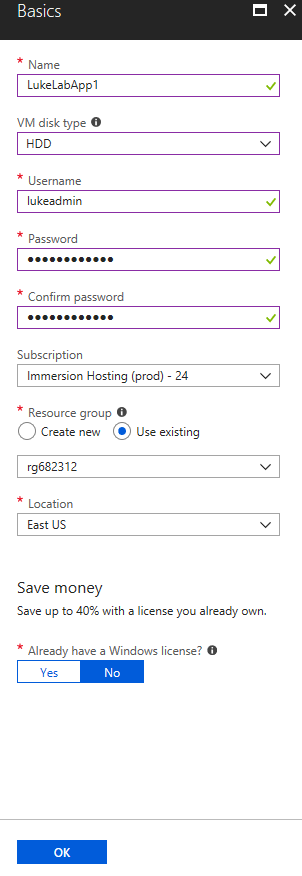
Now let’s fill in the basic info. In this example, I’ll name my VM “LukeLabApp1”. Fill in all the required info and select OK:
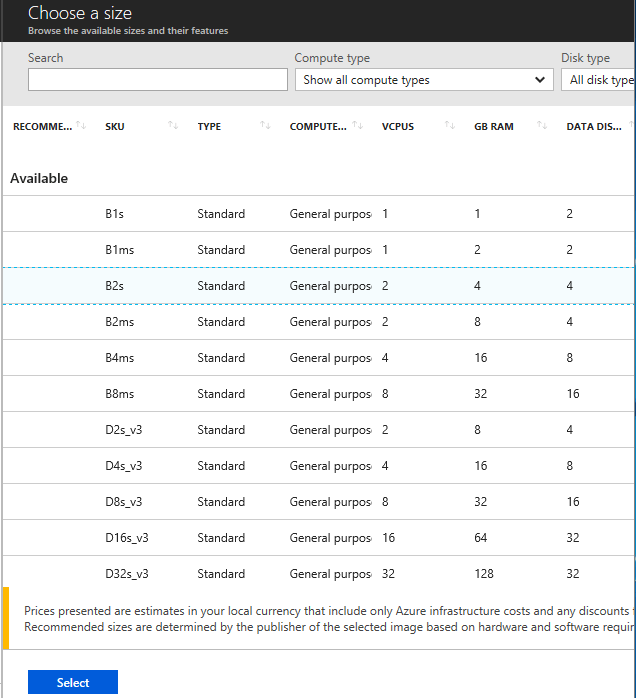
Now we will choose our VM size and click Select:
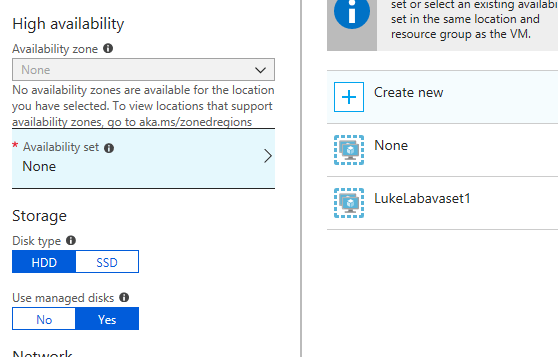
For the last step, we can now add the availability set to our VM. Click on availability set, and select the one we created, LukeLabavaset1. Next, configure the rest of the settings for your VM and select Create:
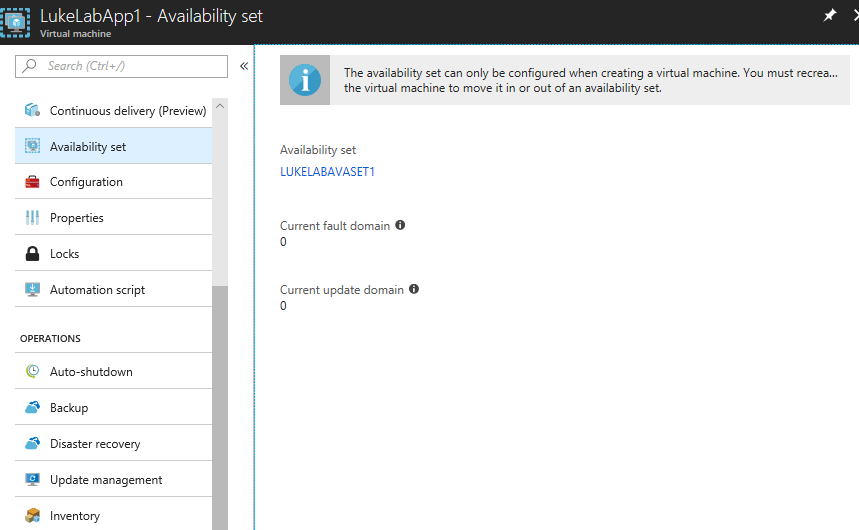
After the VM is completely deployed, we can check and see the availability set settings by selecting Availability Set in the VM settings blade. We can see our first VM has to take slot 0 of both the fault domain and update domain. Notice the warning stating that we can’t configure the availability set anymore unless we create the VM, this is very important to understand when planning your cloud infrastructure:
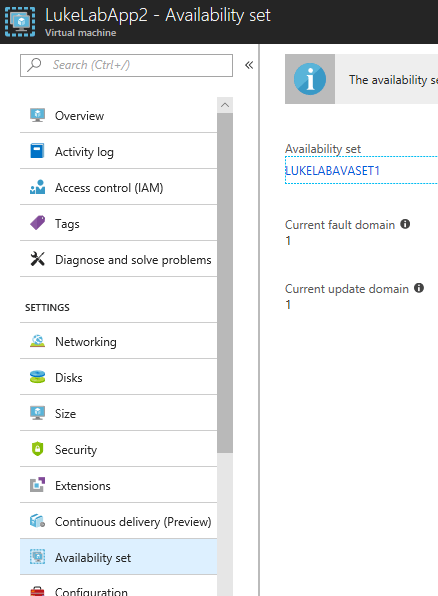
Now I made a 2nd VM called LukeLabApp2 and assigned it to the same availability set. You can see it took up the next available slot for both the fault domain and update domain:
Wrap-Up
Availability sets are a very important piece of Azure infrastructure and it’s very important to have a good concept of them before designing and implementing your infrastructure in the cloud. If you have already created your infrastructure without properly planning the fault domain and update domains, unfortunately, you will have to re-create the VM again in order to change the availability sets. However, there is a PowerShell script that will automatically save the settings and recreate the VM with the new availability set. Be sure to check it out and let me know how it works in the comments below.
Thanks for reading!


Not a DOJO Member yet?
Join thousands of other IT pros and receive a weekly roundup email with the latest content & updates!


23 thoughts on "How to Make an Availability Set in Azure"
This template creates an Availability Set and configures it for 3 Fault Domains and 20 Update Domains. This is just a snippet you may want to include in a more complex template 3 FDs are very useful when you’re building a quorum-based solution or simply to ensure high availability of your service. You signed in with another tab or window. Reload to refresh your session. You signed out in another tab or window. Reload to refresh your session.