Save to My DOJO
The exciting time has come for my wife’s laptop to be replaced. After all the fun parts, we’ve still got this old laptop on our hands, though. Normally, we donate old computers to the local Goodwill. They’ll clean them up and sell them for a few dollars to someone else. Of course, we have no idea who will be getting the computer, and we don’t know what processes Goodwill puts them through before putting them on the shelf. A determined attacker might be able to retrieve social security numbers, bank logins, and other things that we’d prefer to keep private. As usual, I will wipe the hard drive prior to the donation. This time though, I have some new toys to use: Hyper-V and Kali Linux.
Why Use Hyper-V and Kali Linux to Securely Wipe a Physical Drive?
I am literally doing this because I can. You can easily find any number of other ways to wipe a drive. My reasons:
- I don’t have any experience with Windows-based apps that wipe drives and didn’t find any freebies that spoke to me
- I don’t really want to deal with booting this old laptop up to one of those security CDs
- Kali Linux focuses on penetration testing, but Kali is also the name of the Hindu goddess of destruction. For a bit of fun, do an Internet image search on her, but maybe not around small children. What’s more appropriate than unleashing Kali on a disk you want to wipe?
- I don’t want to deal with a Kali Live CD any more than I want to use one of the other CD-based tools, nor do I want to build a physical Kali box just for this. I already have Kali running in a virtual machine.
- It’s very convenient for me to connect an external 2.5″ SATA disk to my Windows 10 system.
So yeah, I’m doing this mostly for fun.
Connect the Drive
I’m assuming that you’ve already got a Hyper-V installation with a Kali Linux guest. If not, get those first.
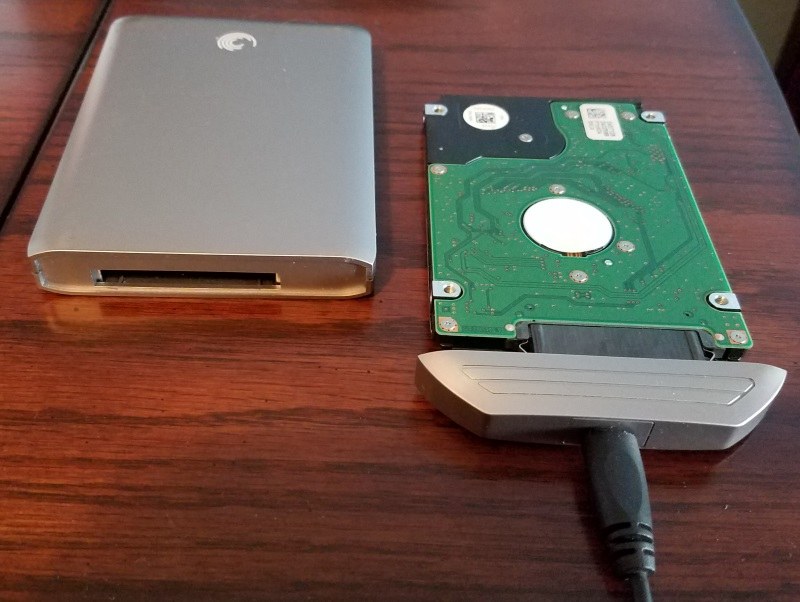
Since we’re working with a physical drive, you also need a way to physically connect the drive to the Hyper-V host. In my case, I have an old Seagate FreeAgent GoFlex that works perfectly for this. It has an enclosure for a small SATA drive and a detachable USB interface-to-SATA connector. I just pop off their drive and plug into the laptop drive, and voila! I can connect her drive to my PC via USB.
You might need to come up with some other method, like cracking your case and connecting the cables. Hopefully not.
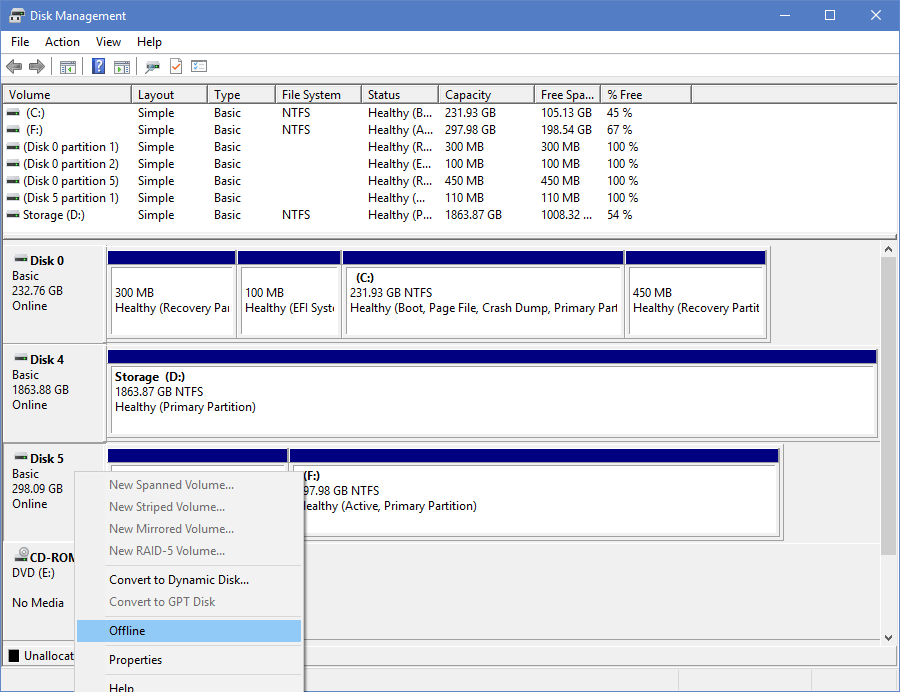
I plugged the disk into my Windows 10 system, and as expected, it appeared immediately. Next, I went into Disk Management and took the disk Offline.
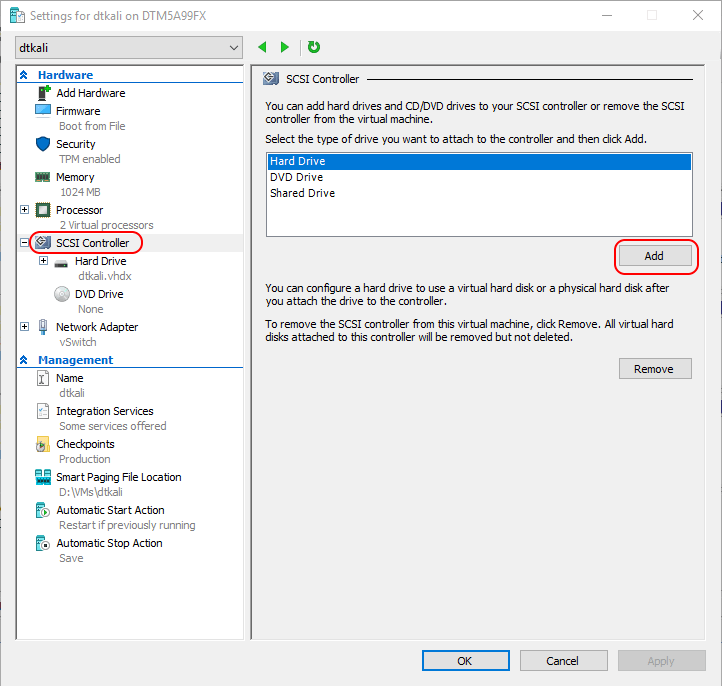
I then went into Hyper-V Manager and ensured the Kali guest was running. I opened its settings page to the SCSI Controller page. There, I clicked the Add button.
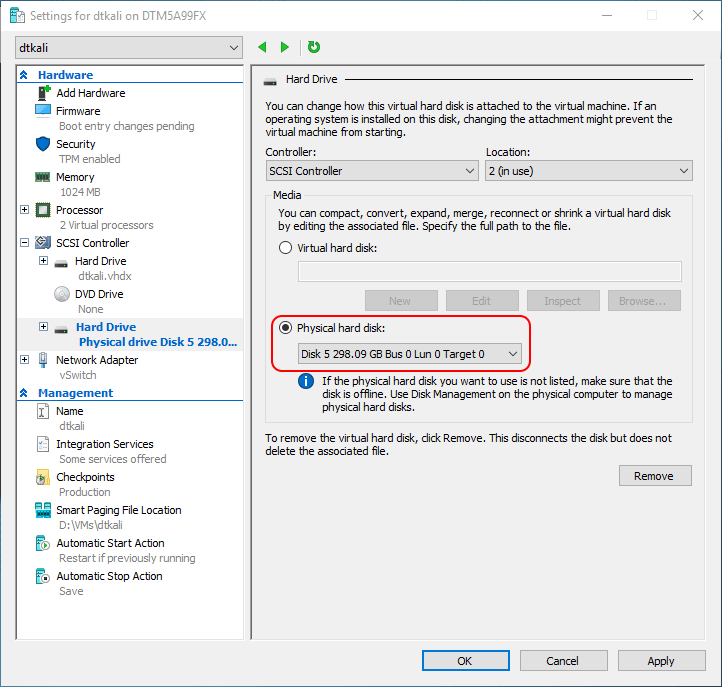
It created a new logical connection and asked me if I wanted a new VHDX or to connect a physical disk. In this case, the physical disk is what we’re after.
After clicking OK, the disk immediately appeared in Kali.
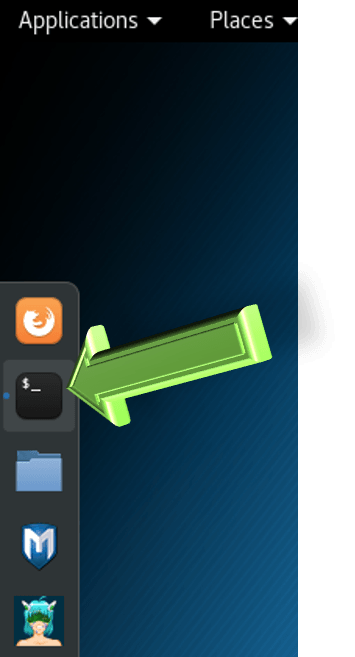
In Kali, open the terminal from the launcher at the left:
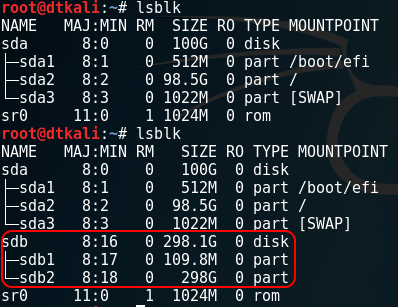
Use lsblk to verify that Kali can see your disk. I already had my terminal open so that I could perform a before and after for you:
Remember that Linux marks the SATA disks in order as sda, sdb, sdc, etc. So, I know that the last disk that it detected is sdb, even if I hadn’t run the before and after.
Use shred to Perform the Wipe
Now that we’ve successfully connected the drive, we only need to perform the wipe. We’ll use the “shred” utility for that purpose. On other distributions, you’d usually need to install that from a repository. Kali already has it waiting for you, of course.
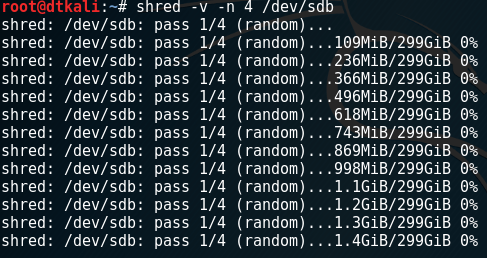
The shred utility has a number of options. Use shred –help to view them all. In my case, I want to view progress and I want to increase the number of passes from the default of 3 to 4. I’ve been told that analog readers can sometimes go as far as three layers deep. Apparently, even that is untrue. It seems a that a single pass will do the trick. However, old paranoia dies hard. So, four passes it is.
I used:
shred -v -n 4 /dev/sdb
And then, I found something else to do. As you can imagine, overwriting every spot on a 250GB laptop disk takes quite some time.
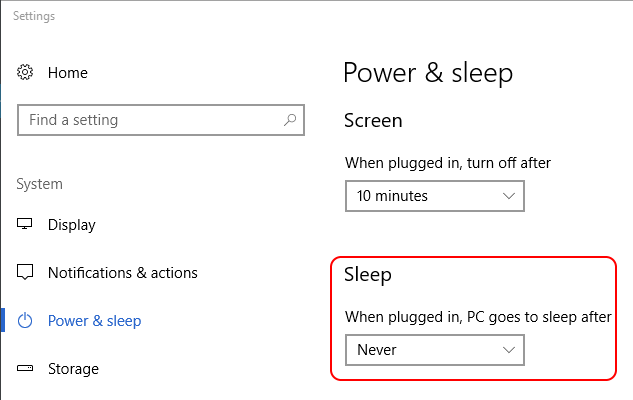
Because of the time involved, I needed to temporarily disable Windows 10 sleep mode. Otherwise, Connected Standby would interrupt the process.
After the process completed, I used Hyper-V Manager to remove the disk from the VM. Since I never mounted it in Kali, I didn’t need to do anything special there. After that, I bolted the drive back into the laptop. It’s on its way to its happy new owner, and I don’t need to worry about anyone stealing our information from it.


Not a DOJO Member yet?
Join thousands of other IT pros and receive a weekly roundup email with the latest content & updates!
