Save to My DOJO

Hello once again everyone!
This post will serve as part 7 of our ongoing series on container services for MSPs.
Thus far in the series we’ve spent quite a bit of time with Docker. Again, Docker is the core container engine we’ve been talking about as part of this series. We’ve covered things like supported platforms for hosting Docker Containers, running Linux Containers on Windows with Docker, and attaching containers to external persistent storage. While we’ve covered quite a bit, we’re still not done! Today we’re going to be talking about container networking.
Before we get into that, let’s take a brief look at the series so far….
The Definitive Guide to Containers for MSPs
Part 1 – What are Containers
Part 2 – Platforms for Running Containerized Workloads
Part 3 – Introduction to Docker
Part 4 – 4 Pro Tips for Working with Docker
Part 5 – How to Run Linux Containers on Windows Server 2019
Part 6 – How to Create Persistent Docker Containers
Again, we’re going to be discussing container networking in this segment. We could likely spend several segments just talking about container networking (and we likely will later on), but at this stage of the series I want to make sure we have basics covered. If you’ve been reading the previous entries in this series, you should now understand how to pull and run containers and attach them to storage, but we really haven’t covered how containers talk to the physical network. In this article, we’ll talk about the different methods of connectivity in Docker, and how you present services in a running container to your network.
Let’s get started!
Docker Network Connectivity Options
When it comes to connectivity, there are a number of different options. Like most things IT, you can start simple, and things get more complex as your use case becomes more complicated. We’ll start with the simplest and also the default option.
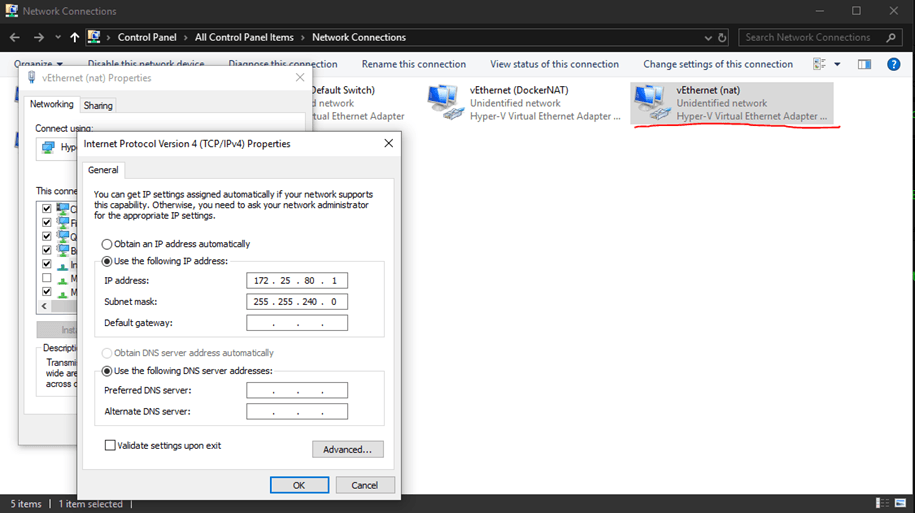
Bridge Networks – by default when you start a container with no defined networking options, this is the type of networking the container will use. When Docker starts for the first time on a container host a default bridge network is created automatically. For example, you can see here in my NIC list on my Windows 10 box that a “nat” network exists. This network gets created automatically on Windows when Docker gets installed.
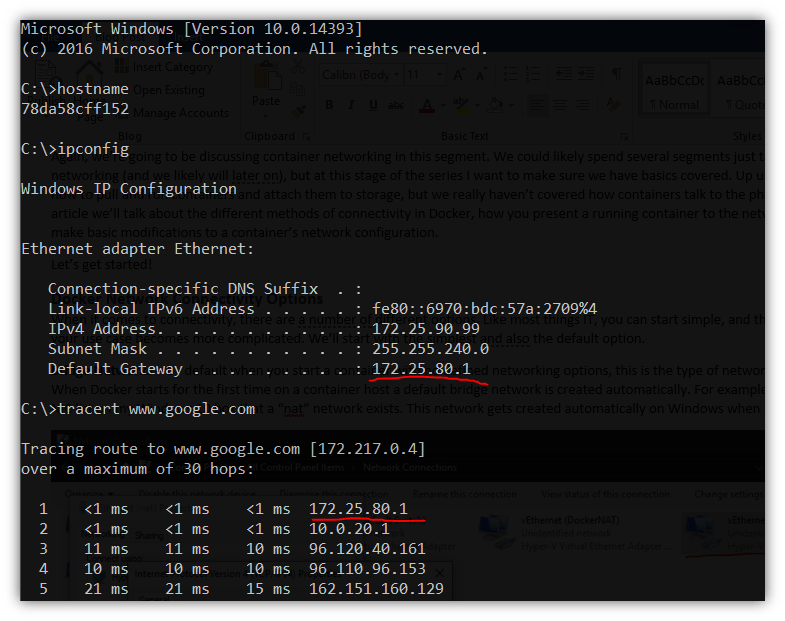
Additionally, if I launch a container in interactive mode like we’ve seen in previous segments, I can look at the IP settings and see that the container is using the configured bridge to communicate out to the physical network.
This type of networking keeps things fairly simple and makes it easy to have your container reach the external network with minimal fuss. If you need to open up a certain port to access the container’s services remotely, you can do so when you run the container as we’ll see shortly.
Bridge Networks are best when you need a single or multiple containers to communicate on the same docker host.
Host Networks – This option tells the container to use the host’s networking configuration directly. This option is not available on non-linux container hosts and does not work when Docker is running on a Mac or Windows Box.
Host Networks are best when you don’t care about the containers networking being isolated from the host but you still want the container’s workload to have a dedicated run space.
Overlay Networks – An overlay network allows you to connect multiple container hosts together to facilitate communication between containers running on different container hosts. If you’re familiar with the virtualization world, think of this as an advanced distributed vSwitch, in that the network exists on multiple container hosts, and containers running on those hosts can each use it to communicate with each other.
Macvlan Networks – By default some network legacy services may not see a container as a physical device on your network. Attaching containers to a Macvlan network allows you to assign a MAC address to a container. This gives the container a more traditional look a feel to legacy applications that depend on a dedicated MAC address.
Third Party Networks – There are 3rd party plugins available for use if you’d rather manage your container networking that way. Current options can be found on the Docker Hub.
How Do I Connect Services in a Docker Container to the Network?
So, you’ve seen the options, but how do you actually use them? We’ll be covering that next.
In this article, we’re assuming you’re still getting started and are still using the default bridge network. We’ll simply be showing you how to present a specific port from your container to the physical network. This allows you to access your containerized workload remotely.
Note: We’ll be showing you how to setup and use a Macvlan and Overlay networking in a future segment.
For example, if you’re hosting a web server within a container, users need to be able to access port 80 or 443 within that container, right? Really a simple command line switch will take care of this for us when launching the container. Let’s see it in action!
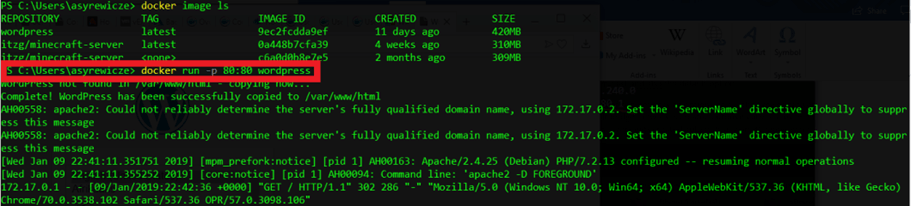
I’m running the below on my Windows 10 machine with Linux mode enabled (Right-click the tray icon). I’m going to run a simple WordPress container and present port 80 to the network so I can reach the webpage once the container is running.
I simply issue the following to accomplish this
docker run -p 80:80 wordpress
The container will start and return some stuff to the console as shown below:
We’re just using Docker run like we have in previous segments, the magic is the -p 80:80. What this is doing is telling docker to associate port 80 on the container host with port 80 in the container. For another example if I wanted to associate port 8080 on the container host to port 80 in the container I would change the parameter and instead run the following command:
docker run -p 8080:80 wordpress
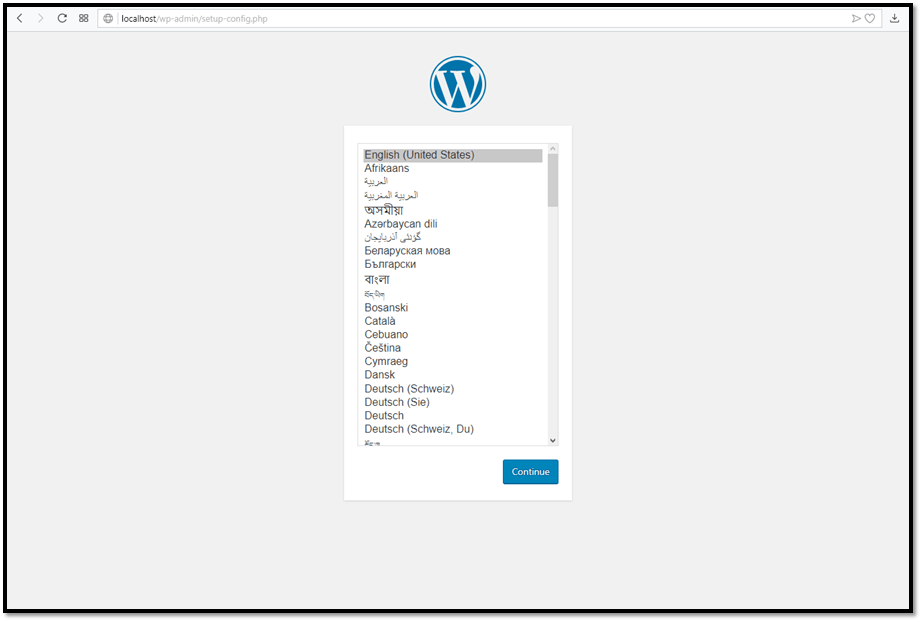
Assuming you stuck with the first command, you would then be able to point a web browser at the container host (in this case localhost) with a default port of 80, and we can see wordpress is running and ready to be configured!
Pairing this method with persistent storage like we talked about in the previous segment allows you to run most of your needed web services within a container! Easy setup, easy patching, easy rollbacks! All because of containers!
Wrap Up
What we’ve covered here simply scratches the surface of networking with Docker Containers. It truly is a vast subject. With what we’ve done here you now have everything you need to present basic production workloads to your network using containers. In a future segment we’ll talk about configuring custom IPs and DNS for your containers and also how to use more advanced networking options like macvlan and overlay networks.
How about you? Have you had success presenting network services from docker containers using the above? Have you had issues of any sort? We’d love to hear more! Let us know in the comments section below!


Not a DOJO Member yet?
Join thousands of other IT pros and receive a weekly roundup email with the latest content & updates!
More in this category


About the Author
Andy Syrewicze

